
You Can Do It!
Like many people, I was hesitant to try the video and 3D capabilities of Photoshop CS4 Extended because I thought, “I‘m not a video editor, and I don’t know anything about 3D.” Then I realized that if you treat video as you would a photo, and think of 3D as another design element, it’s easier than you’d imagine.
1 OPEN A VIDEO IN PHOTOSHOP
If I had a photograph that was too dark, I’d use an adjustment layer to lighten it. At its most basic level, working with video in Photoshop CS4 Extended is no different: You use the same approach as you would with a photo. First, you open it in Photoshop (File>Open) but instead of choosing a photo, select a video (QuickTime video [MOV] in this example). The video opens in Photoshop and appears in the Layers panel as a video layer.

2 BRIGHTEN VIDEO WITH ADJUSTMENT LAYER
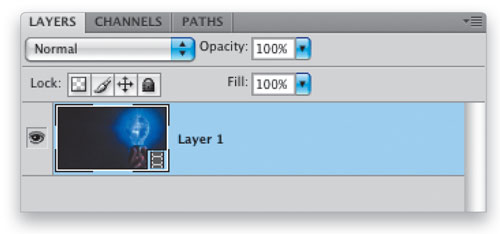
Just as you’d do to a photograph, you can add an adjustment layer (Window>Adjustments) to change the overall brightness of all the frames in the video. In this case we’ll use a Curves adjustment layer (click on the Create New Adjustment Layer icon at the bottom of the Layers panel and select Curves) to brighten up the image. Other than the small video icon that appears on what would normally be the Background layer, this process is the same as working with a single image.

3 EXPORT THE EDITED VIDEO
If all you were doing were brightening a photo, you’d now save the changes. For our example, instead of saving the “edited” video, we need to export it: From the File menu choose Export>Render Video. In the dialog, choose the settings for the video. (Note: Using the same settings as the original video is often the best choice, unless you have specific settings you need to use.) Press Render to export the video and that’s it. Congratulations, you’re a video editor!

4 CHANGING COLORS
Here’s another example of simple video editing: changing colors. To change the overall color of the video throughout all of its frames, click on the Create New Adjustment Layer icon and select Hue/Saturation from the pop-up menu. Drag the sliders to get the results you want, and once you’re done, use the File>Export>Render Video command as we did in Step 3.

5 PAINT ON THE MASK
In some situations you may also be able to take advantage of painting on a layer mask, recognizing that the mask can’t “move.” That means you could paint a gradient on the adjustment layer mask to change the effect of the adjustment on all frames in the video. Because the hand holding the bulb doesn’t move in our example, we masked the hand so the Hue/Saturation adjustment layer didn’t adjust it: Choose the Brush tool (B), click the layer mask thumbnail in the Hue/Saturation layer to make it active, and then paint the hand with black.

6 ADD A LOGO TO THE VIDEO
Using the photo comparison again, if you were to add a logo to a photo, you’d drag or create a logo onto a new layer. And it’s no different here: Open your logo file in Photoshop, and using the Move tool (V), drag the logo onto your video to add a new layer above the video layer. (In this example, we used the Webdings font and typed Shift-T for the boat.) If you want the logo to appear see-through on the video, just lower the Opacity of the layer in the Layers panel. Once again, File>Export>Render Video when you’re finished.

7 MAKING THE LOGO FADE IN
Here’s the first thing that requires anything other than typical Photoshop techniques: making the logo fade in. For this we need the Animation (Timeline) panel (Window>Animation). The Timeline shows layers in the document and if you twirl down the triangle beside the logo layer, you’ll see “tracks” for Position, Opacity, and Style. Drag the Current Time Indicator (CTI) to the time where you want the logo to be completely visible, then click the Stopwatch beside Opacity, which adds a keyframe, indicating the point where the layer’s opacity should be 100%.

8 ADD SECOND KEYFRAME; LOWER OPACITY
Now drag the CTI back to the beginning, and to the left of the Stopwatch in the Opacity track, click the Add Keyframe icon to add a second (starting) keyframe.
Once that’s added, go to the Layers panel, and change the logo layer’s Opacity to 0%. With the CTI still at the beginning of the Timeline, press play at the bottom of the Animation panel to view the results. Once you’re satisfied, File>Export>Render Video.

9 MANY MORE POSSIBILITIES
There are many possibilities using the Timeline, including changing the position of a layer over time (to have the logo move onto the video) or changing the Style of a layer over time. In each case, the theory is the same as in Step 8: use keyframes to make a start and end point for the change you want to have happen.

10 3D GRAPHICS AS DESIGN ELEMENTS
Although the Photoshop 3D tools are powerful (and potentially overwhelming), we can use simple 3D effects as a design element, allowing us to do things that might be difficult otherwise. Our example here is a business card background. Start by creating two documents: the business card and a document that’s twice the size: File>New to create the business card then Image>Duplicate to create the second one. With the second document open, use Image>Image Size and double the Width and Height. (Note: To use 3D features, we have to work in RGB and then convert the file to CMYK once we’re done).

11 USE THE HALFTONE PATTERN FILTER
In your larger document, click on the Foreground/Background swatches near the bottom of the Toolbox and choose their colors—we used R:106, G:106: B:89 and R:106, B:122, G:125, respectively. Now press Command-J (PC: Ctrl-J) to copy the Background layer. Choose Filter>Sketch>Halftone Pattern and change the settings to get a series of stripes. For our stripes, we used 12 for Size, 50 for Contrast, and Line Pattern Type. (Tip: You could also apply this as a Smart Filter first [Filter;Convert for Smart Filters] to have more flexibility when editing the filter’s results.)
12 DRAG STRIPES INTO SMALLER FILE
Using the Move tool (V), hold down the Shift key (to position object in the center of the document), then drag the stripes layer into the business card document. The entire layer won’t be visible, but do not scale it down.

13 NEW 3D POSTCARD FROM LAYER
From the 3D menu, choose New 3D Postcard from Layer and two things happen: the layer will scale down to fit the document and the Layers panel will display the layer as a 3D layer.
Tip: Note “Layer 1” at the bottom of the 3D layer in the Layers panel; you can double-click that to edit the original artwork for that layer.

14 PLAY WITH ANGLE, ROTATION, MASKING
Now you can use the 3D object tools (K), and 3D camera tools (N) to experiment with rotation, perspective change, etc., until you get the results you want. Click-and-drag on various parts of the 3D Widget that appears at the top left of your document to see how it affects the layer. Experiment with the other tools that appear in the Options Bar (these are nested under the 3D tools in the Toolbox, as well.) You could also add a layer mask to hide areas of the 3D layer. Once you’re happy with the results, add your text, save, Image>Duplicate to make a copy, and change its mode to CMYK.

