
Website Design Tips Using Photoshop CS4

How to make your next website design pop!
Web design is one of those areas that, when done right, you just know it. The finished site looks refined and well done—it pops! There are a number of ways that you can achieve this by polishing off your design in Photoshop. Here we look at some of the ways to do just that.
1 [LAY OUT THE FUNDAMENTALS]
Before you go about making your website pop, you must first have your fundamentals in place. By this stage you should have done the research, laid out your website appropriately, and done most of the basic design work—but you haven’t applied the polish. In the following example, we’re going to look at some techniques used for a chocolate delivery website; however, these same techniques can be applied to any website.

2 [CHECK ALIGNMENT AND SPACING]
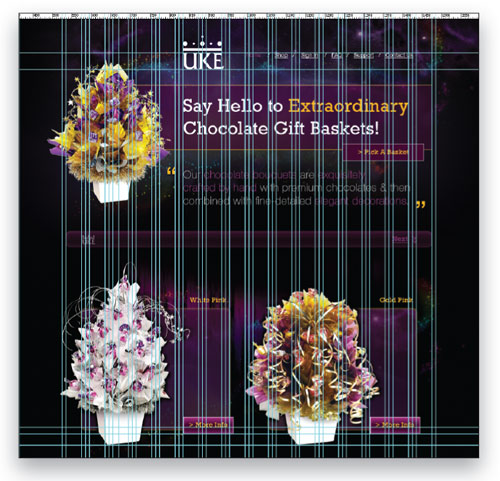
Alignment and spacing in website design creates order, organizes the page, and groups parts of the website for easy navigation. In the screenshot above you can see the guidelines in place ensuring everything is aligned (the grid is from www.960.gs). Notice how the logo and all of the text is left aligned? Also take note of the even spacing around the boxes and text. Use guides in Photoshop to ensure all of your elements are aligned. To add a guide to your document, drag it from one of your rulers (press Command-R [PC: Ctrl-R] to turn rulers on).
3 [APPLY ANTI-ALIASING TO TEXT]
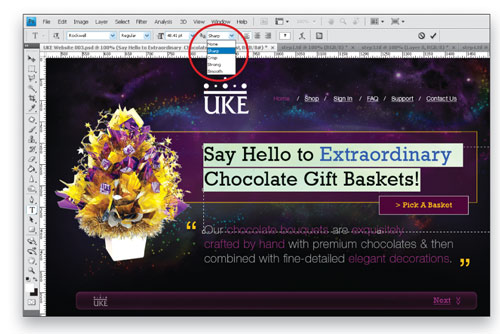
Something that’s often overlooked when designing for the Web is anti-aliasing text. For those who don’t know, anti-aliasing is the technique of minimizing distortion artifacts. There are a few ways to minimize this distortion in your text but the best way is to make use of the anti-aliasing options in your Options Bar (or Character panel). You can choose between None, Sharp, Crisp, Strong, and Smooth. Experiment to see what works best, as different fonts and sizes will yield different results; however, the Sharp setting usually prevails in most cases.
4 [ADD A 1-PIXEL STROKE]
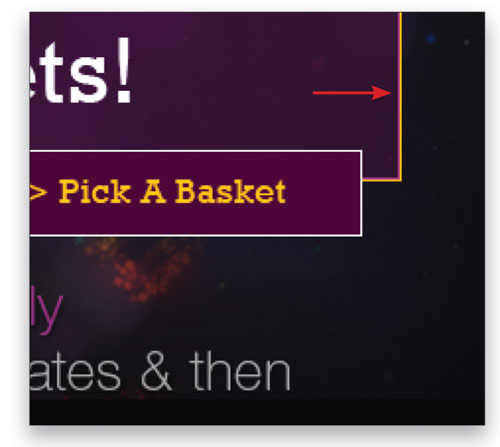
Something that really makes a difference in making a website pop is the use of a 1-pixel stroke inside borders and lines. Take a look at the zoomed-in screenshot above—see the inner purple line that runs alongside the inside of the box on the right? These stroked borders really add that extra crispness to the design as it provides extra contrast to the surrounding elements and gives the design more depth. You can add two strokes by selecting the object, choosing Edit>Stroke, and applying the 1-pixel stroke to the Inside. With your selection still in place, go back to Edit>Stroke and apply your second stroke to the Outside.
5 [ADD SUBTLE GRADIENT EFFECTS]
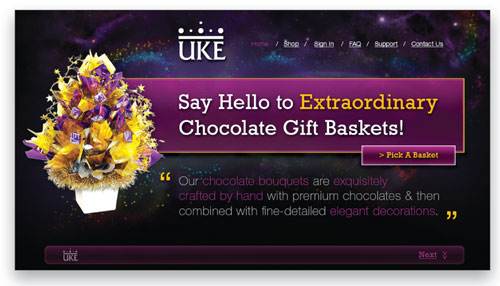
Gradients are popping up everywhere in Web design and for a reason—they add depth and real aesthetics to the design. Unlike print design where gradients seem flat, onscreen they make a design come alive. Notice the slight dark to light purple gradient in the screenshot above? Also take note of the slight transparency. These effects give the design a new dimension, making the image come off the screen, so to speak. Use Gradient Overlay in the Layer Style dialog to create these nice subtle (emphasis on subtle) effects.

6 [ADD SUBTLE DROP SHADOWS]
Use subtle drop shadows in conjunction with the gradients and stroked borders. Once again, these shadows add a new depth and dimension to your design as it makes the different elements on the page play against each other and pop out at you. Notice in the screenshot above that the logo, text, and boxes all have subtle drop shadows applied to them, which break them away from the other elements. You can use the Drop Shadow layer style to achieve these effects—but make sure you use them in moderation.
7 [HIERARCHY & CALL TO ACTION]
When someone first visits your website, what is the first thing they’re going to do? Is there a clear hierarchy of what to read or do first? What is the purpose of the site? These are all questions that you should have considered at the start of the project; however, now is a good time to go back and reflect on these decisions. Can you adjust the colors, size, or position to achieve better results? Notice in the screenshot below that the call to action on the UKE website is the “Pick a Basket” button, which is placed conveniently after the main opening slogan.

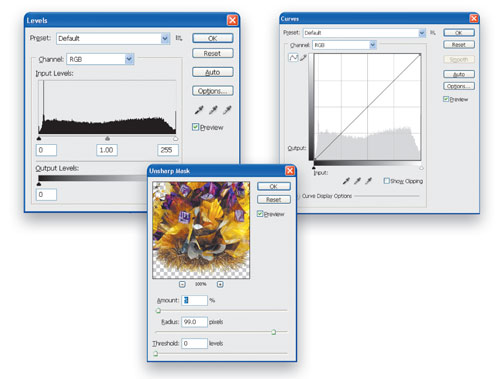
8 [COLOR CORRECTION & SHARPENING]
In Web design, photos, icons, and images are usually quite prominent, so you should ensure that they’re of the highest quality. Check the color balance, sharpness, and contrast of each image and make certain that it balances with the rest of the page and other images. A good way to do this is to make use of Levels, Unsharp Mask, and Curves in Photoshop. A quick search at www.layersmagazine.com will yield results on how to do this—these functions go beyond the scope of this tutorial.
Less Is More
In Web design, the old saying goes, “less is more.” After completing your website design, have a break and come back to it. Then ask yourself these questions to see how you can further improve your site:
1. Is there anything that I can remove, fix, replace, move, change or edit?
2. Does one element take up too much space or draw too much attention?
3. Are there too many colors?
4. Is the site balanced?
5. Is there consistency?
6. Can I make use of more white space?
When you set out to design your next website, you can also ask yourself these questions:
1. Do I have the basic fundamentals in place?
2. Can I improve my alignment or spacing?
3. Have I used the appropriate anti-aliasing?
4. Can I sharpen my images or text with strokes or borders?
5. Can I give more depth to the page by using gradients or drop shadows?
6. Is there a clear hierarchy with a call to action?
7. Are all of the images color corrected, balanced, and sharpened?
8. And last of all, ask yourself—does the website pop?
Before

After

ALL IMAGES BY JACOB CASS UNLESS OTHERWISE NOTED
