
Get Creative with Adobe Bridge
Many people, understandably, think of Adobe Bridge as a visual file browser, and of course, that’s its strength. But thanks to the Output module, Bridge also offers some interesting design possibilities. In this example, we’ll use Bridge to create both a filmstrip of images and a mosaic.
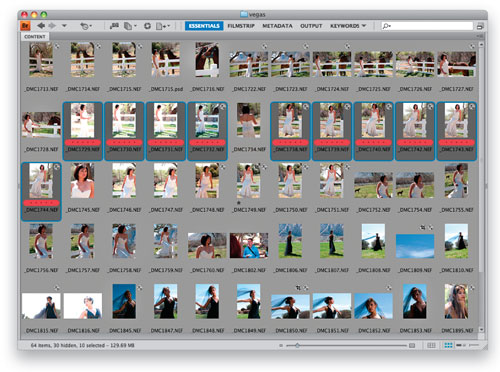
1 SELECT PHOTOS IN ESSENTIALS VIEW
In the Essentials module of Bridge, navigate to the folder of images you want to use and select the photos you want to include in the filmstrip. You can either simply select them, or label/rank them.
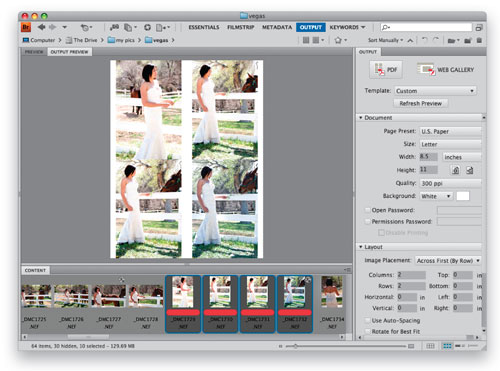
2 SWITCH TO OUTPUT MODULE; CHOOSE PDF
With the photos selected, switch to the Bridge Output module: Window>Workspace>Output or click on the Workspace drop-down menu (down-facing arrow at the top just to the left of the Search field). You can also click on the double dotted line to the left of the Workspace menu and drag to the left to display the main workspaces, and then just click on the name of the workspace you want to use.
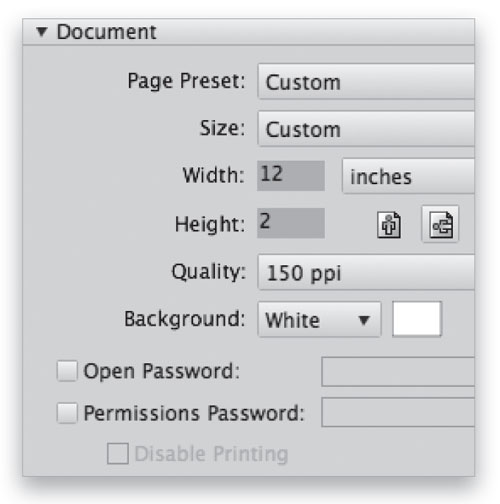
3 SET DOCUMENT SIZE
Click on PDF at the top of the Output panel. In the PDF options, go to the Document settings and enter values for the Width and Height of the document. As we want to create a filmstrip of photos, the document has to be very wide and not very high. Based on the number of images, we guessed at 12×2″ (as you’ll see, it’s okay to guess, because we’re going to be working with a preview). You also enter the Quality (resolution): for this example, we used 150 ppi.
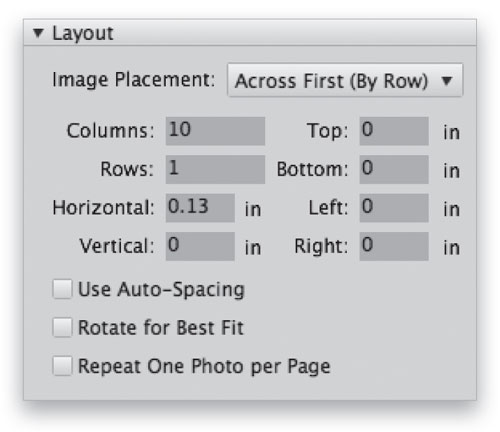
4 SET LAYOUT OPTIONS; REFRESH PREVIEW
In the Layout section, enter 10 for the number of Columns (because we have 10 photos) and 1 for Rows. Leave everything else at zero, press the Refresh Preview button, and a preview will be generated based on the information you’ve entered. Once the preview is finished, you can alter any values and press Refresh Preview again. For our example, we added a small value (0.13 in) for the Horizontal spacing.
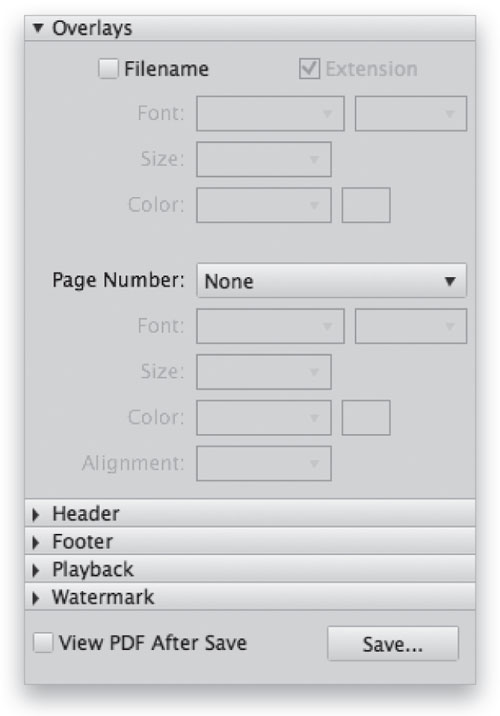
5 TURN OFF OTHER OPTIONS; SAVE AS PDF
In this example, we don’t want Filenames, Page Numbers, Playback options, or Watermarks, so make sure all of these are turned off (no checkmark) or set to None. After Refreshing Preview one more time just to be sure, press the Save button at the very bottom of the panel, name it appropriately, and click OK.
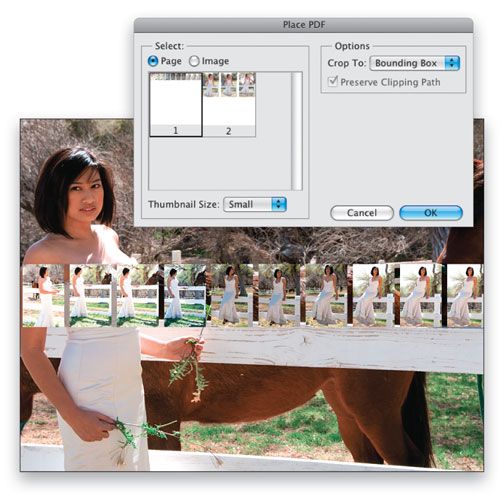
6 PLACE PDF FILE IN PHOTOSHOP
In Photoshop, open or create a document, and then use File>Place, navigate to your PDF file, and click Place. In the dialog that appears, choose Page rather than Image, and click OK. Use the transform handles to resize the placed graphic, if necessary, and press Return (PC: Enter).
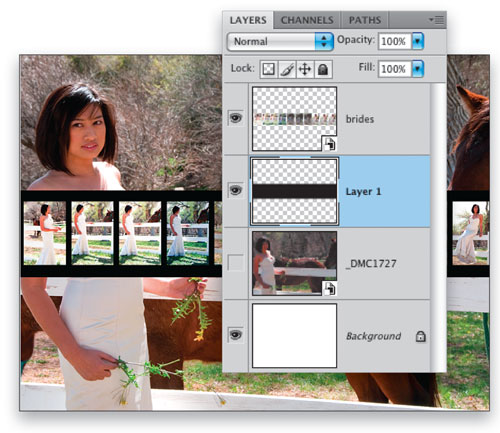
7 ADD A LAYER BELOW; FILL WITH BLACK
Press Command (PC: Ctrl) and click on the Create a New Layer icon at the bottom of the Layers panel to add a layer below the filmstrip layer. Using the Rectangular Marquee tool (M), make a selection a little larger than the “filmstrip,” adding some extra space above and below. Press D to set your Foreground/Background colors to their default Black/White and press Option-Delete (PC: Alt-Backspace) to fill the selection with black.
8 START CREATING FILM SPROCKETS
Add a layer above the black layer, and grab the Rounded Rectangle Shape tool. Press X to switch your Foreground color to white, make sure the Shape tool is set to Fill Pixels (the third icon in the Options Bar) and that the Radius value (for the rounded corners) is 2–3 px, then click-and-drag to create the first sprocket. Hold down the Command (PC: Ctrl) key and click on the sprocket layer’s thumbnail in the Layers panel to load it as a selection. Using Free Transform in copy mode (Command-Option-T [PC: Ctrl-Alt-T]), hold the Shift key and click-and-drag the sprocket to the right, leaving a space between the sprockets.
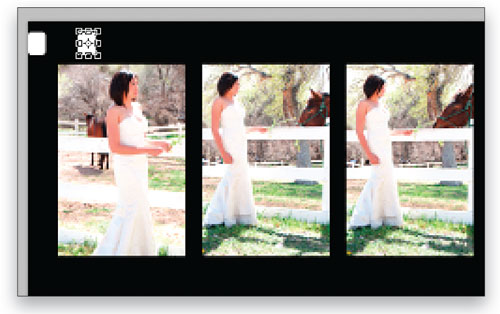
9 FINISH CREATING THE FILM SPROCKETS
Press Return (PC: Enter) and then Shift-Command-Option-T (PC: Shift-Ctrl-Alt-T) repeatedly until your sprockets are all the way across. Command-click (PC: Ctrl-click) the layer to select all the sprockets. Using the Move tool (V), hold down Shift-Option (PC: Shift-Alt) and drag a copy of the sprockets to the bottom of the filmstrip. Command-click (PC: Ctrl-click) on the sprockets layer to load both rows as a selection, click on the black box layer to make it active, and press Delete. You can now drag the white sprocket layer to the Trash icon in the Layers panel. Press Command-D (PC: Ctrl-D) to deselect.
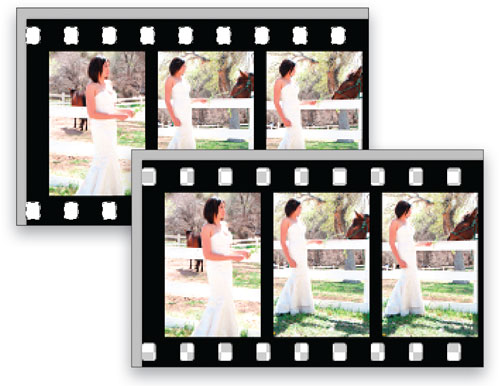
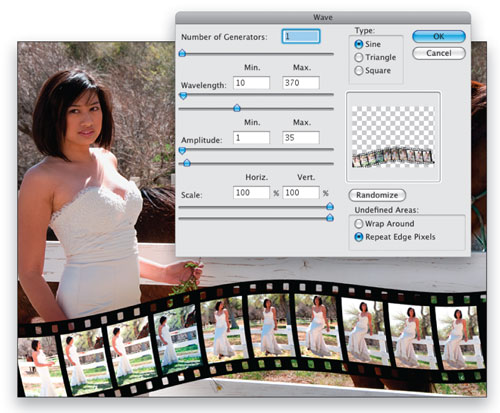
10 CREATE A SMART OBJECT; APPLY SMART FILTER
In the Layers panel, select the black box layer and then Shift-click the photos layer so both layers are active. Right-click on either layer and from the menu, choose Convert to Smart Object. Then go to the Filter menu, and choose Distort>Wave. Take advantage of the preview in the Wave dialog to enter settings to apply a slight curve to the filmstrip, then click OK.
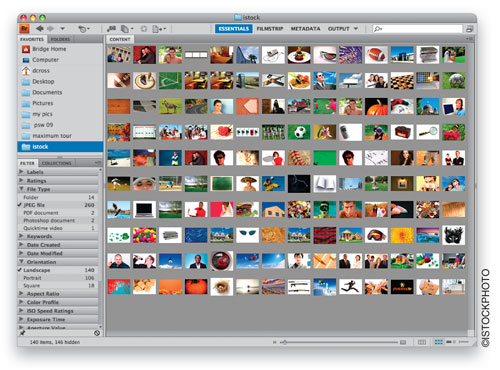
11 VARIATION: MOSAIC OF MANY SMALL PHOTOS
Bridge Output can also be used to create a mosaic of many small photos. First, go back to the Essentials module and choose a folder with many different photos, ideally containing many different colors. If you wish, you can filter the results—in this example, we used only JPEGs in landscape orientation. Press Command-T (PC: Ctrl-T) to show only the thumbnails and get an idea of what you’re going to get. (You may wish to drag files around to change the order.)
12 EXPERIMENT WITH SETTINGS AND REFRESH PREVIEW
Switch to the Output module and experiment with the settings. Because we had 140 photos, we chose a layout of 14 Columns and 10 Rows, with a document size that forced the images to be small with very little space in between. (This is an example of where you can take great advantage of the Refresh Preview button.)

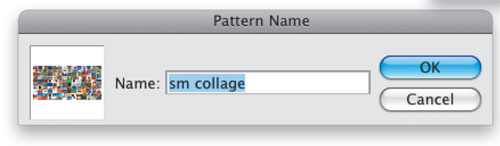
13 OPEN THE PDF AND CREATE A PATTERN
Save the PDF file and open it in Photoshop. Under the Edit menu, choose Define Pattern, naming the pattern if you wish.
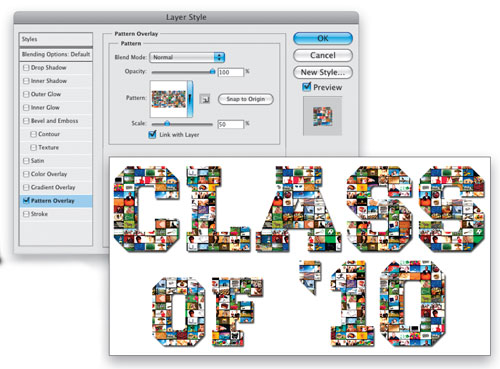
14 APPLY AS PATTERN OVERLAY
Now we can apply the pattern in different ways: Either by using the Edit>Fill command (to fill with the pattern at the size you created it) or with the Pattern Overlay layer style. Here, we created a Text layer and used the Pattern Overlay—click the Add a Layer Style icon at the bottom of the Layers panel, choose Pattern Overlay, and select your new pattern in the Pattern Picker—to add the mosaic pattern at 50% of the original size.
(Tip: Why you’re still in the Layer Style dialog, you can click-and-drag inside your document to reposition the pattern.)
ALL IMAGES BY DAVE CROSS UNLESS OTHERWISE NOTED
