Troubleshooting CSS in Dreamweaver
Dreamweaver CS3 provides a great collection of tools for creating page designs with CSS, but when it comes to altering and troubleshooting CSS, things can get confusing in a hurry. To help you sort through the options, this column focuses on some of the challenges you may face when working with CSS.
1 PROBLEM: CONFLICTING STYLES
It’s easier than you might imagine to create conflicts by applying two or more different styles using CSS. For example, let’s say you redesign your website, creating a new style for your H1 tags with a white text color. But when you look at the pages in your site, many headlines still display in a green color from your old design. There can be many possible causes, but if you don’t remember all of the old styles or you’ve taken over a site created by someone else, the next step offers you a few tips for diagnosing this kind of problem.
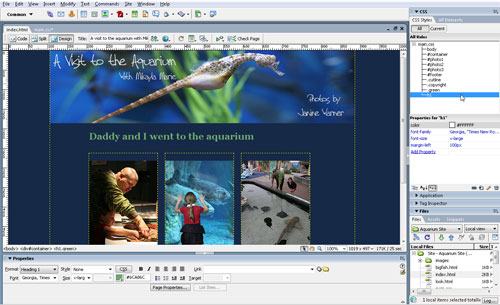
PHOTO CREDIT: JANINE WARNER
2 SOLUTION: USE STYLES PANEL TO FIND CONFLICTS
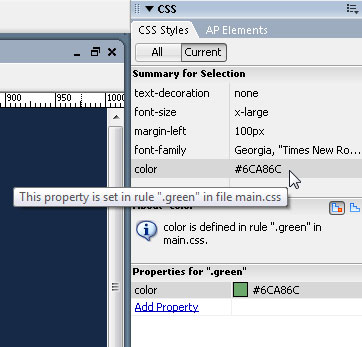
How styles are prioritized when more than one is applied to the same element is complex, but the Styles panel in Dreamweaver can help identify conflicts. To use this feature, first click to select an element, such as a headline, then click on the Current tab at the top of the CSS Styles panel. The Properties pane at the bottom of the panel displays how styles are applied to the selected element. In the example shown here, the green color in the headline is being caused by a class style called .green, which is overriding the H1 style.
3 SOLUTION PART 2: REMOVE CONFLICTING STYLE
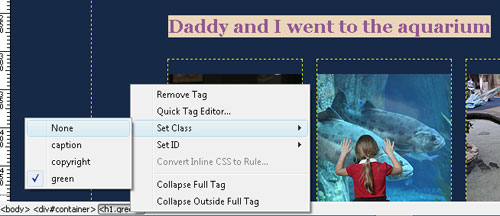
Once you’ve identified a conflict, you’ll need to edit or remove styles to fix it. In this case, if you remove the .green class style, the newly defined H1 style will take over. You can remove a style by deleting it from the code in Split or HTML view, but there’s an even easier way. Click to place your cursor in the element, then find the style in the Tag selector at the bottom of the workspace (in this case, the .green style is applied to a paragraph tag). Control-click (PC: Right-click) and choose Set Class to None to remove a class style.
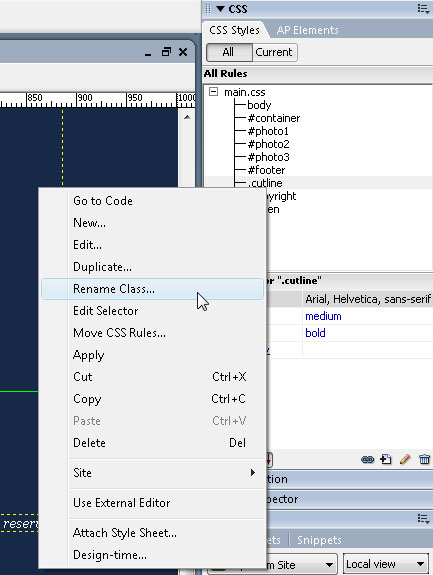
4 PROBLEM: CHANGING STYLE NAMES
Dreamweaver CS3 makes it easy to change the name of a style in the CSS Styles panel. But here’s the rub: There are two ways to edit a style name, and the outcome from each method is quite different (as you’ll learn in the next few steps). One way to change the name of a CSS rule is to Control-click (PC: Right-click) on a style name in the CSS Styles panel and select Rename from the drop-down menu. When you use this option, Dreamweaver prompts you to open the Find and Replace dialog and automatically change the style name anywhere it’s used in your page code.
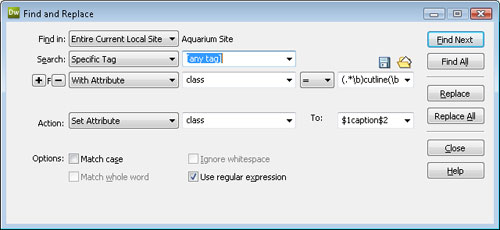
5 SOLUTION: USE FIND & REPLACE TO CHANGE STYLE NAMES
If the style name doesn’t match the name used in your page code, the style definition will no longer be applied. Using the drop-down lists in the Find and Replace dialog, you can specify if you want to change the style name in all of the files in a site, only in the current document, in open documents, or within selected text. As you see here, the attributes are automatically filled in by Dreamweaver when you use the rename option, making it easy to use the correct search string to change the style name of the style in the code.
6 PROBLEM: CHANGING A STYLE NAME REMOVES STYLE
If you change the name of a style in the CSS Styles panel by simply clicking on the name and retyping it within the panel, much as you would in the Finder or Explorer in your operating system, Dreamweaver won’t prompt you with the Find and Replace dialog and you’ll have to change the style name in the code manually if you want the style definition to apply.

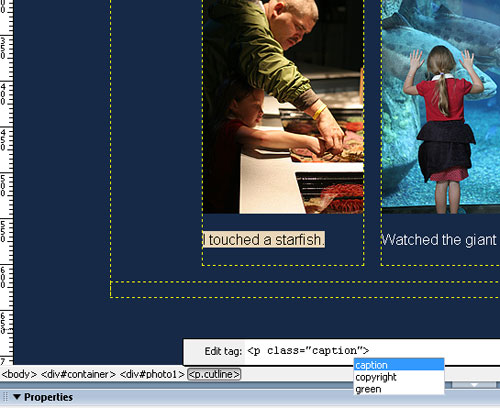
7 SOLUTION: USE SPLIT VIEW OR THE QUICK TAG EDITOR
Changing a style name in the code is not hard if you know where to look. Indeed, when I’m changing a style name that’s only applied once in a website, I find it much quicker to do it this way. After you’ve changed the style name, just click on the element formatted with the style and then Control-click (PC: Right-click) the Tag selector, and choose the Quick Tag Editor. That brings up a little dialog where you can edit the style name without having to view the code (and thanks to shortcuts, you can select the new name from a list of available styles). If you opt to type, make sure you do it carefully. The name has to be exactly the same.
8 PROBLEM: CENTERING A BACKGROUND IMAGE
Dreamweaver makes it easy to use CSS to insert a background image using the Page Properties dialog. While you’re at it, you can define whether the background image repeats or not, and even specify it if should repeat on only the x or y axis. But if you want to center a background image so that it floats within a centered design area, you can’t do it through the Page Properties dialog. But don’t fret, read on to the next step for an easy solution to centering a background image.

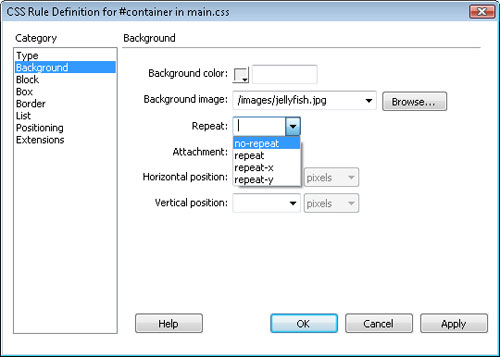
9 SOLUTION: USE DIV TO CENTER BACKGROUND
If you follow the box model to create centered CSS designs, you probably create a div with a style called something like #container, and then insert all of your content, including other divs, inside that main container div. The predesigned CSS layouts in Dreamweaver follow this model. If you want your background image to be centered, the trick is to set the image as the background of the #container div instead of setting it as the background of the entire page. To do so, double-click on the #container style name in the CSS Styles panel, and use the Background category in the CSS Rules Definition dialog.
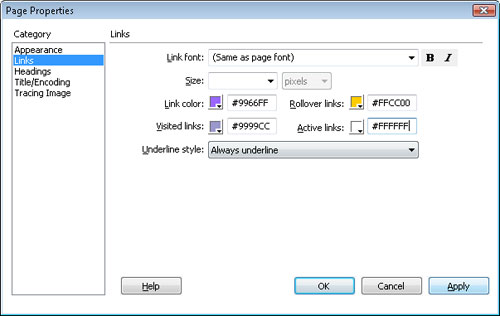
10 PROBLEM: HOW TO CREATE DIFFERENT STYLES FOR LINKS
Using the Link category in the Page Properties dialog, it’s easy to create styles for all four of the link states: link, visited link, hover, and active link. When you do, Dreamweaver automatically creates styles named a:link, a:visited, a:hover, and a:active. That set of link styles works fine if you want all of the links on your webpage to look the same, but if you want to create a second set of styles, say, for the links that appear in a navigation bar, you’ll need to use the Advanced link selector, covered in the next step.
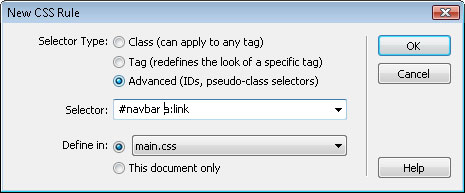
11 SOLUTION: CREATE AN ADVANCED STYLE
To create a second set of link styles for a navigation bar, create the links inside a div and then include the ID for the div in the name of the link styles. For example, if you name the ID for you div #navbar, and you want to create link styles that only affect the display of links inside the div, you’d create styles that look like this: #navbar a:link. (Note the space between the ID name and the tag name.) These advanced styles instruct the browser to only apply the style definition when a link appears inside an element with the ID #navbar. (For more detailed instructions, see “Creating a Navigation Bar with CSS in Dreamweaver” at www.layersmagazine.com.)
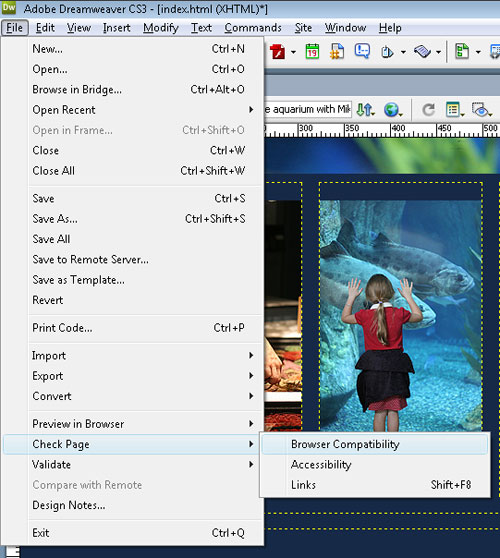
12 PROBLEM: NOT ALL BROWSERS DISPLAY CSS THE SAME
One of the greatest frustrations when it comes to working with CSS is that not all Web browsers display styles the same way. For example, early versions of Internet Explorer display padding differently than Firefox, which can throw off the alignment of elements. Unfortunately, the differences among browsers are far too complex to cover in a step or two in this article, so the tip here is to use the Browser Compatibility feature to identify possible problems and tips for how to resolve them. You’ll find this feature under the File menu when you choose Check Page.
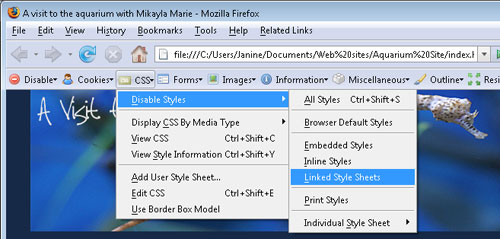
13 COOL FIREFOX EXTENSION FOR VIEWING CSS ON THE WEB
If you haven’t discovered it already, download the Web Developer Toolbar for the Firefox Web browser, available from addons.mozilla.org. This handy addition to Firefox makes it possible to disable, view, and even edit the CSS on any webpage. Of course, your edits won’t permanently change a live webpage, but you can use the Web Developer Toolbar to see how other designers use CSS, and even alter their style sheets to see the effects, which is a great way to learn more about CSS, and even test your own webpages.