Video in Photoshop
Now that Photoshop CS3 Extended can work directly with video files, I’m receiving an increasing number of questions about the nuances of working with video files in a graphic design program. Here are some of the most common questions and answers:
Question: When I send a PSD file with an embedded video layer to a friend, he can’t play the video. All he can see is the first still frame of the video. What gives?
Answer: Ah…the clue for me (hidden in your question) was when you said that you were sending the video file with an “embedded video layer.” I know Photoshop makes it look that way, but that’s not how it works. Photoshop is simply linking to the video file on your hard drive. By sending your PSD file to your buddy without the folder that contains the actual video file, you’ve broken the link so all that he can see is the “poster frame” of the video file. Send him the entire folder that contains both the PSD file and the video file(s) and you should be fine.
Question: Last year, when you were on PhotoshopUser TV, (www.photoshopusertv.com), you showed how to take a bunch of still images and turn them into a time-lapse video in Photoshop. Did you ever write that up as a tutorial?
Answer: No I never did, but here’s a quick step-by-step that should do the trick for you.
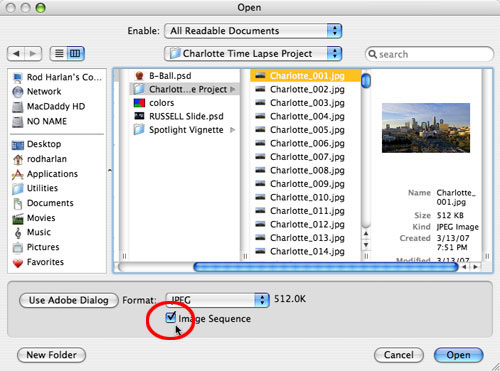
1. Select File>Open and navigate to your folder of images—make sure that they’re numbered in sequence.
2. Select the first image and then click the Image Sequence checkbox (circled).
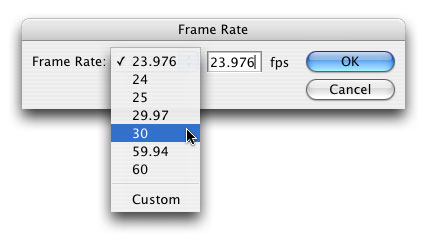
3. Select your Frame Rate. This will also determine the overall duration of the clip, as it makes this calculation based on the frame rate. Click OK.
4. Click the Play button in the Animation Timeline or simply press the Spacebar to render the video clip into RAM.
Tip: Using large, 8–12-megapixel images allows you to create 4,000–5,000-pixel video files. This is many times larger than SD and HD video files. In fact, you can go out and shoot once, but then be able to chop up the resulting monster video file into 30–50 standard-definition video files.
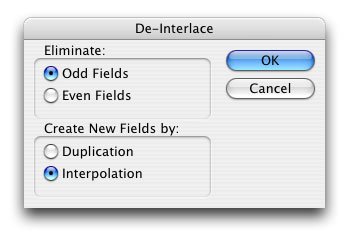
Question: I was given a video file to use but when I brought it into Photoshop it looked like it had scan lines running through it. Any idea how to fix this?
Answer: It actually sounds like you have an interlace problem. Was this footage captured from the TV or off a VHS tape or other analog video source? If so, why don’t you give this a try?
1. Open the file that has the interlace problems in Photoshop.
2. Convert the layer to a Smart Object (Layer>Smart Objects>Convert to Smart Object). The reason for converting the layer to a smart object is because you want the filter that you’re about to apply to affect the whole video file and not just one single frame.
3. Apply the De-Interlace filter (Filter>Video>De-Interlace). Try the standard options first—they usually work best—and click OK.
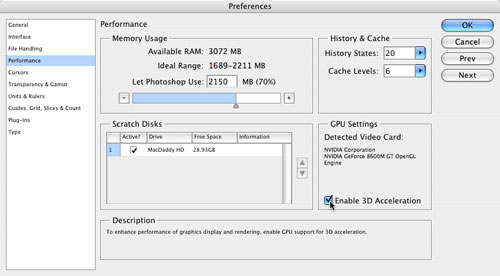
Question: My friend and I have the exact same machine, but he’s able to work with 3D files (rotate, spin, position, scale, etc.) a lot faster than I am. Why is this?
Answer: If your friend really has the exact same CPU, RAM, hard drive, and graphics card as you do, then there’s only one real explanation: Your friend has enabled 3D Acceleration for his video graphics card (or he’s disabled yours and not told you about it.) To check if this is the case, go to Photoshop (PC: Edit)>Preferences>Performance and look for the Enable 3D Acceleration checkbox. If it’s not checked, click on it to turn it on.