Insert Google Ads with Dreamweaver
Dreamweaver CS3 makes it easy to create beautiful webpages without ever having to look at the code behind your designs. But even though you don’t have to learn HTML, every once in a while knowing how to work with the code can come in handy. In this tutorial, you’ll find instructions for using Dreamweaver’s code-editing features to insert Google ads and other features.
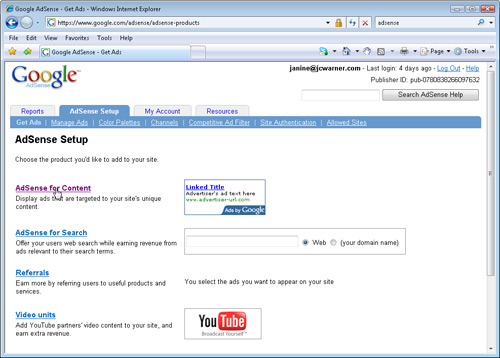
1 ADDING GOOGLE ADS
We’ll use Google AdSense as the main example in this tutorial but the process is similar for nearly all sites that offer features you can include on your pages. You generally begin by creating an account. In the case of Google AdSense, once you’re approved (most websites are), you simply log in to create the code needed to display Google ads for your pages. Once you’ve added the code, Google delivers ads to your site based on the content on your pages. If your visitors click on those ads, Google pays you a small fee.
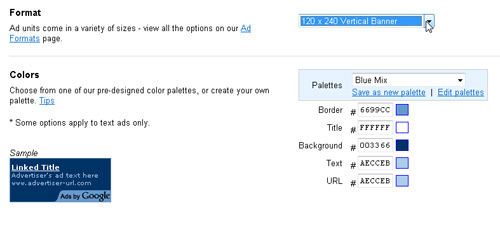
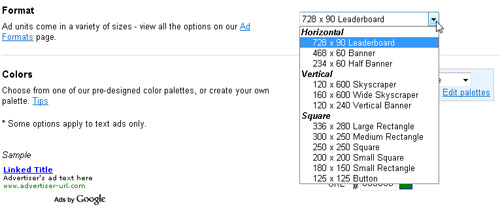
2 CHOOSE AD SIZES, COLORS, ETC.
As you go through the Google AdSense setup process, you can select from a variety of advertising options, including the size and colors you want for your ads. You can also create Channels to better organize and track ads on different parts of your site.
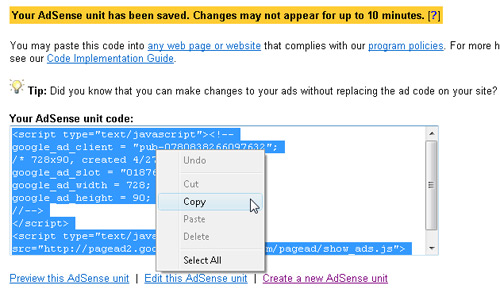
3 GENERATE GOOGLE ADSENSE CODE
Once you’ve completed the ad setup process and specified all of the options for your ads, Google generates a unit of code in JavaScript that you can add to your webpages. You’ll need to copy all of this code, from the opening tag to the closing tag, so that you can paste the code in its entirety into the pages on your site.
4 USE CODE VIEW IN DREAMWEAVER
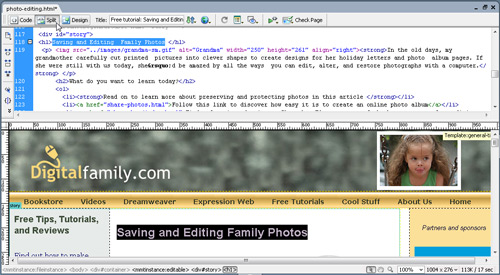
Now, open the page where you want to insert your ad code. Click either the Split view or Code view buttons (located in the upper-left corner of the workspace) to display the code behind the page. The advantage of using Split view (shown here) is that you can see Design and Code views at the same time. Tip: Highlight any element in Design view, such as the headline, “Saving and Editing Family Photos,” on this page, and Dreamweaver automatically highlights the corresponding code so that you can find your place more easily.
5 INSERT GOOGLE ADSENSE CODE
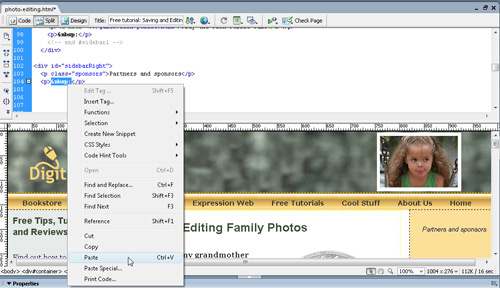
Find the exact place on your webpage where you want to insert the Google ads and click to place the cursor in that spot in the code. Note: If you paste the JavaScript into Design view, it won’t work. Choose Edit>Paste to insert the code from the website into your code. Again, make sure that you have all of the code including the opening and closing tags. If you ever want to move or remove this code, you’ll need to select all of this code.
6 VIEWING GOOGLE ADS
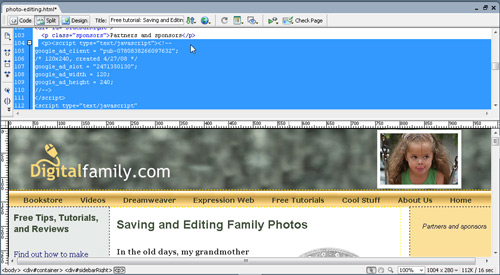
One of the most confusing aspects of working with Google AdSense in Dreamweaver is that although you can see the code in Code view after you paste it into your page, you won’t see the ads in Design view. The only indicator that you’ve successfully added your Google ads will be a little blank space added to your design.
7 PREVIEWING ADS IN A BROWSER
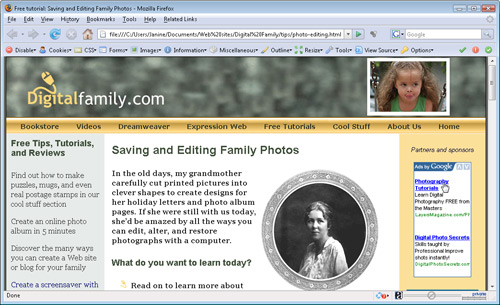
To view your ads in your pages, you’ll need to preview the page in a Web browser: Click the Preview button at the top of the workspace or choose File>Preview in Browser. As long as you’re connected to the Internet, the Google ads should automatically appear wherever you added the code to your page. Note: Google ads can take up to 10 minutes to become activated before they’ll display.
8 ADDING MORE ADS
You can add the same AdSense code to as many pages in your site as you want. You can create a variety of ads to include in different places in your site by repeating the Google AdSense setup process and choosing different options before generating a new snippet of code. Tip: When you open Dreamweaver to add your code, leave your Web browser open so that you can easily return to Google to make changes or copy the code again, if necessary. You can switch between two programs on your computer by pressing Command-Tab (PC: Alt-Tab).
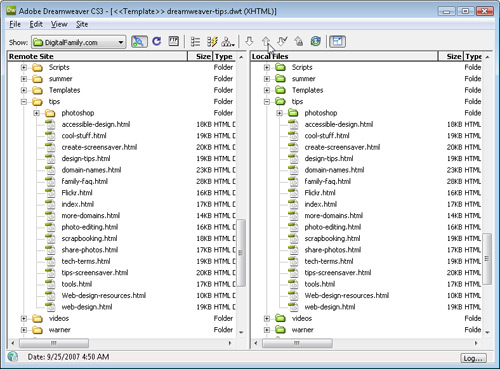
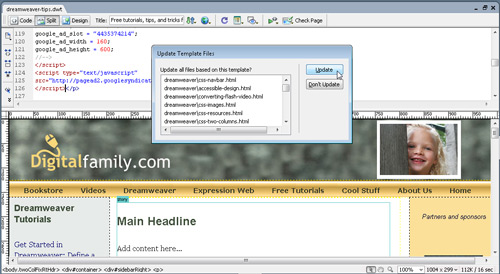
9 WORKING WITH CODE IN TEMPLATES
If you use Dreamweaver’s Dynamic Web Templates (a great way to save time and create more consistent designs), you can add Google AdSense code to a template and automatically insert ads into all of the pages created from the template at once. To do so, open the template file, choose Split or Code view, and paste the code into the template file just as you would into any other HTML page. When you save the template, choose the Update option to automatically insert the ads into all corresponding pages.
10 WORKING WITH FLICKR AND OTHER SITES
Although the first nine steps in this tutorial are specific to Google AdSense, the process of inserting code into a page in Dreamweaver works the same whether you’re using AdSense or any of the myriad other online advertising options, such as www.CommissionJunction.com and www.Linkshare.com. You can also use this process to add widgets or images from sites such as www.Flickr.com.

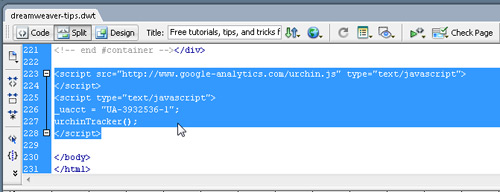
11 ADDING INVISIBLE FEATURES
Some of the code you may want to add from sites like Google won’t appear in your webpages in a browser, making it a little trickier to add. For instance, you can use Google Analytics to track your Web traffic (with better detail than you’ll get from most Web hosts). Just insert code in a way that’s similar to the way you do it with AdSense but because the code won’t be visible on the page, save it somewhere that makes it easy to find, such as just above the body tag at the bottom of your pages.
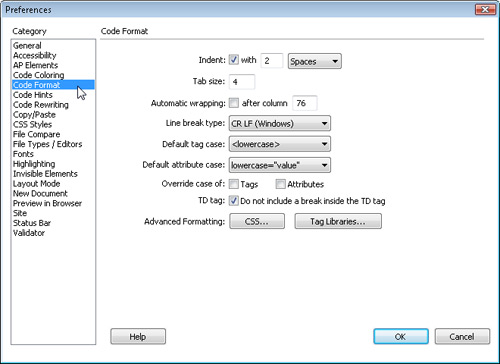
12 CHANGING CODE DISPLAY OPTIONS
If you spend a lot of time working in Code or Split view, you may want to take a minute to adjust the code preferences in Dreamweaver. Choose Dreamweaver>Preferences (PC: Edit>Preferences) and then specify your preferred options in these Categories: Code Coloring, Code Format, and Code Hints. Also note that the Code Rewriting category provides options for how (or if) Dreamweaver will alter any code to your pages.
13 UPLOAD YOUR PAGES
Although you should be able to test most third-party code, such as Google AdSense, by previewing your pages on your local computer, remember that your new features won’t become visible on your website until you’ve uploaded the pages to your Web server.