Warped Perspective in Adobe Illustrator
The combination of bringing Illustrator artwork into Photoshop and warping it offers some tremendous possibilities—but only if you know the super-secret trick to make it possible to warp a vector smart object. In our example, we’ll start with a basic calendar that we created in Illustrator and use Photoshop to change the angle and make it look more photographic.
If you’d like to download the Illustrator file used in this tutorial to practice these techniques, visit www.layersmagazine.com and navigate to the Magazine section. All files are for personal use only.
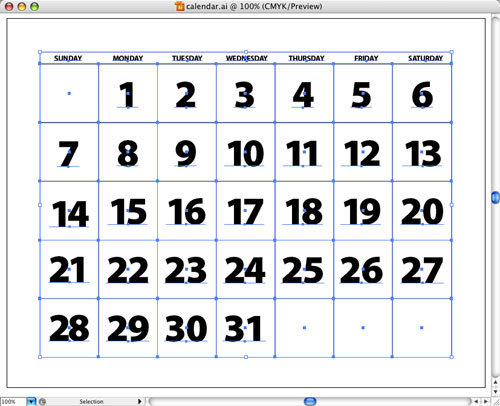
1 CREATE THE BASIC CALENDAR IN ILLUSTRATOR
We used basic Illustrator commands, particularly Transform Again, to create our calendar. If you’d like to see a video of how we created the calendar, visit www.layersmagazine.com and navigate to the Illustrator section. We’ve also already created the calendar file for you, so navigate to the Magazine section and download the Illustrator document if you’d like to follow along.
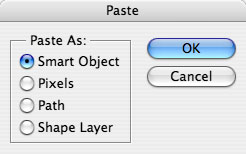
2 COPY-AND-PASTE INTO PHOTOSHOP
In Illustrator, select all the objects (Command-A PC: Ctrl-A) and then choose Edit>Copy. Now, switch to Photoshop and create a new document (File>New), choose the size and resolution you need, then Edit>Paste. In the dialog that appears, choose Paste As: Smart Object.
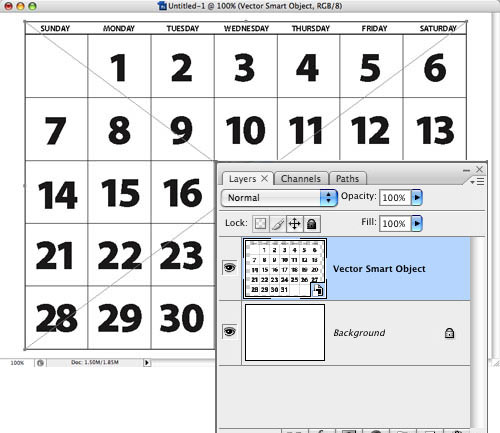
3 SCALE THE CALENDAR
Holding down the Shift and Option (PC: Alt) keys, drag outward on a corner handle to scale up the graphic to fill the document (because it’s a smart object, you won’t lose any quality by scaling up). Press Return (PC: Enter) when the calendar (object) is the correct size and the new layer will display as a Vector Smart Object in the Layers panel.
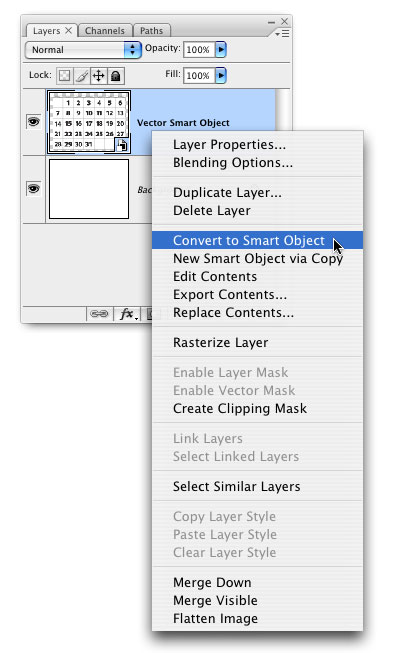
4 USE THE “SECRET” TRICK TO WARP
If you go under the Edit menu and choose Transform, you’ll notice that Warp is grayed out (along with Distort and Perspective), because it’s not possible to distort a vector smart object. As odd as it sounds, the solution is to change the vector smart object into a smart object. Here’s how: Control-click (PC: Right-click) on the Vector Smart Object layer and choose Convert to Smart Object and now we’re all set to warp the object in the next step. (Note
: The layer thumbnail and name do not change to show that you’ve converted it to a smart object.)
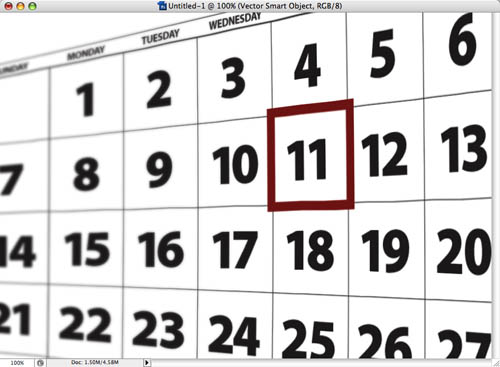
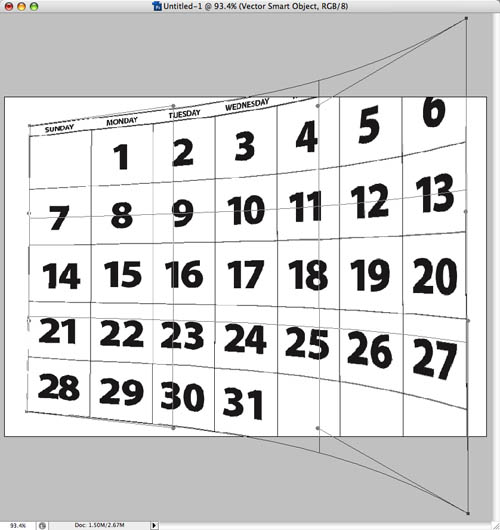
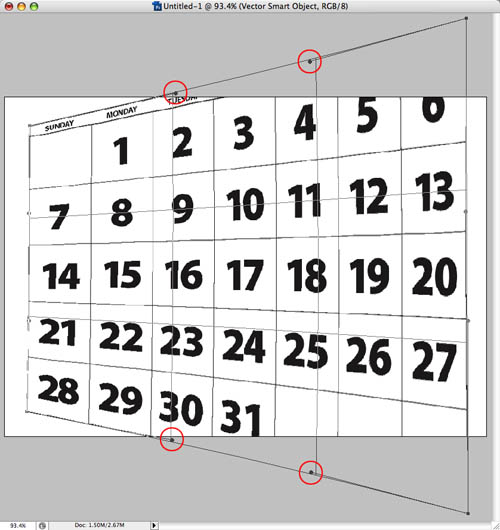
5 WARP THE SMART OBJECT
Use the Zoom controls to zoom out and from the Edit menu, choose Transform>Warp. Pull the corners out to create the effect you want, either curved edges or straight. Note: To create a straight-edged warp you’ll have to also use the warp handles (circled). Just drag them until they line up with the edges of the warp boundary box.
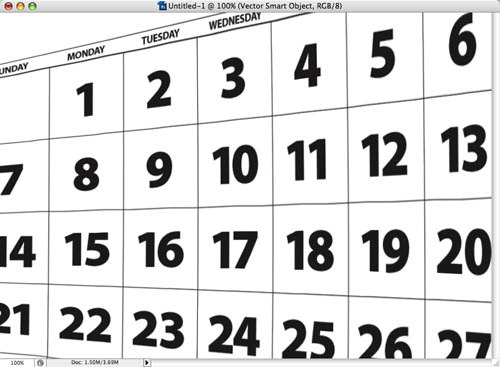
6 SCALE THE OBJECT EVEN LARGER
Press Command-T (PC: Ctrl-T) for Free Transform and then holding Shift and Option (PC: Alt), drag a corner outward to make the object even larger. Press Return (PC: Enter) when you’re done scaling and, if necessary, use the Move tool (V) to position the artwork where you want.
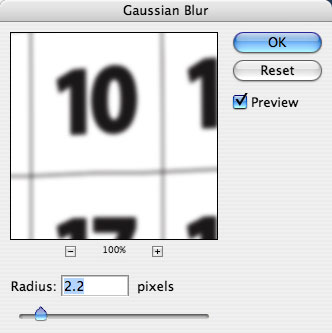
7 ADD GAUSSIAN BLUR
From the Filter menu choose Blur>Gaussian Blur, apply a slight blur of 2–4 pixels (we used 2.2 pixels), and click OK.
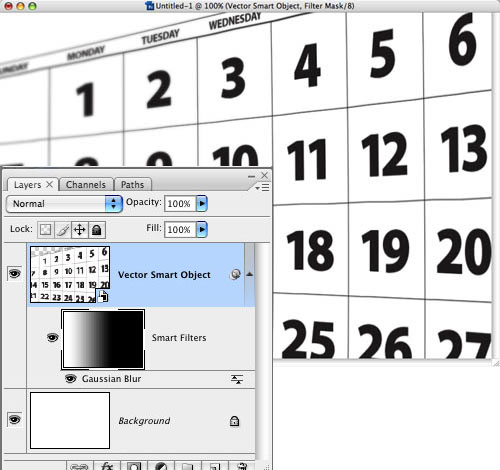
8 APPLY GRADIENT TO MASK
Because the layer is a smart object, the Gaussian Blur was applied as a smart filter that we can edit or mask. For this example, we’ll add a Black, White gradient to the smart filter mask. So, click on the Smart Filter mask thumbnail in the Layers panel and select the Gradient tool (G) from the Toolbox. Up in the Options Bar, click on the down-facing arrow to the right of the gradient thumbnail to open the Gradient Picker, and choose the Black, White gradient. Now drag your mouse from right to left on the calendar to gradually show the blurry effect and simulate photographic depth of field.
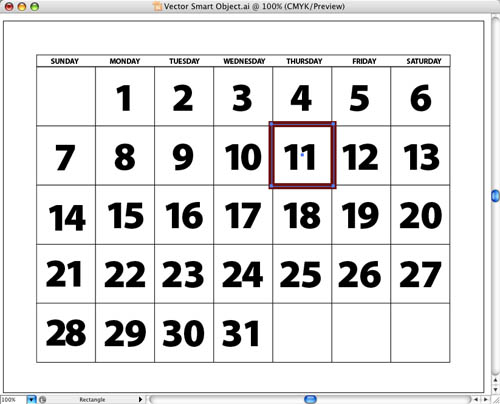
9 EDIT THE ORIGINAL ARTWORK
To edit a smart object, you double-click on the layer thumbnail, but in this case, it’s a little trickier. Remember that we converted the vector smart object to a smart object, which means when you double-click on the Smart Object thumbnail, a second Photoshop document will open, which contains the vector smart object. Now double-click on that layer thumbnail to open the Illustrator artwork. In Illustrator, we added a red box around one date and saved the document.
10 CLOSE AND SAVE TO UPDATE
Now, return to Photoshop and the first document will update. Close and Save that document and the second (warped) document will also update. (It’s really not as tricky as it sounds.)