Using QuickTime Videos with Dreamweaver
Dreamweaver makes it easy to add Flash Video to your webpages, but if you want to display your video in QuickTime format, you’ll have to take care of the various settings and other options yourself. In the following steps, you’ll learn how to easily control and customize your QuickTime videos in Dreamweaver. (Note: This tutorial works for both Adobe Dreamweaver CS3 and CS4. The instructions will also work with Windows Media video and other formats, but the parameters will have to be adjusted for those formats).
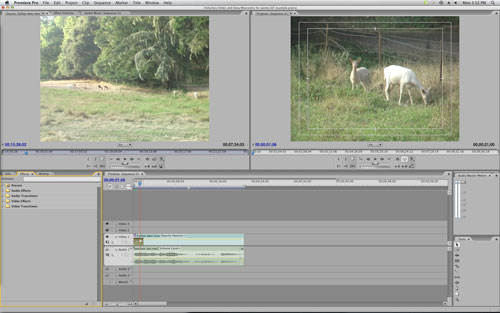
1 PREPARE QUICKTIME VIDEO IN A VIDEO EDITOR
Although you can insert many different types of video into your pages in Dreamweaver, you’ll first need to edit and convert the video in a video editor, such as Adobe Premiere Pro (shown here).
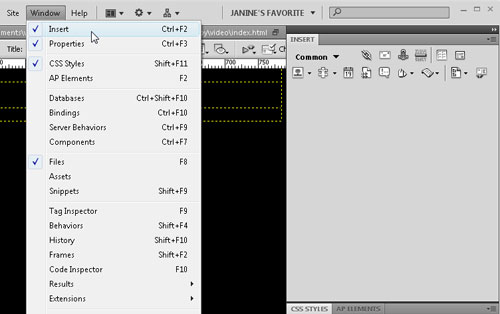
2 OPEN THE INSERT PANEL IN DREAMWEAVER
Dreamweaver’s Insert panel (Window>Insert) provides a handy collection of options, including the Insert>Media>Plugin feature you’ll need for adding video in QuickTime, Windows Media, or any format other than Flash. If you’re using Dreamweaver CS4, you have the option to keep the Insert panel at the top of the workspace using the CS3 workspace layout (Window>Workspace Layout>Classic) or integrate it into the panels, as we’ve done here. (Note: In Dreamweaver CS3, this feature is called the Insert Bar and it’s only available at the top of the workspace.)
3 INSERT QUICKTIME FILE
First, place your cursor where you want to add the video in your webpage. Then, with the Insert panel open and the drop-down menu at the top set to Common, click the arrow to open the drop-down menu next to the Media icon and select Plugin (note that the Media icon changes to reflect whatever you last selected). Alternatively, you can choose Insert>Media>Plugin.

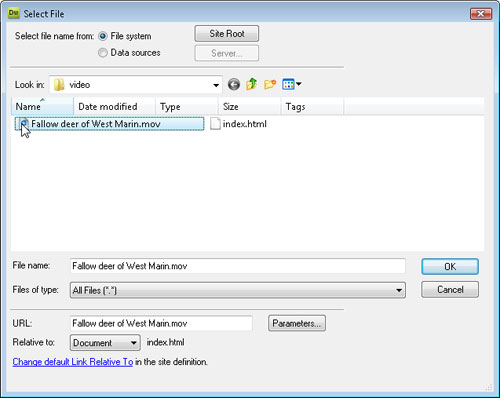
4 SELECT THE QUICKTIME FILE
If you’ve used the Insert Flash Video (FLV) options in Dreamweaver, you may be surprised that when you add video in other formats using the Plugin option, you won’t be presented with a dialog that contains settings for size or other video options. Don’t worry; just select the QuickTime file for now (as you would if you were inserting an image into the page—just Control-click [PC: Right-click] on the Plugin icon and select Source File). You’ll get a chance to set the size and other settings in the following steps.
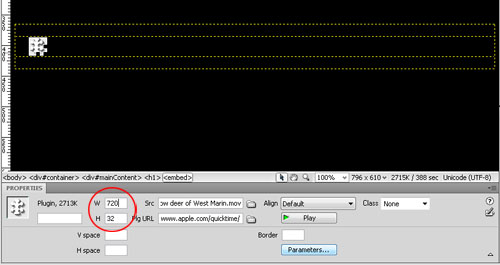
5 SPECIFY SIZE IN THE PROPERTY INSPECTOR
Because Dreamweaver can’t automatically detect the size of a QuickTime file, you’ll need to specify the size after you insert it into the page. To do so, click to select the 32×32 icon that Dreamweaver inserts in place of the video and then enter the actual size of the video in pixels in the W (width) and H (height) fields in the Property inspector. The video file we’re using in this lesson is 720×480 pixels. Once you input the sizes, the icon will expand to the specified size.
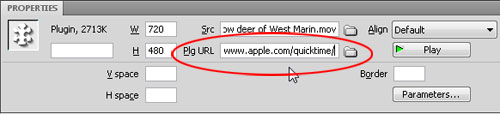
6 ADD A PLUGIN PAGE URL
With the video selected, you can also use the Property inspector to add a Plugin Page URL. The Web address you enter in the Plg URL field will be displayed in place of the video if the visitor to your site doesn’t have the QuickTime player installed on his or her system. If you’re using QuickTime video, the Plugin URL is http://www.apple.com/quicktime.
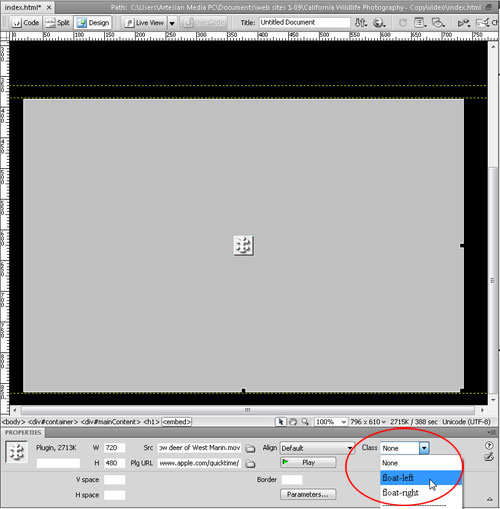
7 ALIGN YOUR VIDEO FILE
Although you can use the Align drop-down menu in the Property inspector to align your video, the better option is to use Cascading Style Sheets (CSS). In this example, we’ve created class styles named .float-right and .float-left using the Float options in the Box category of the CSS Rule Definition dialog. To create a new class style, click on the New CSS Rule icon in the CSS Styles panel, choose Class in the drop-down menu, name your style, and click OK to enter the CSS Rule Definition dialog. (You’ll find lots more information about creating and using class styles on the Layers magazine website in the Dreamweaver tutorials section.)
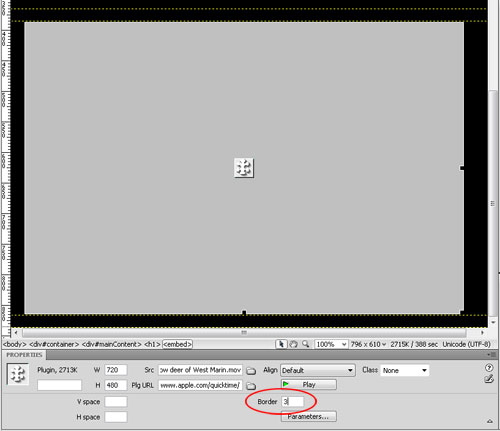
8 SPECIFY A BORDER, V SPACE, AND H SPACE
To add a border to your video, enter the size you want in pixels in the Border field in the Property inspector. You can also add V Space and H Space (vertical and horizontal space, respectively). When you use H space and V space, you add margins to the top and bottom or left and right. If you define a style in CSS to specify margins and border, you’ll have more options and can choose to add margin space to any or all of the sides of the video, as well as change the color and style of the border.
9 USE PARAMETERS FOR ADVANCED SETTINGS
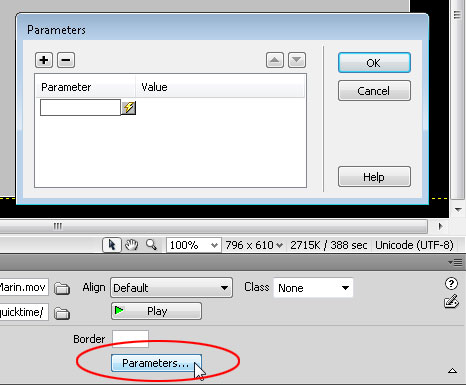
For more advanced options and settings, you’ll use the Parameters option in Dreamweaver and you’ll need to know the parameter options specific to QuickTime (or whatever video format you’re using). To open the Parameters dialog, click on the Parameters button in the Property inspector (remember, the video must be selected for these options to display in the Property inspector).
10 SET VIDEO TO LOOP WITH PARAMETERS
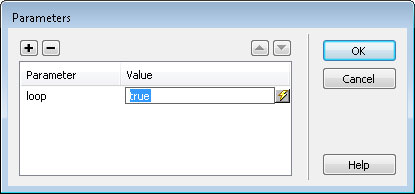
If you want your video to play in a continuous loop, use the Parameters dialog, enter “loop” as the Parameter and “true” as the Value, and click OK. Most parameters work this way with true being the setting to turn an option on, and false the setting to turn an option off. Thus, if you set the Parameter to “loop” and the Value to “false,” the video won’t loop.
11 TURN OFF AUTOPLAY
To add additional parameters, click the plus (+) sign at the top of the Parameters dialog and then enter each parameter and value on its own line. Another popular QuickTime parameter is Autoplay. To prevent the video from playing when the page loads, enter the Parameter “autoplay” with the Value “false.”

12 MORE PARAMETERS
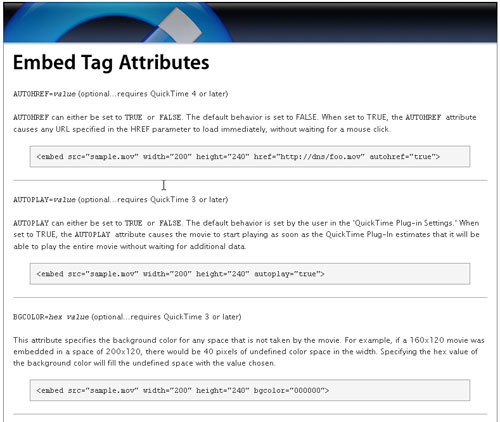
You’ll find more parameters and Embed settings for QuickTime at www.apple.com/quicktime/tutorials/embed2.html. Another popular option is to include the video controller using the Parameter “controller” and Value “true.” To hide the controller, set the Value to “false.” And here’s an advanced tip: For the controller to display properly, you need to add 16 pixels to the Height of the video in the Property inspector. So the new Height in this example would be 496 pixels.
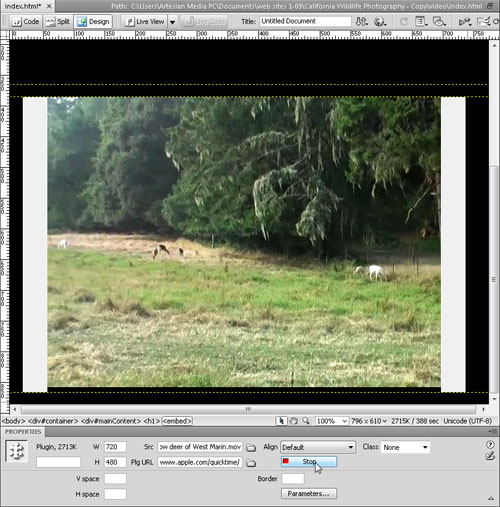
13 PRESS PLAY TO PREVIEW
Dreamweaver CS4 makes it possible to preview the video in the Dreamweaver workspace. Just select the video and press the Play button in the Property inspector and the video should play much as it would in a Web browser with the QuickTime plug-in. You can also preview your work by using the Browser preview option (File>Preview in Browser). (Note: You must have the QuickTime plug-in installed on your computer for the QuickTime video to play in a Web browser.)