Mixing It Up With CS3
If you’ve used Photoshop for more than eight minutes, you know there’s typically more than one way to achieve the same result – in some cases there are many different ways. Throw Illustrator into the mix and now you’ve got a whole bunch of options at your fingertips. Here’s an overview of the various ways that you can use Photoshop CS3 and Illustrator CS3 together, followed by an in-depth look at the methods you’ll most likely use.
FROM ILLUSTRATOR TO PHOTOSHOP
To move Illustrator artwork into Photoshop you have lots of options: use the File>Open command, export the Illustrator artwork as a PSD, copy and paste from Illustrator to Photoshop, drag from Illustrator and drop into a Photoshop document, or use the File>Place command. Each method has its own set of advantages and disadvantages.
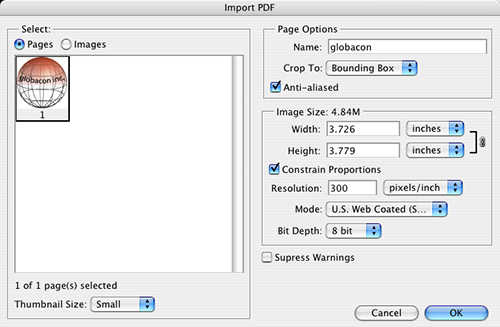
Open command: When you open an Illustrator document in Photoshop, vector artwork will be rasterized (converted to pixels) based on the settings in the Import PDF dialog. You choose the Resolution and color Mode and a Photoshop document will be created with a rasterized version of the Illustrator artwork. This is a quick way to convert a file, but text is rasterized and can’t be edited, and there’s no link back to the original Illustrator artwork.
Export as PSD: The Photoshop Export Options dialog (go to File>Export and choose Photoshop [psd] as the format) offers a number of options that will give different results, depending on the structure of your Illustrator document. For the most editability, make sure Write Layers and Preserve Text Editability are both checked.
- If you haven’t used layers in Illustrator, you’ll get one layer for all objects and another layer with editable text in Photoshop.
- If you create layers in Illustrator and then export as PSD, you’ll get separate layers in Photoshop, and the type will be editable.
- If you change modes when exporting (e.g., the document is in CMYK but you export as RGB), you’ll get one layer, similar to using File>Open as described above.
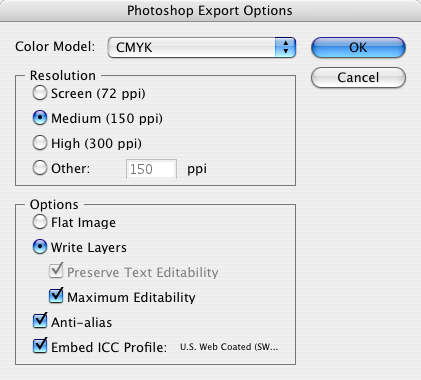
Depending on the structure of the Illustrator document, this can be a pretty “editable” way to move your file. This method includes the possibility of editing the text in Photoshop, but as with the Open command, there’s no link back to the original Illustrator artwork.
Copy and paste: When copied vector artwork is pasted into a Photoshop document, a dialog will appear offering four Paste As options: Smart Object, Pixels, Path, or Shape Layer.
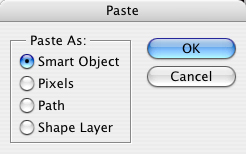
Smart Object: Creates a special layer in Photoshop that references the original Illustrator artwork. Any text will not be editable from within Photoshop. (We’ll explore this later in more detail, as this is often the best choice.)
Pixels: Scaling handles let you determine the size of the pasted graphic, and after pressing Enter, a single layer with a rasterized version of the Illustrator artwork is created. There’s no link to the Illustrator artwork. (Needless to say, text is rasterized and is not editable.)
Path: Creates a Photoshop path from the vector shape. That path can be used to make a selection, a clipping path, or you can add a layer and paint along the path. Note: Paths will not be created from any text that’s copied. The text disappears.
Shape Layer: Using the current Foreground color, this option creates a shape layer that can be edited with the path editing tools in Photoshop. The fill color can be changed (by double-clicking on the layer thumbnail in the Layers panel and choosing a different color) and the shape can be scaled with Free Transform (Command-T [PC: Ctrl-T]) without any loss of quality. Unless you create outlines in Illustrator, text will disappear in a shape layer.
Drag-and-drop: Drag-and-drop artwork from Illustrator to Photoshop to create a smart object. Hold down Command (PC: Ctrl) to create a path in Photoshop instead of a smart object.
Place: When you place (File>Place) an Illustrator file into Photoshop, it automatically creates a smart object.
Place from Adobe Bridge: You can place Illustrator artwork directly from Bridge. Simply click on the Illustrator file and from the File menu, choose Place>In Photoshop. The result will again be a smart object.
Make your objects smart
Smart objects provide the most control and flexibility in working with Illustrator artwork in Photoshop. However, if you need to actually alter the artwork in Photoshop (such as applying filters or painting) or edit any text, you may want to export as a PSD.
If I had to pick one method that I’d use over any other, I couldn’t—I’d pick two: smart objects and paste as a shape layer. Let’s start with smart objects.
Step One: In Illustrator, create your artwork. (Here we used effects and the Appearance panel to make a very editable logo.) Select (Select>All) and copy (Edit>Copy) the artwork.

Step Two: Switch to Photoshop and paste (Edit>Paste) the art into a document. In the resulting Paste dialog, choose Smart Object and click OK. Use the handles to scale the logo to the size you want, then press Enter.
Step Three: A new smart object layer is created, as indicated by the small icon on the thumbnail. You can change the position, size, and opacity of the smart object or add layer styles. You can’t paint on the layer, change the fill color, or use transformations such as Distort, Perspective, or Warp.
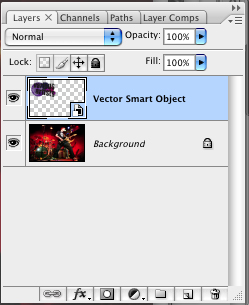
CREDIT: ©ISTOCKPHOTO/OLEG PRIKHODKO

Step Four: To edit the original artwork in Illustrator, double-click on the smart object thumbnail. A new window called Vector Smart Object opens in Illustrator containing the artwork. Make changes and save the file. When you switch back to Photoshop, the smart object updates.
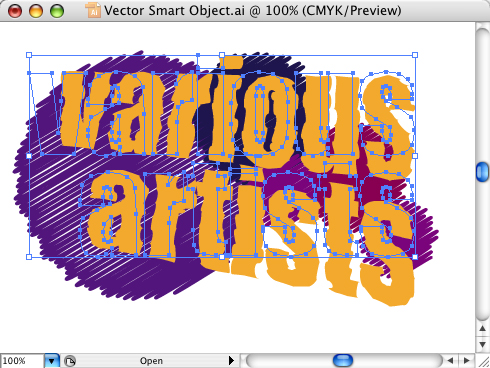
One huge advantage of a smart object (from Illustrator) is the option to scale it to any size. Normally, you can’t scale a pixel-based layer without losing quality, but a smart object from Illustrator will reference the original vector artwork so you can scale it as large as you want without losing quality.
Get your layers in shape
There’s one specific (and unique) benefit of pasting Illustrator artwork as a shape layer and that’s creating a custom shape. In Photoshop, just go to the Edit menu and choose Define Custom Shape. Name the shape, click OK, and it will be saved into the Custom Shape Picker in the Options Bar.

Now anytime you need to add that design to Photoshop artwork, simply switch to the Custom Shape tool, select your shape from the Custom Shape Picker, and click-and-drag. Since the shape is vector, you can make it as large as you want. Using the different settings available in the Options Bar, you can create a shape layer, path, or fill pixels from the custom shape.
FROM PHOTOSHOP TO ILLUSTRATOR
There are a number of options for using Photoshop artwork in Illustrator, and as before, your choice will depend on what you want to do with the Photoshop file (and whether you’re using pixels or paths).
Open: On opening a PSD file (File>Open), the Photoshop Import Options dialog offers several choices, in particular whether you want to convert layers to separate objects, or open a flattened version of the file. If your PSD file contains layer comps, you can also choose which comp you’d like to use when opening the file. If you convert the layers, any text will be editable “where possible,” while flattening the image will result in an image without layers or editable text.
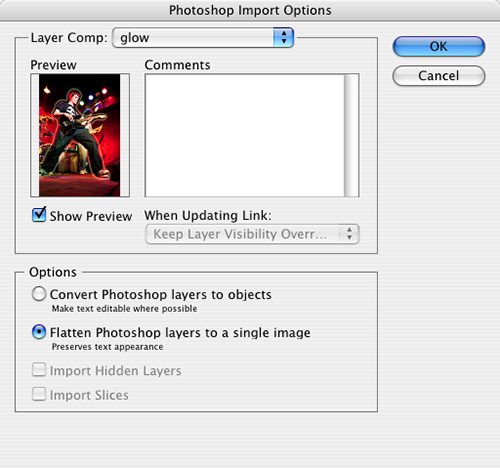
Place: Similar to using the Open command, placing a PSD file into Illustrator (File>Place) will open the Photoshop Import Options dialog after you navigate to your image in the Place dialog and click the Place button. But before you click the Place button, you must choose between linking and embedding (use the Link checkbox near the lower-left corner of the Place dialog). If you link the file, the Photoshop Import Options dialog will only allow you to place a flattened version. This version will have a “live” link back to the original PSD. If you embed the file (don’t link), you have the option to either convert layers to objects or flatten the layers. (More on linking in a moment.) You can also choose any layer comps here, as well.
Place from Adobe Bridge: You can also use Adobe Bridge to place a Photoshop file into Illustrator. Simply click on the PSD file and from the File menu, choose Place>In Illustrator. The result will again be a linked file.
Copy and paste: Copying in Photoshop and pasting in Illustrator will result in an embedded, flattened file (not linked). To copy a layered file, choose Select>All then Edit>Copy Merged. Or you can temporarily flatten your image (Layer>Flatten Image), then copy (Edit>Copy) the file. Note: Pasting in Illustrator creates a clipping path around the image that, among other things, means you can’t use the Live Trace feature. To give yourself more options after pasting, delete the clipping path sublayer from the Layers panel.
Drag-and-drop: Like copying and pasting, dragging-and-dropping from Photoshop to Illustrator results in a flattened, embedded image. Again, you’ll want to delete the clipping path sublayer in the Layers panel. To drag-and-drop a path from Photoshop to Illustrator, use the Path Selection tool (A) rather than the Move tool (V).
Export paths: If you have one or more paths in your document, you can take just the paths (no pixels) into Illustrator using File>Export>Paths to Illustrator. This will save an AI file that contains just the paths, with no fills or strokes. Open the file in Illustrator, then switch to Outline view (View>Outline) to see the paths.
First place
Of all these methods, I think I’d probably choose Place, creating a link back to the original Photoshop document. In fact, I would recommend saving your file as a PSD (rather than TIFF or JPEG) to give yourself more options.
Step One: In Photoshop, create a file with various layer comps and save your file as a PSD.
Step Two: In Illustrator, use File>Place (or place from Bridge) and make sure the Link button is checked in the Place dialog. If the document contains layer comps (as our example does), choose the version you want to place. Change the option under When Updating Link to Use Photoshop’s Layer Visibility. Position and size the graphic.
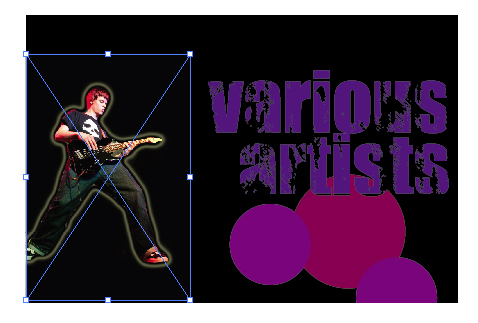
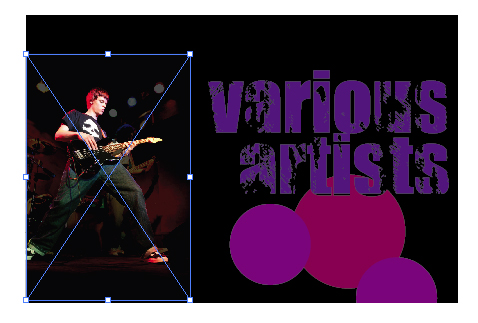
Step Three: To switch to a different layer comp, hold down Command-Option (PC: Ctrl-Alt) and double-click on the placed file (you can also use the Links panel and click on the Edit Original button). This will open the document in Photoshop where you can choose a different layer comp. Save the file and return to Illustrator.
Step Four: A dialog appears that “warns” you that a file has been modified and gives you the opportunity to update the file. As soon as you click Yes, the placed file will update. If you want to have the file updated automatically, go to Illustrator (PC: Edit)>Preferences>File Handling & Clipboard and choose Automatically from the Update Links pop-up menu.
Then Live Trace
In this second example, we want to experiment with Live Trace in Illustrator, so we’ll place a linked Photoshop document, apply Live Trace, and then use the link to update the Photoshop document—and the Live Trace.
Step One: Save the original Photoshop file as a PSD and place it into Illustrator as a link.
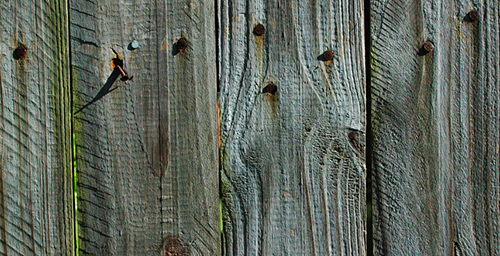
Step Two: Click on the Live Trace button (or choose one of the built-in presets from the down-facing arrow next to the Live Trace button).
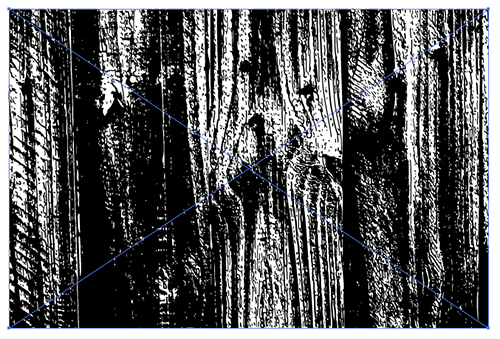
Step Three: Add some type on top of the traced object, select both the object and the type, and select Object>Clipping Mask>Make. (In our example, we added some circles below to better show the effect.)
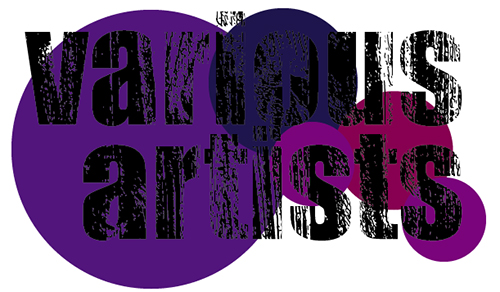
Step Four: To change the effect, hold Command-Option (PC: Ctrl-Alt), double-click on the placed file, and make some changes to the Photoshop file. In our example, we added a Threshold and a Black & White adjustment layer. Save the file and return to Illustrator.
Step Five: Back in Illustrator, the placed file updates. The Live Trace will also update to reflect the changes you made to the placed photo.

So to answer the most commonly asked question: “Which method should I use to move files between Photoshop and Illustrator?” The answer: It depends! Many times you’ll probably want to use smart objects when moving from Illustrator to Photoshop, and linked files when bringing Photoshop into Illustrator. However, there will be times when the other methods give you more options, so try those, too.

