Logo Mania: Text Effects in Adobe Illustrator
This article is the second part in a follow-up lesson to Corey Barker’s article in Adobe Illustrator Techniques’ newsletter. Corey demonstrates how to create a glare and text effects for his “Trucks” logo.
1
I begin with the text converted to outlines and set to a black fill.

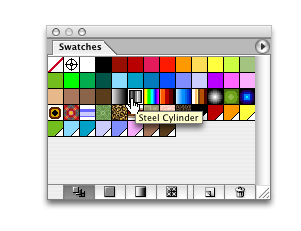
2
With this text selected, I go to my Swatches palette. Go under Window to Swatches. Here I select the default Steel Cylinder grayscale gradient.

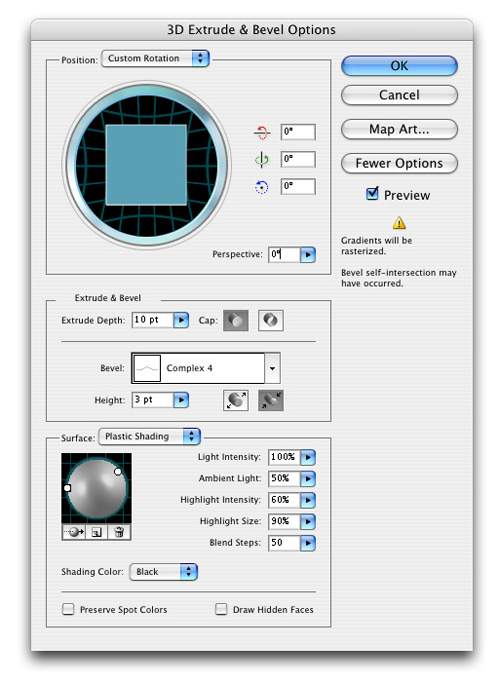
3
Next, go under the Effect window to 3D, then select the Extrude and Bevel. One tricky thing about this function is that the result you get depends greatly on the scale of your graphic. For instance, my settings here were applied to text that was approximately 3 inches long. You may have to play with your settings, depending on the size of your text.

4
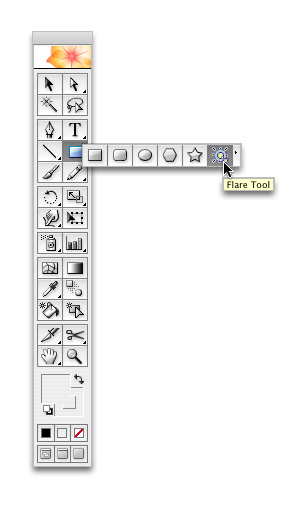
Now, place the text in the final piece. We are almost there. The last thing to do is select the Flare tool in the toolbar and in your graphic click at a point where you want the center point of the flare to be. Then drag out from the center to the desired size of your flare.

Voila!!!