
Dreamweaver: Spry Collapsing Panel
This is a brief introduction to the new Spry features for Adobe Dreamweaver CS3. If you have ever played around with Scriptaculous or jQuery, you might be interested in these simple additions. You can now easily click one of the 12 or so Spry widgets and they are instantly embedded into your page with the required javascript and cascading style sheet to go along with them.
In this tutorial I will go over how to easily set up a slide-down window to display more content. There are some minor modifications that you can do to shape it to your own liking. It’s a great way to condense a lot of content into a simple click-down tab.
Don’t have CS3 yet? This tutorial can be done with prior versions of Dreamweaver since there are just included javascript and css files. So, for you I have included a companion download.
Step One:
Create a new html file. Then press Command-S (PC: Ctrl-S) to save the file. I have created a new folder for this exercise. It helps to keep everything separate.

Step Two:
I work in CODE view probably 99% of the time so for the purpose of this tutorial I will be referring to all edits in this view. It’s also a great way to learn and see how everything is getting pieced together.
When in CODE view, go in between the BODY tag and simply click on the “Spry Collapsible Panel” – the far right icon under the Spry category. This will automatically add a couple div tags and also a Javascript and CSS file in the HEAD of your document. Don’t worry about the really long addresses that are attached. We will get rid of those in step three.

Step Three:
Save your file once again, Command-S (PC: Ctrl-S). A little window will pop-up telling you that a new Spry Assets folder will be automatically added to your root folder and those long addresses will now slim down. Click OK.

Step Four:
If you click on the Preview button, or press Alt-F12 (PC: F12), you can see what is happening so far. Not all that exciting-looking quite yet. Now we are going to adjust the look and actions of this box.
Step Five:
Let’s first go in and add some more text to the “Content” area of the panel. Just grab any text, maybe a few paragraphs worth. This is just to give us a better idea of how it’s going to look. Next, let’s dive into the CSS file (SpryCollapsiblePanel.css – in your SpryAssets folder) and slim it down to a reasonable size. Find the “.CollapsiblePanel” class because we’re going to add an attribute underneath there.
Just add the attribute – width: 450px; right above the margin attribute.

Step Six:
Now the “content” box starts with an opened state. Well, that kind of defeats the purpose if we want to condense our content on the page, so we need to tell it to make sure that panel is closed when the page is launched. To do that go back to your page file. Where you see the embedded script at the bottom you will find “var CollapsiblePanell1”. This is passing the variable through the Javascript file, so all we have to do is add another attribute to make the box closed.
Inside the SCRIPT tags at the bottom, after var Spry.Widget.CollapsiblePanel you will see a variable in parenthesis. Just add another attribute inside: {contentIsOpen:false}
Step Seven:
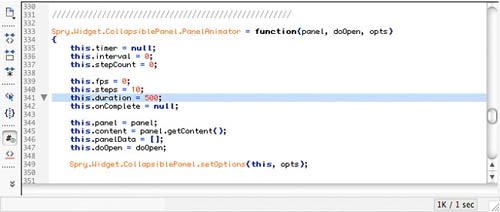
We can also customize the speed at which the panel opens and closes. In the Javascript file (SpryAssets/SpryCollapsiblePanel.js) go down to line 341 – this.duration = 500;
Depending on if you want to speed up or slow this down, you can make those adjustments here. Simply lower the duration to around 300 if you want to speed it up or raise the duration up to 600 if you want to slow it down.
And that’s pretty much the basics for putting a collapsing content box on your page. Play around with this idea and with the other Spry widgets. They will add a lot of interaction to your site and with minimal work on your end.
Finished Sample
You can check out my DEMO VERSION. I have gone in and added some more attributes to the CSS file where I created some backgrounds and hovers. This can obviously be expanded to many other things, but with the help of the new Adobe Dreamweaver CS3 it makes it so much easier.
