Defining a Site in Dreamweaver

Before you start working on any of the pages in your website, it’s important to first define your main website folder in Dreamweaver. Whether you’re creating a new site or working on an existing site, this preliminary step is crucial because it enables Dreamweaver to keep track of all of the elements in your site, automatically create links, and even help you upload your files to your Web server when you’re done.
The first thing to understand about this process is that you need to store all of your site’s resources in one main folder on your hard drive and identify it in Dreamweaver to ensure that the links you set on your computer will work when your site is uploaded to a server. That’s because all of the elements of your site must remain in the same relative location on the Web server as they are on your hard drive for your links to work properly.
Although you can use Dreamweaver without doing this initial site set up, you run the risk of breaking links when you upload your site, and many of Dreamweaver’s features, such as automated link checking and the Library feature, won’t work at all.
Follow these steps to define a new or existing site in Dreamweaver.
STEP 1: Define a New Site
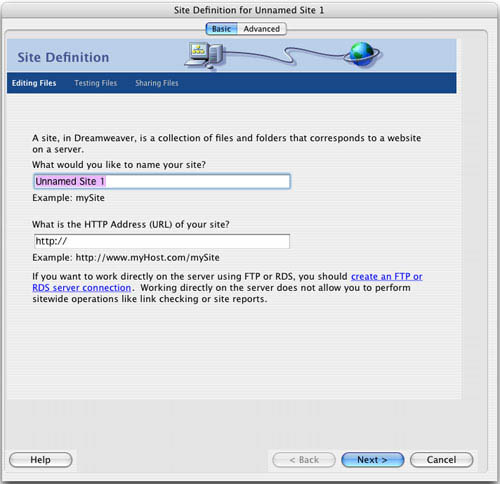
Choose Site>New Site to open the Site Definition dialog. You can use the Wizard shown in this figure to define your site, or click the Advanced tab at the top of the dialog. I find the Wizard a bit tedious and recommend the Advanced option because you can readily access all of the categories in the Site Definition dialog and better identify the fields that are most relevant to your project.
STEP 2: Name Your Site
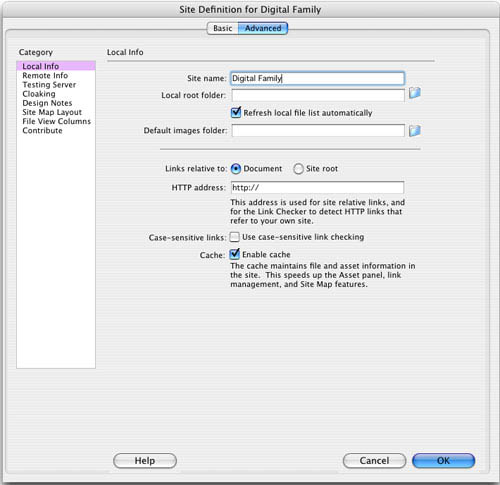
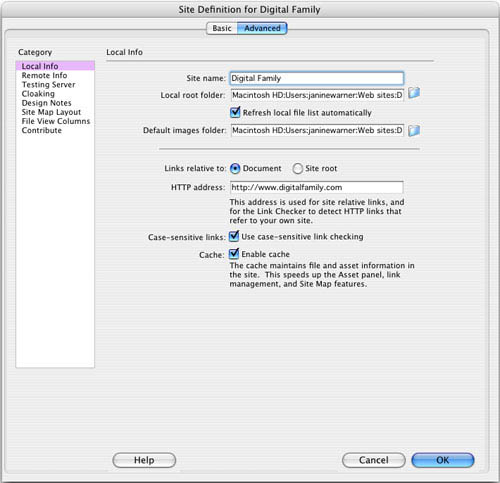
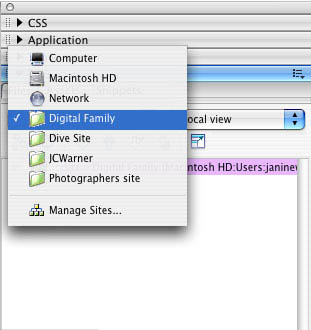
Make sure you’ve selected the Advanced tab at the top of the Site Definition dialog and that the Local Info category is selected. In the Site Name text field, type a name for your site. You can call your site whatever you want, just make sure it’s something you’ll easily remember. The Site Name is what will appear in the pull-down list in the Files panel, which you’ll use to select your site in Dreamweaver after it’s defined. This is especially important if you’re working on more than one website.
STEP 3: Identify Your Main Site Folder
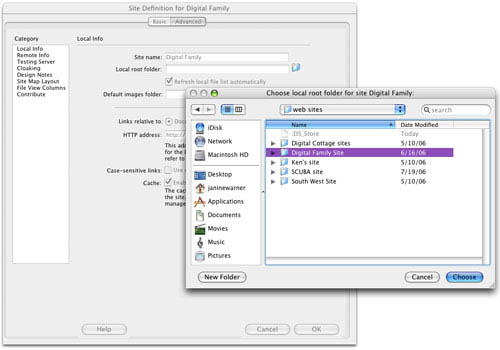
Click on the browse button (which looks like a small folder icon) located just to the right of the Local Root Folder text field. If you’re working on an existing site or you’ve already created a folder for you site, find and select that folder on your hard drive. If you’re creating a new site, select the new folder Dreamweaver automatically creates for your Web files or create a new folder anywhere on your hard drive and select that folder. All you’re doing in this step is identifying in Dreamweaver the main folder where you will store all of your websites files. Note: You can create subfolders within this main site folder to further organize the files in your site.
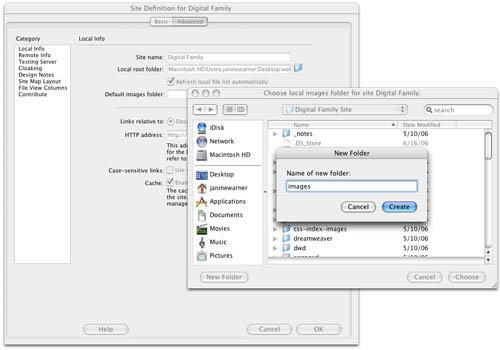
STEP 4: Identify Your Main Images Folder
Click the Browse button (again it looks like a small folder icon) next to the Default Images Folder text field and create a folder within your main site folder to store your images. If you have already created an images folder, select the existing folder. Tip: You can have more than one image folder within your main site folder and you can name your image folders anything you like (just don’t use spaces or special characters in the name). You don’t have to identify an images folder, but if you try to insert an image into a page in Dreamweaver that’s not stored in your main site folder, Dreamweaver will offer to copy the image in your default images folder.
STEP 5: Fill in the Rest of the Fields in the Local Info Category
In the section labeled Links Relative To, click to select the radio button next to either Document or Site Root. If you choose Document, your links will be created with a path based on the relative location of one file to another within your main site folder. If you choose Site Root, your links will be created with an absolute path from the root. If you’re not sure which option to choose, ask your system administrator or other members of your Web team. If you’re working on your site on your own and you will be hosting your site on a commercial service provider, either of these options should work fine. Dreamweaver’s default option is Document.
In the HTTP Address field, enter the domain name for you site. If you haven’t yet registered a domain name or you don’t know what it will be yet, you can leave this field blank and add it later.
Select Use Case-sensitive Link Checking if you want to ensure that your links will work on a Unix server where links are case sensitive. If you’re using a Windows or Mac server this doesn’t matter as much, but it doesn’t hurt to check this option and it’s good practice to follow the strict naming and linking conventions of a Unix system in case you ever move your site to a different server.
Selecting the Enable Cache option helps Dreamweaver work more efficiently to manage the list of files and folders in the Files panel, set links, and display Site Map features.
STEP 6: View Your Site’s Assets in the Files Panel
When you’re finished filling in all of the fields in the Site Definition dialog, click OK and Dreamweaver will automatically load your site into the Files panel. The Files panel is located by default in the right-hand side of the work area, but you can move it wherever you like. As you see here, once you complete site set up, all of the files and folders in your site are listed in the Files panel and your site’s Name is listed in the Files panel drop-down list, which makes it easy to select your site if you switch from working on one site to another in Dreamweaver. Always make sure that the site you’re working on is the one selected in the Files panel.
STEP 7: What About All of Those Other Categories?
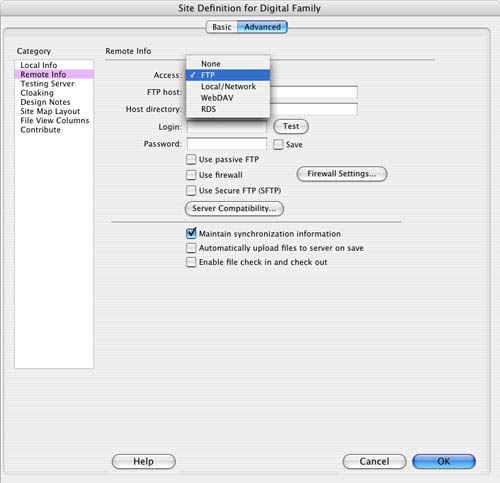
The steps in this tutorial represent all you need to do to define a site in Dreamweaver before you work on it on your local hard drive. The other categories in the Site Definition dialog offer additional functionality, such as FTP capabilities that make it easy to transfer your site to a Web server from within Dreamweaver. You’ll find the FTP settings in the Remote Info Category. If you’re using a commercial service provider, you’ll need to select the FTP option from the Access drop-down menu in the Remote Info Category and fill in the relevant information from your service provider before you can use Dreamweaver’s Get and Put features to upload and download files from your server.
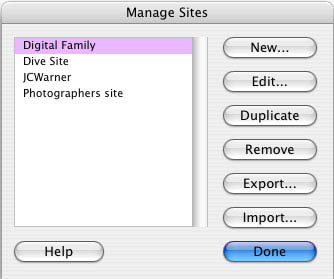
STEP 8: Change or Add Information to the Site Definition
If you want to edit the Site Definition settings for a site after you’ve completed this process, choose Manage Sites from the bottom of the list in the Files panel to open the Manage Sites dialog. Click to select the name of the site you want to edit and then click on the Edit button. This opens the Site Definition dialog with the selected site. Make sure to select the Advanced button at the top to reveal all of the categories shown in the figures in this tutorial.