
Art of Type: Help for Widows and Orphans
No Matter How You Define Them, Charity Is Not the Solution
According to my typographic tutelage (dating well back into the last century, before personal computers), a widow is a short last line of a paragraph. An orphan is a short fragment of a paragraph that appears at the top or the bottom of a column. A widow that appears at the top of a column can also be an orphan. Poor dear.
Whatever your definitions, these things are not pretty. A short widow creates a virtual line space in the text (especially if it barely covers the paragraph indent on the following line), and an orphan wrecks the neat rectangular geometry of a column.
Subheads orphaned at the bottom of a column look particularly bad, as do subheads followed by a single line of text. Whether a two-line body-text morsel creates a problem depends on the setting. In narrow columns with small paragraph indents (as in a newspaper), the answer is probably no. In text with a wide measure and deep paragraph indents (as in a coffee-table book), the answer is often yes.
Fixing short last lines
In Adobe programs, there’s no good cure for short last lines of paragraphs. One thing you can do is disallow hyphenation for the last word of a paragraph (last lines consisting solely of a word fragment being bad form in any case). In Illustrator, select the hyphenated last word and choose No Break from the Character palette flyout menu. In InDesign, choose Hyphenation from the Paragraph palette flyout menu and deselect Hyphenate Last Word. Make this a program default by specifying it with no document open.
To fix most short last lines, your only recourse is to: (a) slightly loosen the tracking of the paragraph to force more text onto the short line, or (b) tighten tracking to draw the short line up into the previous line. If this doesn’t work and it distorts the overall spacing of the paragraph, politely ask the nearest editor if a text tweak is possible.
Fixing misplaced paragraph fragments
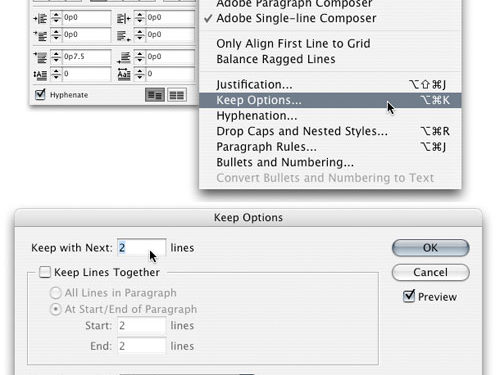
For orphaned paragraph fragments, your main tools in InDesign are Keep Options from the Paragraph palette flyout menu (or press Command-Option-K [PC: Ctrl-Alt-K]).
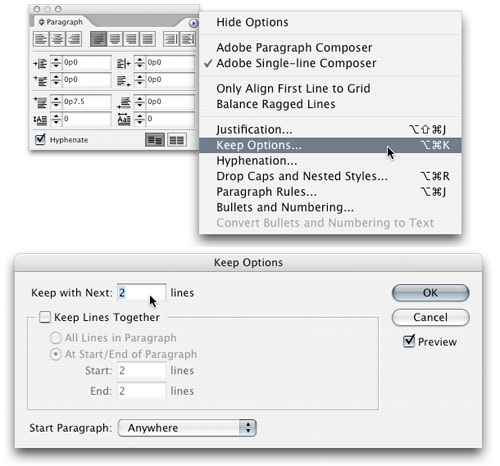
One option is to keep whole paragraphs intact. This makes orphans impossible, except in the case of one-line paragraphs, such as subheads. To do this, put a checkmark next to Keep Lines Together and choose All Lines in Paragraph.
To bind a subhead to the paragraph that follows it, click it with the text cursor, bring up the Keep Options dialog, and use the Keep with Next field to specify the minimum number of text lines that should appear below the subhead. (Save time: Make this a part of the subhead’s style sheet.) A typical value here would be 2, ensuring that a subhead near the bottom of a column is always followed by at least two lines of text.
To define the minimum length of paragraph fragments at the tops and bottoms of columns, again choose Keep Lines Together, but this time select the At Start/End of Paragraph option and enter the minimum numbers of lines you’ll tolerate in such a fragment: three is better than two, but two is better than allowing one-line fragments.
One problem: The Keep Options controls create columns of varying lengths. Some layouts allow this so-called ragged-bottom style, but most (such as this magazine’s layout) don’t. When using Keep Options controls, to force all the columns in a layout to end on the same baseline requires vertical justification.
Using vertical justification
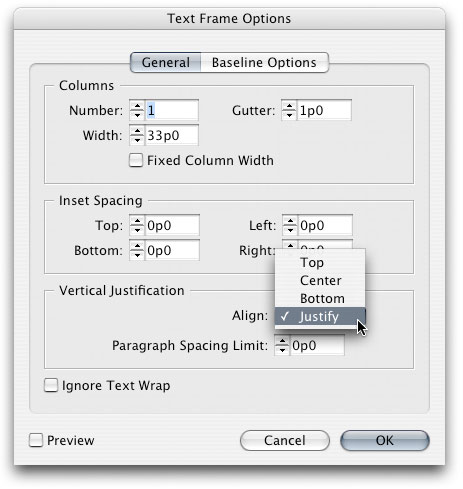
Vertical justification forces the text to fill its frame from top to bottom by expanding leading. In InDesign, you do this by clicking in a frame with the text cursor and choosing Text Frame Options from the Object menu (Command-B [PC: Ctrl-B]). In the Vertical Justification portion of the dialog, choose Justify from the Align pop-up menu. This alone will stretch leading as needed to meet the composition requirements you established with your Keep Options specs. You can control how the leading is feathered (in typographese) by using the Paragraph Spacing Limit. If you enter a value here, the program will try to vertically justify the text solely by padding the leading between paragraphs. To adjust all lines’ leading by the same amount, leave this value at 0 (zero).
Vertical justification throws the lines of text off any baseline grid you may have established, but in single-column pages this usually isn’t obvious. It is, in fact, normal practice in setting text for books and novels. In multiple-column pages (such as newspapers and magazines) this can create an untidy layout and is usually frowned upon.
Because vertical justification is a frame attribute, you can add it to an object style and apply your specs by clicking on any other text frame. To make such specs the default setting throughout a document, edit the object style entitled Basic Text Frame in the Object Styles palette. But if you do so with no document open, you’ll make vertical justification the default setting for any future document you create, which you probably don’t want to do.

