In addition to providing integration between all the Creative Suite applications, Adobe Bridge also gives an array of tools and methods for opening, viewing, and even creating PDF documents. Here are some of the more useful PDF management techniques using Bridge.
1 LAUNCH CONTROL—GLOBAL
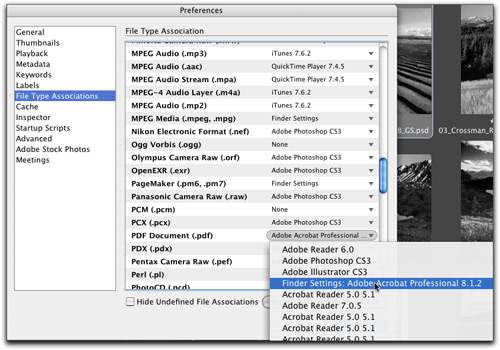
To specify the default application used to open PDF documents through Bridge, press Command-K (PC: Ctrl-K) to activate the Preferences dialog in Bridge. Then, select File Type Associations from the list on the left. Scroll down the alphabetical list of file formats to PDF Document (.pdf). Click on the downfacing arrow located to the right to activate the list of PDF-capable applications (the number may surprise you). Select the application you want, and click the OK button. Your choice will now be the default application to open any PDFs through Bridge.
2 LAUNCH CONTROL—DOCUMENT SPECIFIC
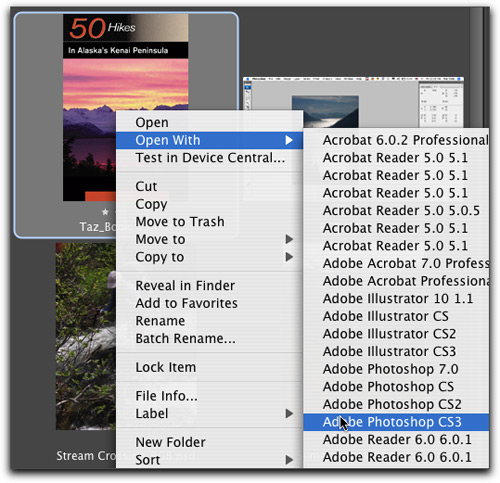
Sometimes you may want to open a PDF document in an application other than the one you designated in Step 1. To specify a particular application to open a PDF document, first select the PDF you want to open in Bridge. Control-click (PC: Right-click) on the image to activate the contextual menu. Choose Open With to activate the list of PDF-capable applications. Select the application you want (here Photoshop CS3) and your PDF will be opened in that application.
3 VIEW CONTENTS WITHOUT OPENING
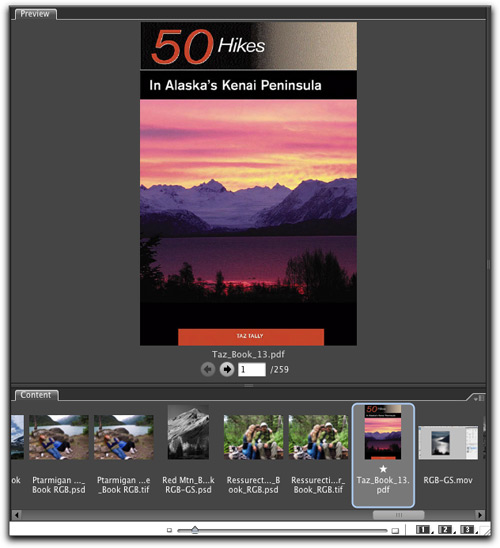
In Bridge, select Window>Workspace>Horizontal Filmstrip to activate an enlarged preview of you documents. Then, select the PDF document you want to preview from the thumbnails in the Content tab located at the bottom of the Bridge window. If your PDF has more than one page, you’ll see navigation arrows, a page display field indicating the page you’re currently viewing, and the total number of pages. Use the navigation arrows to scroll through your PDF. Note: You can adjust the dimension of the preview by changing the size of the Bridge window or dragging the bar between the Preview and Content areas.
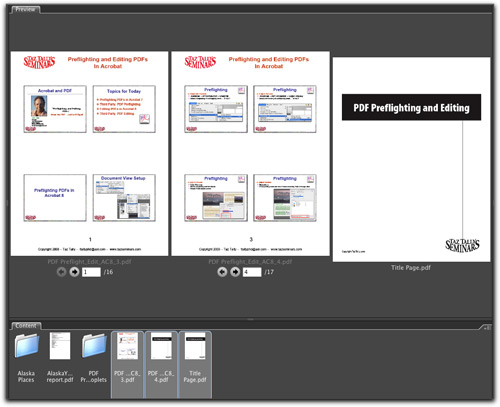
4 COMPARE MULTIPLE PDFS
As you did in Step 3, select Window>Workspace>Horizontal Filmstrip to activate an enlarged preview of your documents. Command-click (PC: Ctrl-click) each PDF document you want to view and compare in the Content tab (we used three documents). Enlarged previews of all the selected PDF documents will be displayed, side-by-side. Note: You can navigate the contents of any of the PDFs that contain multiple pages.
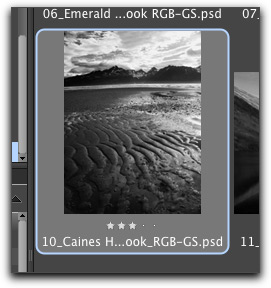
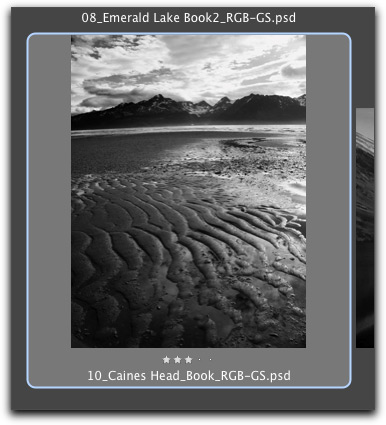
5 QUICK WAY TO MAGNIFY THUMBNAILS
Use the following keyboard shortcuts to enlarge or reduce the onscreen dimensions of the thumbnails in the Content tab: Command-+ (PC: Ctrl-+) to enlarge; Command-– (PC: Ctrl-–) to reduce. If you first select one of the thumbnails, Bridge will keep the selected PDF in view as you enlarge or reduce.
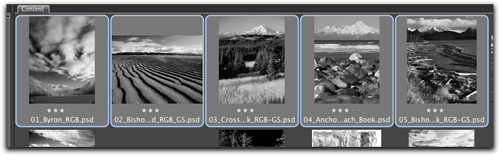
6 CONVERT FILES TO PDF VIA PHOTOSHOP
From the Content tab, select the images you’d like to convert to PDF. These images can consist of a broad range of file formats including TIFFs, JPEGs, and PSDs. You can Shift-click to select a continuous sequence of images or Command-click (PC: Ctrl-click) to select noncontiguous images.
Tip: If you don’t select any images in a folder displayed in the Content tab, Bridge assumes you want to work on all the images contained in that folder. This is a very handy feature when you’re working with dozens or even hundreds of images in a single folder.
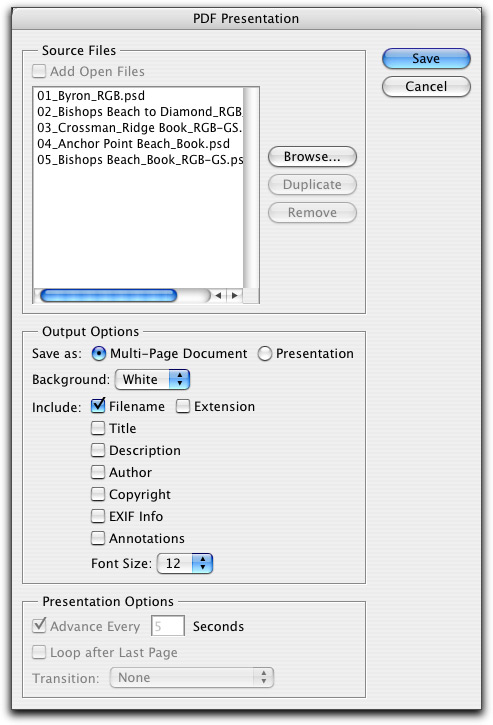
7 CREATE A PDF PRESENTATION
Choose Tools>Photoshop>PDF Presentation. When the PDF Presentation dialog appears, all the images you selected are listed in the Source Files section. You can add to this list by either clicking on the Browse or Add Open Files button. Configure your output Options section. We selected Multi-Page Document rather than Presentation, but you can use Presentation mode to assign Presentation Options such as Transitions (these can be controlled more completely in Acrobat). It’s recommended that you check the Include Filename box to facilitate image identification in your PDF. Click Save, then name and choose a location for your PDF.
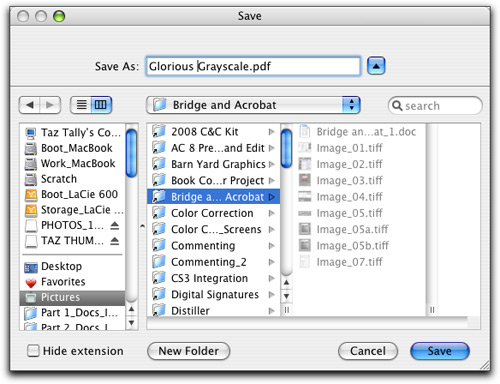
8 CONFIGURE PDF CHARACTERISTICS
When the Save Adobe PDF dialog appears, select an Adobe PDF Preset or configure your own PDF settings. (In this example, we’re using a custom preset called “PDF Presentation_Web.”) Then, click the Save PDF button to create your PDF.
Note: For your PDF settings, be sure to consider the resolution, compression, and color space that’s consistent with how you intend to use this PDF.
Tip: For multipage Web PDFs, check the Optimize for Fast Web Preview option to allow your PDF to be sent across the Internet one page at a time.

9 CREATE TEMPLATE FOR CONTACT SHEET
Using InDesign, create a contact sheet template. Stick with a basic layout until you get the hang of it; so just design a simple headline at the top of the page—no need to create image frames, as Bridge and InDesign will perform this. Go to Layout>Margins and Columns and adjust the Top margin so it’s below your headline. This way, only the white space below the headline will be used by Bridge and InDesign to place the selected images.

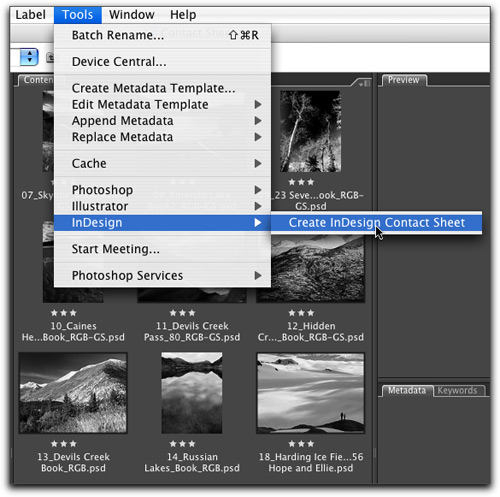
10 SELECT IMAGES FOR CONTACT SHEET
When you’re done, save your template. In the Save As dialog, choose InDesign CS3 Template as the Format. In Bridge, gather the images that you’d like to place in a contact sheet. You can either select images from a larger set or isolate your choices in a separate folder (as shown). Decide how many images you want to have on each page—the greater the number of images per page, the smaller the image dimension. If you want to use all the images, don’t select any (remember the Bridge tip in Step 6), and then choose Tools>InDesign>Create InDesign Contact Sheet.
11 CONFIGURE YOUR CONTACT SHEET
In the Contact Sheet dialog, set the number of Columns and Rows (here 3, 3). Then check the Auto–Spacing box. Now set the captions to be used (filenames in this example). Check the Use InDesign Template box and locate and select the InDesign template you created in Step 9. If you think you might use this Contact Sheet setup again in the future, click the Save Settings button to create a preset. Don’t click OK yet.
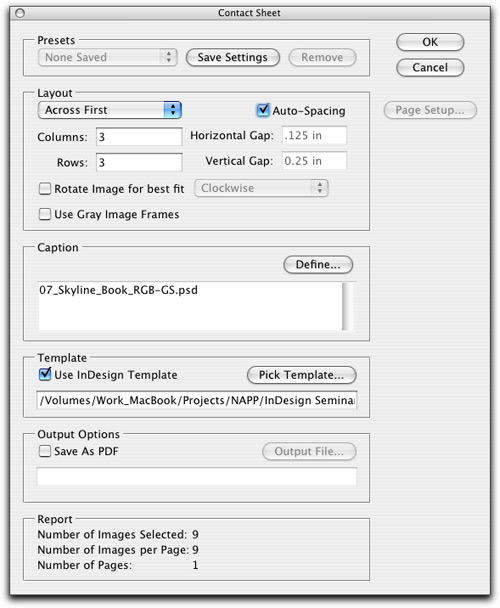
12 CONFIGURE YOUR CONTACT SHEET PDF SETTINGS
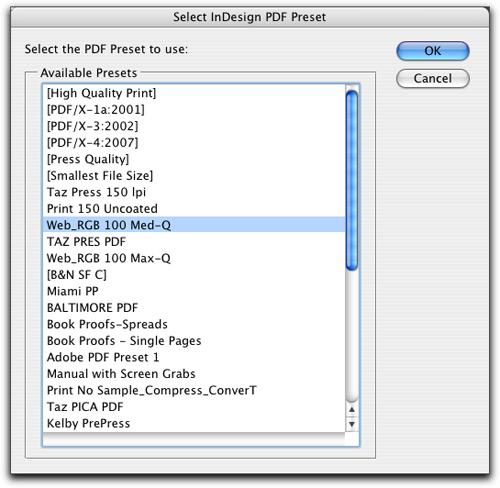
Check the Save as PDF box at the bottom of the Contact Sheet dialog. In the Select InDesign PDF Preset dialog that appears, choose a PDF preset that matches your output intentions. Once again, consider the image resolution, compression, and color space in your decision. Click the OK button to confirm your PDF Preset settings, which will return you to the Contact Sheet dialog.
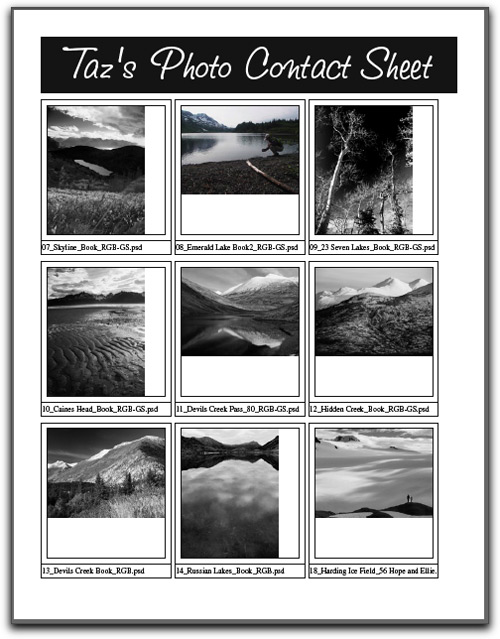
13 VIEW YOUR INDESIGN PDF CONTACT SHEET
Click the Output File button next to Save as PDF, name your PDF, select a location, and click Save. Click OK back in the Contact Sheet dialog to begin the Contact Sheet and PDF creation process. Using either Bridge (the fastest way), Acrobat, or another PDF application, view your new InDesign PDF contact sheet.