
Adding Ecommerce to Your Dreamweaver Site

In the last year, both Google Checkout and PayPal have added shopping-cart features to their most basic ecommerce offerings, making it easy for anyone to sell multiple products on a website. For no upfront costs and a competitive transaction fee, you can set up an entire shopping cart in an hour or two.
1 CREATE/OPEN A NEW PAGE IN DREAMWEAVER
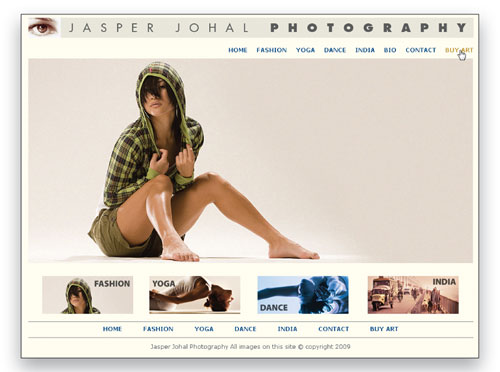
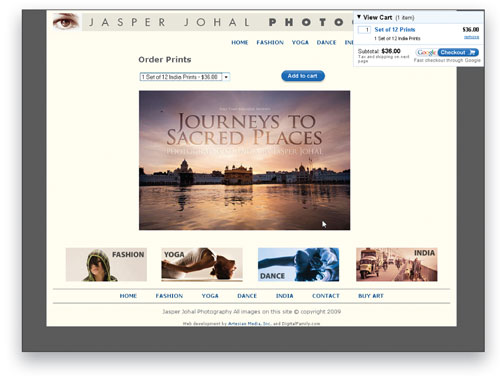
I built this website to showcase my friend Jasper Johal’s photography. In addition to displaying galleries of his photos, his bio, and contact information, he also wanted to sell a few prints and calendars. Thanks to Google Checkout, all I needed was to set up a Google Account for him, then copy-and-paste a little code into a page In Dreamweaver. In this tutorial, you’ll see how I used Google to help him sell his beautiful photographs.
2 SET UP AN ACCOUNT
First, you’ll need to sign up for an account. I chose Google Checkout (http://checkout.google.com) because I like the interface, but PayPal offers a similar service, and supports transactions in more countries than Google. Both offer services that are ideally suited for websites where you want to sell only a handful of products and you don’t want to handle credit card processing yourself. With PayPal and Google you get the shopping-cart features and transaction processing in one easy package. (And did I mention no up-front cost?)

3 LOG INTO GOOGLE CHECKOUT
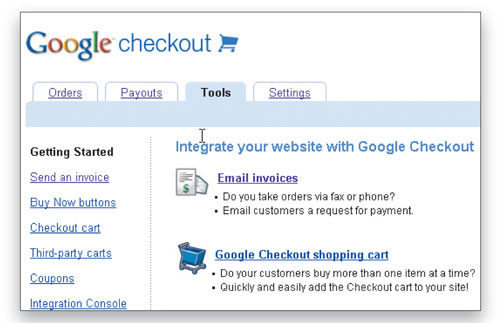
Log into your Google Checkout account with the email address and password you used to set up the account. Once you’re logged in, click on the Tools tab at the top of the screen to access the Buy Now Buttons (great if you only sell one item) and Checkout Cart (best for multiple products). You also find links here to Google’s invoicing services and details about how to integrate Google Checkout with third-party shopping carts, such as Zen Cart, if you want more advanced features or need to integrate sales with some kind of inventory or special tracking service.
4 SET UP A CHECKOUT CART
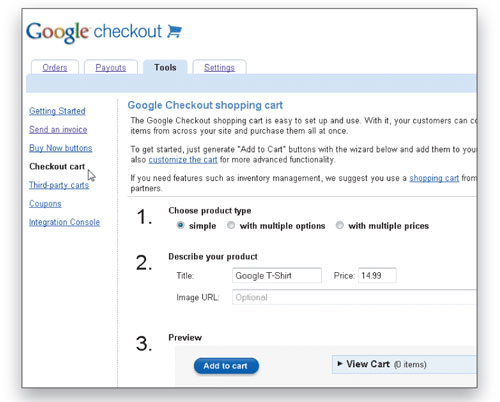
If you want to sell more than one item, or offer different sizes or other options, your best choice is the Checkout Cart. When you click on the Checkout Cart link on the left, you open Google’s Checkout Wizard, which makes it easy for you to create the code you need to add a product listing to your shopping cart. You can create a Simple product listing with one name and price, or you can create new product listings With Multiple Options and Prices based on size, color, quantity, etc.
5 ENTER PRODUCT DESCRIPTION
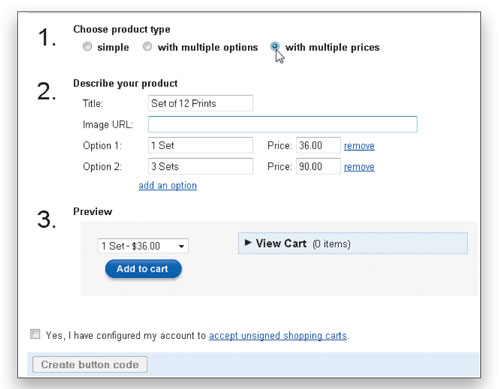
Enter a description of your product by filling in the form fields. As you see in our example, we’re setting up a shopping-cart item for a set of prints with two options: Option 1 to buy one set; and Option 2 to buy three sets at a special price. To create a new product listing, just fill out the form with the text and pricing you want, and Google automatically creates the code that lets you add these products to your site.
6 CREATE BUTTON CODE
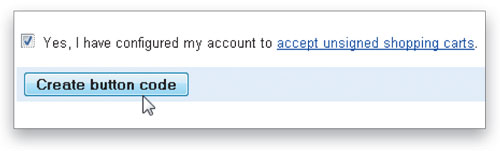
When you get the description the way you want it, click the checkbox next to Yes, I Have Configured My Account to Accept Unsigned Shopping Carts (see next step for details). If you haven’t configured your account yet, you can come back and do it later—just make sure to check the box. To generate the code you need to add to your webpage, click the Create Button Code button and skip ahead to Step 8 to continue. If you prefer to take care of configuration first, just follow along.
7 SETTING UP TO ACCEPT UNSIGNED CARTS
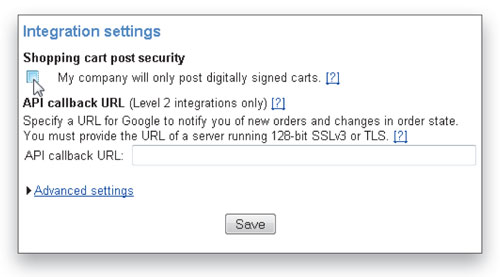
Because Google Checkout Shopping Cart works entirely in the Web browser, it’s possible for a site visitor to alter the pricing in Google checkout when they place an order. Unfortunately, there’s no way for Google to protect the secret key needed to sign a shopping cart. To get around this limitation, you can allow the shopping cart to work without being signed; but you’ll have to change that setting first. To accept unsigned carts, click the Settings tab and then click Integration. Remove the check in the box beside My Company Will Only Post Digitally Signed Carts, and then click Save.
8 COPY CODE
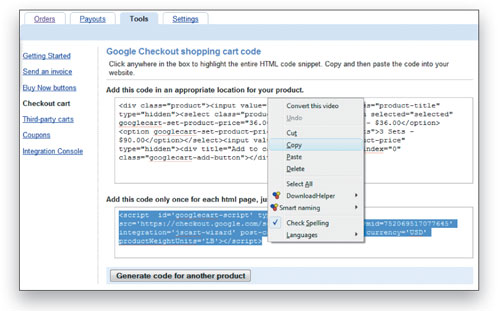
If you create a Buy Now button, you can use one simple snippet of code to place the button anywhere in a webpage. When you use the Checkout Cart option, Google generates two pieces of code, one that should be copied into the page where you want the button to appear and the other—the code that creates the cart itself—should be pasted into the bottom of the page, as you’ll see in Step 11.

9 PASTE CODE INTO DREAMWEAVER
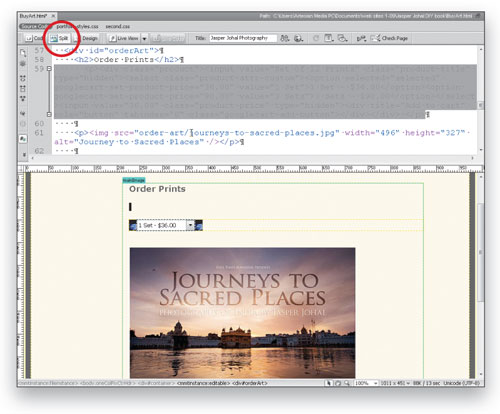
Because you’re copying code from Google’s site, you need to paste it into the code in Dreamweaver. A great way to do that is to use Split view by clicking on the Split button at the top of the workspace. Split view is great because you can see how the page will look in Design view as you’re working in the code, which makes it easier to find your place if you’re not familiar with XHTML or other Web technologies.
10 COPY SECOND PART OF CODE
Once you have the button code where you want it, return to the browser window and copy the second string of code. Tip: You can use Right-click to copy code from the Google Checkout page.
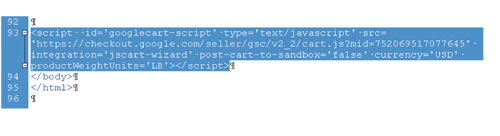
11 PASTE CART CODE AT BOTTOM OF PAGE
The second piece of code goes at the very bottom of the page, and you only need to add it to the page once, even if you have multiple products on the same page. Again, just use copy-and-paste to select the code and insert it into Dreamweaver. As Google instructs, the best place for the shopping-cart code is just above the close body tag ().
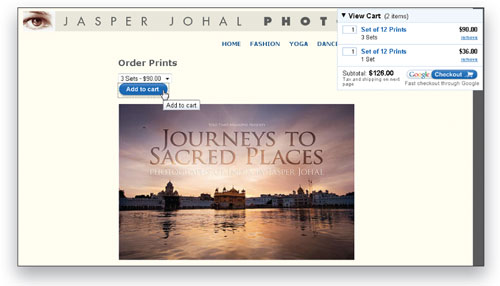
12 PREVIEW TO SEE THE CART IN ACTION
To test your product listings and Add to Cart buttons, preview your page in a Web browser by choosing File>Preview in Browser and then selecting any browser you have associated with Dreamweaver. (In Step 9, notice that the Add to Cart button doesn’t show up in Design view, but it does appear when you preview the page in a Web browser.) When previewing this example, I decided that I should include longer descriptions in the drop-down lists because the product title only appears in the shopping cart, not the product listing.
13 EDIT PRODUCT LISTING
Although you can edit a product as you’re creating it in Google, if you want to go back later to change a product listing, you have to recreate it. The inability to save listings is one of the biggest limitations of Google Checkout, IMHO. Although it would be more efficient if you could save your product information, you don’t have to start completely from scratch. You can copy your price and other information from the code in Dreamweaver and paste it back into Google to save some typing. If all you want to do is edit the name of product, you can change the text in Code view in Dreamweaver.
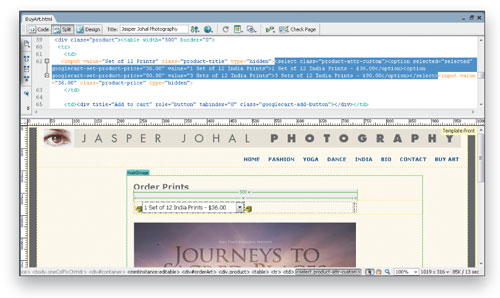
14 TWEAKING FORMAT
Experiment with formatting around the code to align the Add to Cart button to the right of the drop-down menu as shown here. (Tip: You can do this with an HTML Table or by creating styles for divs around the code.) Be careful, however, when you edit around Google’s code: You can split the button from the drop-down but you need to keep all of the code intact. And remember, if you make a mistake and the page doesn’t display properly, you can always go back and copy-and-paste the code in again.
ALL PHOTOS BY JASPER JOHAL UNLESS OTHERWISE NOTED
