
Powering Search with Audio Metadata using Premiere Pro
Across the Production Premium toolset, Adobe has provided increased support for metadata… [pause for audience applause]. What? You didn’t clap? Well metadata is pretty dang important—it can speed up your editing, improve collaboration, or even make your videos more accessible on the Web. Sure, it’s not as enticing as yet another tutorial on making things glow, but give it a shot.
If you’d like to download the assets used in this tutorial to practice these techniques, just click here. All files are for personal use only.
1 LOAD YOUR MEDIA IN PREMIERE PRO
You’ll need some audio to transcribe. Fortunately, this works well with both audio-only formats and video formats with audio attached. Here are a few guidelines to improve the accuracy of the transcriptions:
• Try to avoid heavily compressed or lossy file formats like MP3 audio.
• You can normalize the volume in a clip in Soundbooth using the Equalize Volume Levels tool (Processes>Equalize Volume Levels).
• If there’s a lot of background noise, try to clean that up. Soundbooth also offers noise-reduction tools if needed.
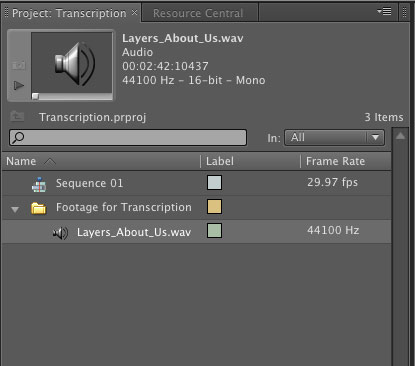
If you need an audio file, you can use the Layers_About_Us.wav from www.layersmagazine.com/magazine-downloads or visit the Internet Archive at www.archive.org.
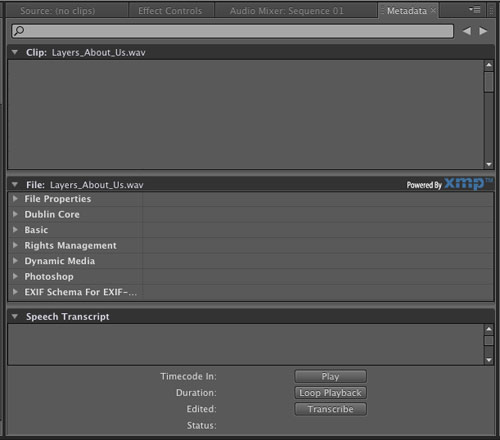
2 OPEN THE METADATA PANEL
The Metadata panel is your starting point for speech transcription. To open the panel, choose Window>Metadata. If the Metadata panel is hidden behind another panel, click its tab to bring it forward.
Using the Speech Search function takes a while to set up, but when finished, all metadata for clips will be searchable from the Metadata panel. Fortunately, the process can run in the background, which means you can still edit or perform other tasks. The Metadata panel allows you to search by any word or phrase within the clip.
3 SELECT A CLIP FOR TRANSCRIPTION
You need to specify which clip you want to transcribe. In Premiere, you can only select one clip at a time. Select the desired clip in the Project panel. Then in the Metadata panel, click on the Transcribe button. A new dialog opens and asks for more information about the clip.

4 SPECIFY A LANGAUGE
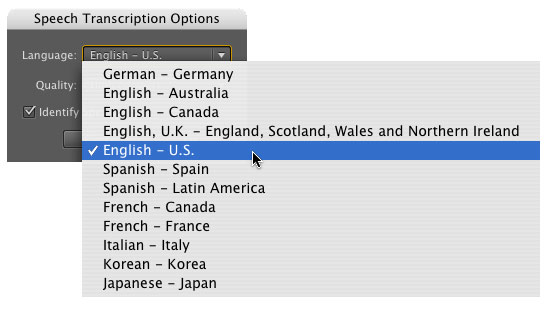
In order to improve the accuracy of the transcription, Premiere needs additional information from you. Production Premium applications can currently access 12 different language libraries, but this list is expected to grow. Click on the Language drop-down menu in the Speech Transcription Options dialog and choose your language. Be sure to pick the one that most closely matches your speaker. Note that there are unique choices for Spanish, French, and English, depending on region.
5 SPECIFY THE QUALITY OF TRANSCRIPTION
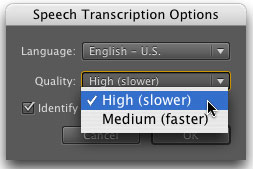
Adobe offers two quality choices for the transcription. The default choice is High (Slower), which will take longer to process the files, but offers significantly better translation. The second choice, Medium (Faster), should only be used when you’re very tight on time. The results are less accurate, but do process more quickly.
In our tests, we used a 2.4-GHz Intel Core 2 Duo processor with 4 GB of RAM to transcribe the Layers_About_Us.wav file. The High method resulted in a ratio of 1.8, meaning the runtime of the clip multiplied by 1.8 equals the approximate processing time. The Medium method was nearly four times faster with a ratio of approximately .5.
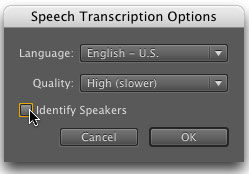
6 IDENTIFY YOUR SPEAKERS
The transcription option can attempt to identify different speakers in a clip. In the Speech Transcription Options dialog, you can select Identify Speakers. This takes longer to process, but will attempt to create separate transcripts for each person. This method can be more inaccurate, so only use it if you have a long clip with multiple voices or want to export the transcript for others to view. When ready to submit your clip, click OK.
7 SWITCH TO THE ADOBE MEDIA ENCODER CS4
The actual transcription is powered by the Adobe Media Encoder CS4 application, which will automatically launch when you click OK in the Speech Transcription Options dialog. This powerful tool allows you to convert audio and video files to many different formats used for tasks, such as DVD authoring and Web distribution. The clip you selected in Premiere Pro should appear at the top of the list and be ready to transcribe. If you have more than one clip to transcribe, you can set up a batch.
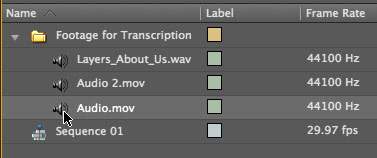
8 BATCH METHOD #1
If you have multiple clips organized in Premiere Pro, switch back to that application. You can select the next desired clip for processing. Just repeat Steps 3–6 in this tutorial for each clip you want to transcribe. This method works well if you have just a few clips to select. The benefit of setting up all the clips for transcription is that you can run the task in the background while editing or working on graphics.
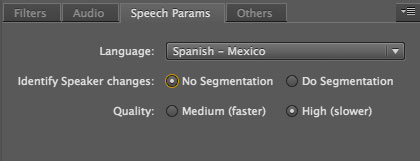
9 BATCH METHOD #2
If you have several clips to transcribe, you might find it easier to grab an entire folder of media. In the Adobe Media Encoder CS4 application, click the Add button in the main window. You can then navigate to a folder and select multiple clips (hold down the Shift key to choose more than one clip). Next, specify Speech Transcription from the Format button. You must then specify options by clicking on the word Custom (if you want to adjust multiple clips at once, Shift-click to select them all before clicking Custom). Select the Speech Params tab and set the Language, Quality, and Speaker options using the aforementioned advice.
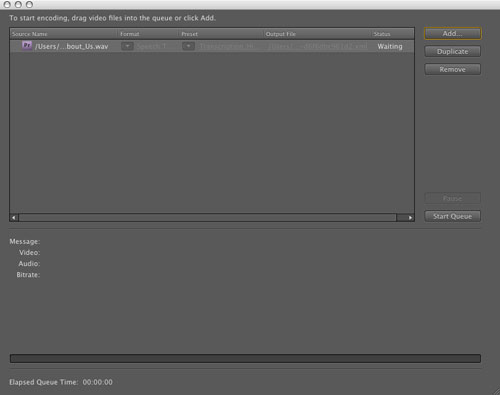
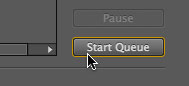
10 START YOUR ENGINES
Once you have all your clips ready to encode, you’ll need to start the Adobe Media Encoder. Just click the Start Queue button to initiate the transcription process. If you have more than one clip loaded for transcription, the Encoder will process them from top to bottom in the Queue. If you plan to leave your computer, leave the Adobe Media Encoder software as the foreground application (and quit any software you aren’t using to free up RAM). If you want to keep working, just switch back to Premiere.
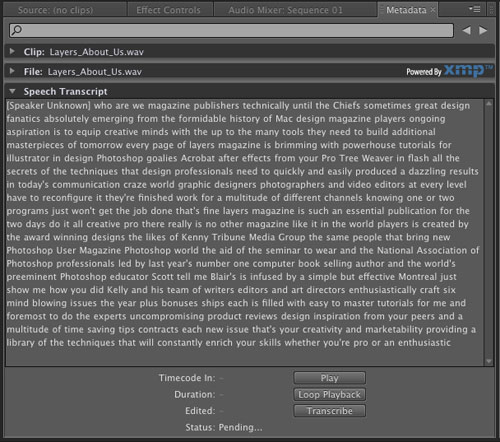
11 VIEW THE TRANSCRIPTION
When the transcription is completed for each clip, the text automatically becomes available. In Premiere Pro select the clip you’d like to search in the Project panel then click on the Metadata panel. To make it easier to view, click in the space above the Speech Transcript area and drag upward to resize the window. You can also close the disclosure triangles for the Clip and File properties to make more room.
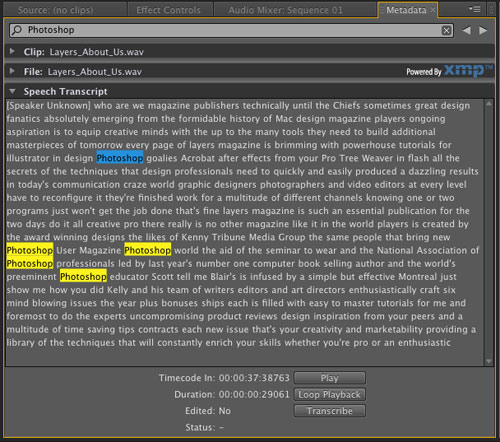
12 SEARCH WITH TRANSCRIPTION
To find a particular piece of audio, just click its word. The accuracy of the transcription will vary (Adobe keeps releasing updates to improve the Speech Search). A little bit of reading, though, will often help you find a word. To actually search for a word or phrase, click in the search field next to the magnifying glass at the top of the Metadata panel. Then type a word or phrase you want to find in the audio file. If the word or phrase occurs it will be highlighted in the Speech Transcript field. Click on the word and its timecode location will appear in the Timecode In field. The playhead is automatically cued to the selected metadata and ready to edit
13 IMPROVE ACCURACY
The transcript created is fully editable. If you want to correct a word, just double-click it, select the letters you want to edit, and type. Additionally, you can Control-click (PC: Right-click) on a word to access commands. The entire transcript can be copied by choosing Copy All from the contextual menu. Additionally, you can choose to include the transcript file in the final export if sending your video to the Web via Flash Video.
This feature is in its infancy, but should prove its use as it continues to mature. Be sure to give it a shot. For more information about XMP metadata, see www.adobe.com/go/learn_dv_tutorial_xmpcreative_en.

ALL IMAGES ©RHED PIXEL, UNLESS OTHERWISE NOTED
