
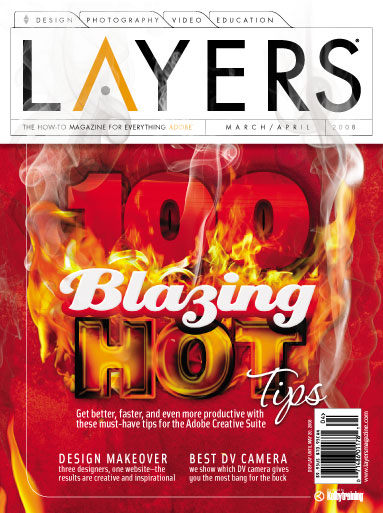
In the March/April 2009 issue of Layers magazine, you’ll find our “Fourth Annual Layers 100 Wicked Tips.” It’s one of our favorite features and we have a lot of fun putting it together every year. But let’s rewind the clock one year to our “Third Annual Layers 100 Blazing Hot Tips” issue. (We base the name of the tips feature on what phrase we hear uttered the most from our editors as they read each tip.) The cover for that issue was one of our most popular covers ever, and we had a lot of requests from readers for us to show them how it was created. So we went to the cover designer—Associate Designer, Christy Winter—and asked her to write a tutorial on how she did it. She was more than happy to oblige. (Note: And if you like this year’s cover, let us know. Taffy Orlowski, another one of our very talented Associate Designers, designed that cover. I’m sure that with a little bribery, we could get Taffy to reveal her secrets, as well.)
How to Create the Layers Magazine 100 Blazing Hot Tips Cover: Part 2—Smoke & Fire
By Christy Winter
When I first started to concept ideas for a theme, I decided to go with a “Hot Tips” theme. But not just hot, “Blazing” hot. Below I’ll show you how to create the fire and smoke effects that were used. (Check out “How to Create the Layers Magazine 100 Blazing Hot Tips Cover: Part 1—The Text” for directions on how to create the text effects.)
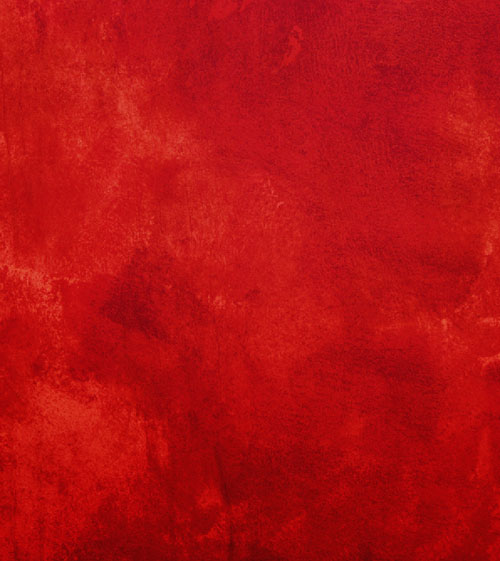
The background behind the text
The red background is a photo of a painted wall from istockphoto.com. The colors were adjusted using Levels (Command-L [PC: Ctrl-L]) to get the shade of red that we wanted. You can also go with a solid red background for this tutorial. Save and name this file; we’ll build on this file using layers from here.
Starting a Fire
Because of time restraints, I decided it would be easier to start with an actual image of fire instead of creating it from scratch in Photoshop. I searched for fire images on istockphoto.com and found one that I liked with a black background.

©ISTOCKPHOTO.COM
Step 1
Now you need to select the luminosity of this photo by pressing Command-Option-2 (PC: Ctrl-Alt-2). This shortcut selects the bright areas of the photo. (Note: In Photoshop CS3, the keyboard shortcut for selecting luminosity is Command-Option-Tilde [~] [PC: Ctrl-Alt-Tilde]. Also, on a Mac this shortcut is used by the operating system. To change the OS shortcut, go under the Apple menu and choose System Preferences. Go to the Keyboard & Mouse section and click the Keyboard Shortcuts tab. Scroll down and turn off Move Focus to the Window Drawer.) Only part of the fire should be selected because we’re only selecting the luminosity or brightest areas of the photo.

Step 2
Now drag-and-drop that selection of fire on the main background file. If you want darker fire, drag the layer to the Create a New Layer icon at the bottom of the Layers panel to duplicate it and then change the blend mode. Experiment with different blend modes to get the darkness you want. You can get many different looks using different blend modes.

Step 3
We like these flames but we’d like to add some bolder flames that aren’t as transparent. Here’s another photo of fire on a black background from istockphoto.com. If you have another image of fire that you would like to add to the image, drag-and-drop the entire photo onto your main working file. Your fire should be on a solid black or white background for the next step to work.


Step 4
Double-click on the new fire layer to bring up the Layer Style dialog. You should be in the Blending Options section. In the Blend If area at the bottom of the dialog, drag the black slider for This Layer to the right (circled below). This will drop out anything that’s black in your image. Then, hold down the Option key (PC: Alt key) and click the slider to split it. Drag the right half of the slider to the right. This softens up the edges and makes the black area of this photo transparent in the way we need to get the darker, bolder fire. If your photos have a white background, you can drop out any white by dragging and splitting the white slider instead.
Step 5
To make different versions of the same piece of fire, duplicate your layer, then go to Filter>Liquify and use the Forward Warp tool (W). With a fairly large brush size you can customize your fire and change the look of the flames. To make other variations of your flames you can create more duplicates of your fire layer and flip it (Edit>Transform>Flip Horizontal) or warp it to make it look different as well. You can also change the blend mode or lower the Opacity at the top of the Layers panel for a variety of different effects.

Step 6
Repeat these techniques on a few different flame images until you get the look you want. Use layer masks to paint out any sections of the fire you don’t want in your image. To create a layer mask, click the layer with the unwanted flame in the Layers panel to make it active, and then click the Add Layer Mask icon at the bottom of the panel. Using the Brush tool (B), paint in black over any of the flames you want hidden.
Up in smoke
We’ll use the same tricks with the smoke that we did with the fire.
Step 1
These really cool smoke photos also came from istockphoto.com. We’re going to select the luminosity of this photo, just like we did with the fire in Step 1.

Step 2
Now drag that selection over to the main file. Doing it this way makes the smoke transparent in the way we need. Repeat this as many times as necessary with different smoke images. Here, I also made the canvas bigger (Image>Canvas Size) so I would have room for the magazine’s masthead. I knew I wanted the smoke to go over the name of the magazine.


Step 3
For both the fire and smoke layers use layer masks to paint out areas you don’t want to use. This is helpful around the text. The smoke and fire layers were also arranged so that some layers were behind the text and some were in front to create depth. You can also play with different blend modes for the smoke and fire layers for many different effects. Here’s a close-up to show how the smoke and fire are placed behind and in front of the text.

Here’s what our final cover looked like.
Well that’s it for the smoke and fire. If you want to learn how the text effects were created, see “How to Create the Layers Magazine 100 Blazing Hot Tips Cover: Part 1—The Text.”
