
Having Fun in Photoshop

If I had to guess, I’d imagine that you didn’t get into digital photography because you were blown away by how light rays are bent and focused on a camera’s image sensor, or how digital noise can be reduced on a camera’s image sensor (as well as by the camera’s image processor), or how an analog image is translated into ones and zeros. In addition, my bet is that you didn’t dive into Adobe Photoshop because you were fascinated with image resolution, CMYK vs. RGB, scripts and actions, smart objects, LZW compression, or many of the other cool features and attributes of the world’s most powerful digital image-editing program.
My guess is that you were attracted to digital imaging for the same reason that I and many other photographers were: to have fun and be creative with your photography. Most of my photography workshop students have lots of fun taking pictures, but they take the Photoshop side of digital imaging too seriously—striving for the most technically perfect image, and forgetting why they got into digital imaging in the first place.
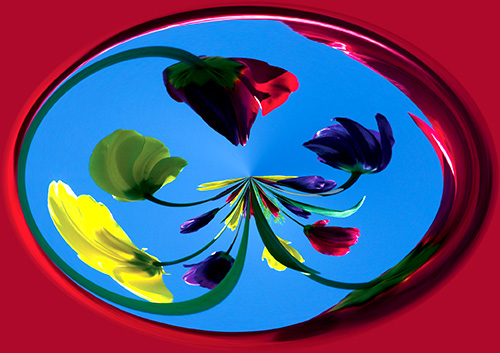
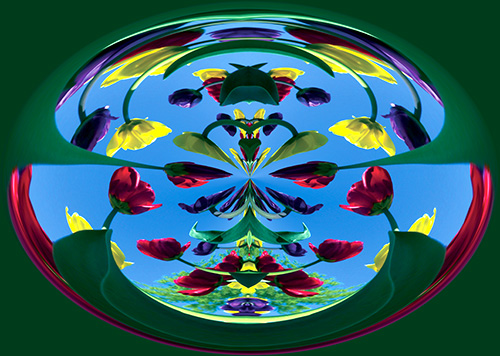
So this column is about—you guessed it—having fun in Photoshop. And that’s just what I was doing when I created the opening, fanciful image above.
We all make our own fun
To illustrate the joy that I was having one night while sitting at my computer listening to Santana on my iTunes, and to show you some of the techniques that you can use in Photoshop, let’s play with one of my favorite pictures of a group of tulips.
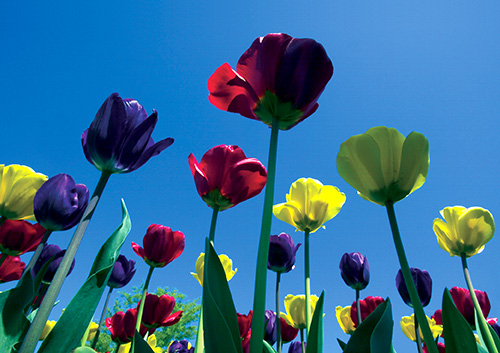
While you’re reading this article, think about the fun that you can have with your own images, using your own creative enhancements. The enhancements that I’ll share here are just a few of the endless creative options that await you—and all fun-loving Photoshop users. Okay, here’s how I created the intro art, using Photoshop CS3. [If you’d like to follow along with this tutorial, download the image used here]
STEP ONE:
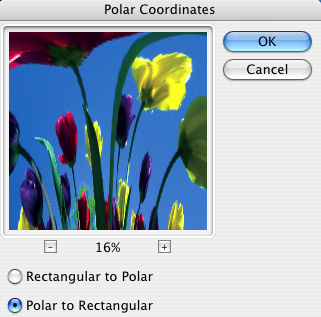
After opening the image, go under the Filter menu and choose Distort>Polar Coordinates. In the dialog, click the Polar to Rectangular radio button and click OK. This creates one of the weirdest-looking images I’ve ever seen!
STEP TWO:
Next, go to Image>Rotate Canvas>180°, which creates yet another strange-looking image. However, if you now go back again to Filter>Distort>Polar Coordinates and this time choose Rectangular to Polar, the image takes on the totally cool look of the opening image!
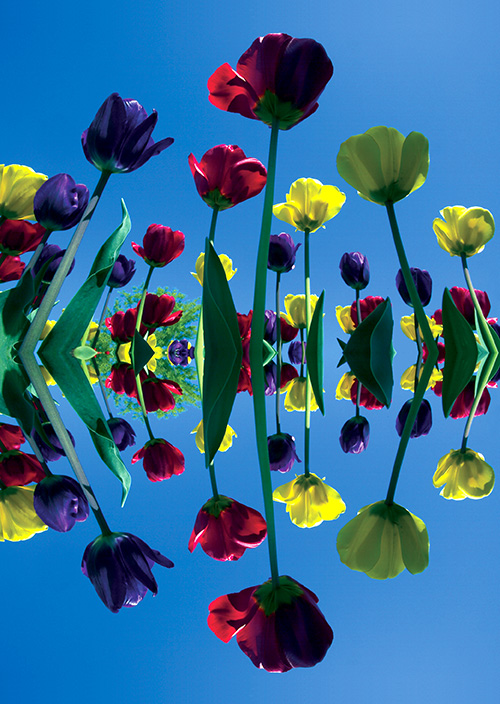
There’s an old adage about working on a picture: A picture is never really finished; it’s only abandoned. In other words, you can go back again and again to an image and make additional enhancements until you’re pleased with a different version of that image. (Eric Clapton did that with “Layla,” as rock music fans know.) That adage rings true for traditional enhancements as well as for artistic creations. So, with the thought of additional enhancements in mind, I used the aforementioned technique after I created a mirror/reflection image of my original image.
Creating a reflection image is easy. Here’s how to do it (okay, one way to do it):
• Open your image and choose Select>All
• Edit>Copy
• File>New (Note: After you copy a file, the settings in the New dialog will match the exact size of your copied area)
• Edit>Paste (you’re now in the new file)
• Image>Rotate Canvas>Flip Canvas Vertical
• Click on your original image and go to Image>Canvas Size and double the height of the image (by clicking on the top center square in the Canvas Anchor area, then typing in the new size in the Height field). You now have an empty area below your original image.
• Click on the new file. Drag it to the empty space in your original image and line it up so that your images look like a perfect reflection. .
• Now flatten the layers of your original file (Layer>Flatten Image)
• Be sure to go back to Steps One and Two above to apply the Polar Coordinates filter and complete the effect
• When you’ve completed the effect, choose Image>Rotate Canvas>90° CW
Are we having fun yet?
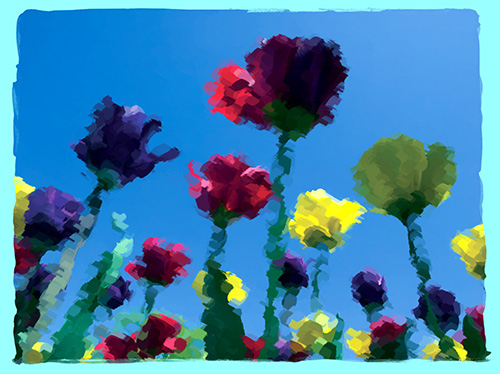
I hope you’re feeling creative and artistic at this point. More importantly, I hope you’re having fun. The following creative technique takes a bit longer than the previous enhancement. When you’re finished, however, one of your straight photographs can be transformed into an image that looks like a one-of-a-kind painting.
The technique involves “painting” the entire image area with the Art History Brush tool, which is nested with the History Brush tool in the Toolbox. The key to making your image look like a painting is to select a brush that mimics the type of brush a painter would use, for example, a Dry Media, Natural, Faux Finish, or Wet Media brush.
You’re probably saying, “Where the heck do I find these cool brushes?” That’s easy in CS3. Simply select the Art History Brush, then click on the Brushes icon at the right-hand side of your desktop to open the Brushes panel. If you don’t see the icon, then turn on the Toggle the Brushes Palette icon at the right-hand side of the Options Bar. (You can also go to Window>Brushes or use the keyboard shortcut, F5.) To see a complete list of brushes, click on the little flyout arrow in the Brushes panel.
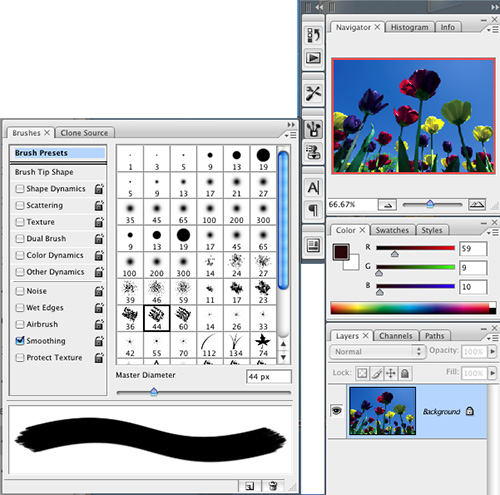
We chose Chalk 44 for this creative Photoshop effect (hold your cursor over the brush to learn its name). Click on the brush, set it to a small size (use the [ key on the keyboard to decrease the brush size), and begin to “paint” and create your one-of-a-kind image.

Tip: You’ll find that if you use a brush that’s too large, it will obscure the details in the image. So if we used a too-large brush in our example, the tulips might look like big blobs of color, not tulips.
Don’t stop now
Remember I said that an image is never really finished? Well, to dress up my “hand-painted image,” I added one of the Brush digital frames in PhotoFrame Pro 3, a Photoshop plug-in from onOne Software (www.ononesoftware.com). In PhotoFrame, you have literally endless creative possibilities because you can customize the color, shape, design, and size of each of the dozens of frames.
Using PhotoFrame Pro 3
And while we’re mentioning plug-ins, check out this effect. I had fun creating it using Nik Color Efex Pro from Nik Software, Inc. (www.niksoftware.com). First, I applied a Pastel filter from the Stylizing filter set and then I applied the Classical Soft Focus effect from the Traditional filter set.

Two Nik Software filters added
And to play with that image, I created a panorama effect in Photoshop: Go to Image>Image Size, then in the dialog, click off the Constrain Proportions checkbox, and double the image Width.
Okay. That’s it for now. Go have—and make—your own fun in Photoshop!
