Go Retro With a 70s Inspired Illustrator CS3 Tutorial
Feelin’ Groovy
Okay, I admit it. I’m a retro fan. In fact, I caught myself watching I Love the 70s on VH1 just recently and was inspired yet again. So this time around, let’s launch Illustrator and take our own trip back in time. Groovy!
1 [FIND THE RIGHT FONT]
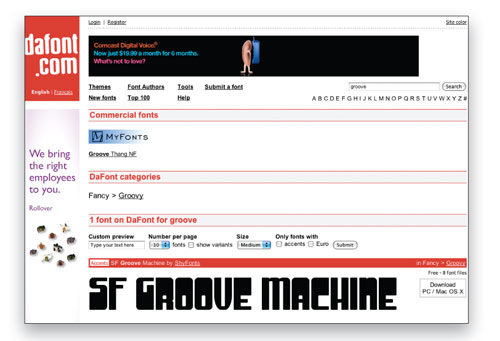
First, we have to start with the right font. For that we’ll turn to one of my favorite sites: www.DaFont.com. Once on the site, enter the word “groove” in the Search field, and click the Search button. When the Groove Machine font shows up, click the download button to the right. Notice you can download both Mac and PC versions.
2 [LOAD THE FONT]
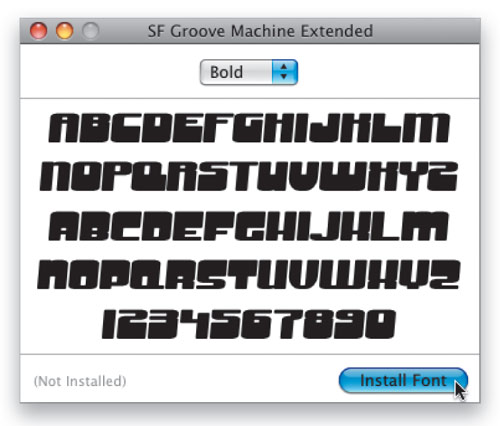
Next, you need to install the font into your system. To do this you can either simply double-click the icon for each font and follow the onscreen instructions (PC: Right-click and choose Install), or if you use a font management tool, go through the normal steps to activate the font.
3 [SET TYPE; CREATE OUTLINES]
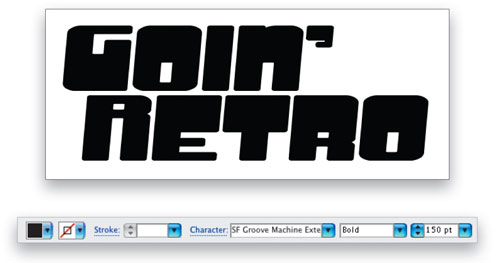
If Illustrator is already open, quit and restart it to load the new font. Otherwise, go ahead and launch Illustrator. Select the Type tool (T), click on the artboard, and type “GOIN’ RETRO.” With the type selected, go to the Font pop-up menu in the Control panel and look for the SF Groove Machine Extended font. Set the Font Size to about 150 pt and set the Fill to black. Switch to the Selection tool (V), go under the Type menu, and choose Create Outlines. Ungroup the text (Shift-Command-G [PC: Shift-Ctrl-G]) and reposition as you see here. Then regroup by selecting all the objects and pressing Command-G (PC: Ctrl-G).
4 [DUPLICATE; STROKE ORIGINAL]
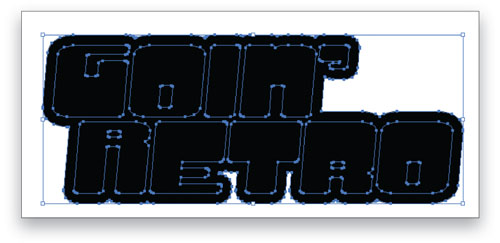
Press Command-C (PC: Ctrl-C) then Command-V (PC: Ctrl-V) to create a duplicate of the type. Move the duplicate off to the side for now. Select the original type and set a really thick 30-point black stroke.

5 [EXPAND STROKE; COMBINE SHAPES]
Go under the Object menu and choose Expand. Make sure that Stroke is the only thing checked in the Expand dialog and click OK. This will turn that thick stroke into a regular shape. You can see the original shape of the text as well. We need to combine the text and the expanded stroke into one shape, so go under the Window menu and choose Pathfinder. With all the objects selected (excluding the duplicate object, of course) Option-Click (PC: Alt-Click) the Add to Shape icon in the Shape Modes section of the Pathfinder panel.

6 [ALIGN SHAPES]
With the Select tool, select both the shape you just created and the duplicate text that you created in Step 4. In the Control panel, click the Horizontal Align Center icon and then the Vertical Align Center icon to center the duplicate in front of the larger, original shape.
7 [USE KULER TO CHOOSE COLORS]
Now that we have our shape, we need color. For this, we’re going to use the built-in Kuler feed. Go under the Window menu, to Adobe Labs, and choose Kuler. Click the Accept button in the resulting dialog and the Kuler panel will appear. We’re looking for retro colors, so enter “70s” in the Search field. You’ll see a number of seventies-style color schemes. Simply choose one (we chose 70s Purple) and click the Add to Swatches icon at the bottom of the Kuler panel. This will put that set of swatches in your Swatches panel.

8 [EXPERIMENT WITH COLOR]
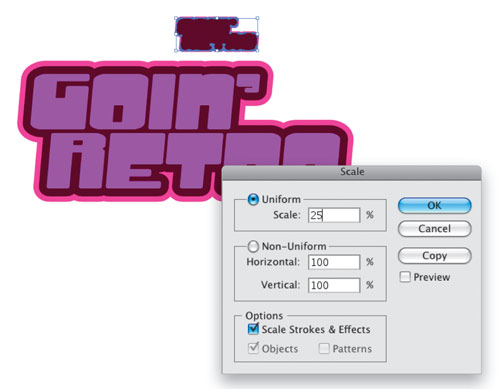
This is where you can get a little creative with the color. You can either use the same color scheme shown here or experiment with your own combinations. To apply a color, simply select either the duplicate text in the front or the larger shape in back and click on one of the new swatches in your Swatches panel (make sure that you’re applying it to the Fill and not the Stroke). For the background shape, we also added a new 10-point stroke set to a bright pink.

9 [DUPLICATE AND SCALE BACKGROUND SHAPE]
Now select the background shape and copy-and-paste a duplicate like you did in Step 4. Double-click the Scale tool (S) in the Toolbox and set the Scale in the Uniform section to 25%. Make sure that the Scale Strokes & Effects option is checked on, and click OK.
10 [POSITION DUPLICATE; SEND TO BACK]
Position this shape in the upper right above the original shape. We’re going to apply a blend, and we want the blend to appear behind the original shape, so go under the Object menu, to Arrange, and choose Send to Back.

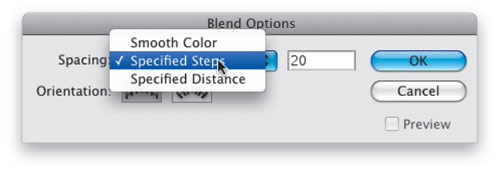
11 [APPLY 20-STEP BLEND]
To apply a blend, first select both the original background shape along with the smaller duplicate. Double-click the Blend tool (W) in the Toolbox. Select Specified Steps from the Spacing pop-up menu and set the number of steps to 20. Click OK. Then press Option-Command-B (PC:Alt-Ctrl-B) to apply the blend.
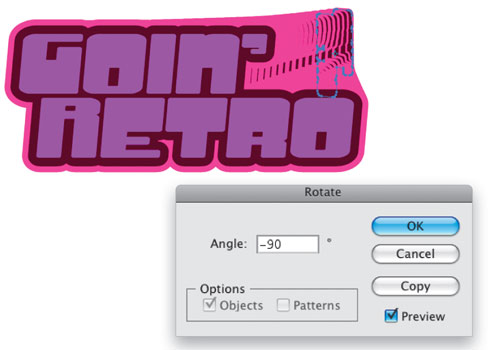
12 [ROTATE SMALL DUPLICATE SHAPE]
One last thing: Grab the Direct Selection tool (the white arrow tool) and select just the small shape. Double-click the Rotate tool in the Toolbox to bring up the Rotate dialog. Enter –90˚ for the Angle and click OK. There you have it. Oh, we also added a groovy disco girl for a final touch using the same Fill and Stroke as the background shape. Groovy!