Getting Great Duotones (and Split Tones) in Lightroom

Okay, I need to clarify here a bit: This trick is for getting great duotones, but I also cover how to do a split-tone effect, since it kind of uses the same controls. A duotone generally starts with a B&W photo, then you expand the visual depth of the image with a deep color tint. Split toning is where you apply one color tint to the highlights and another to the shadow areas. We’ll cover duotones first, because not only are you more likely to do a duotone, they just look better (I’m not a big split-toning fan myself, but hey, I’m still happy to show ya how to do one, just in case).
Step One:
Although the actual duotone or split tone is created in the Split Toning panel (in the right side Panels area), you should convert the photo to black and white first. (I say “should” because you can apply a split-toning effect on top of your color photo, but…well…yeech!) In the Develop module’s Presets panel, under Lightroom B&W Presets, click on B&W Look 5 to convert the photo. Then, in the Basic panel, increase the Clarity a bit more, and decrease the Exposure a little.
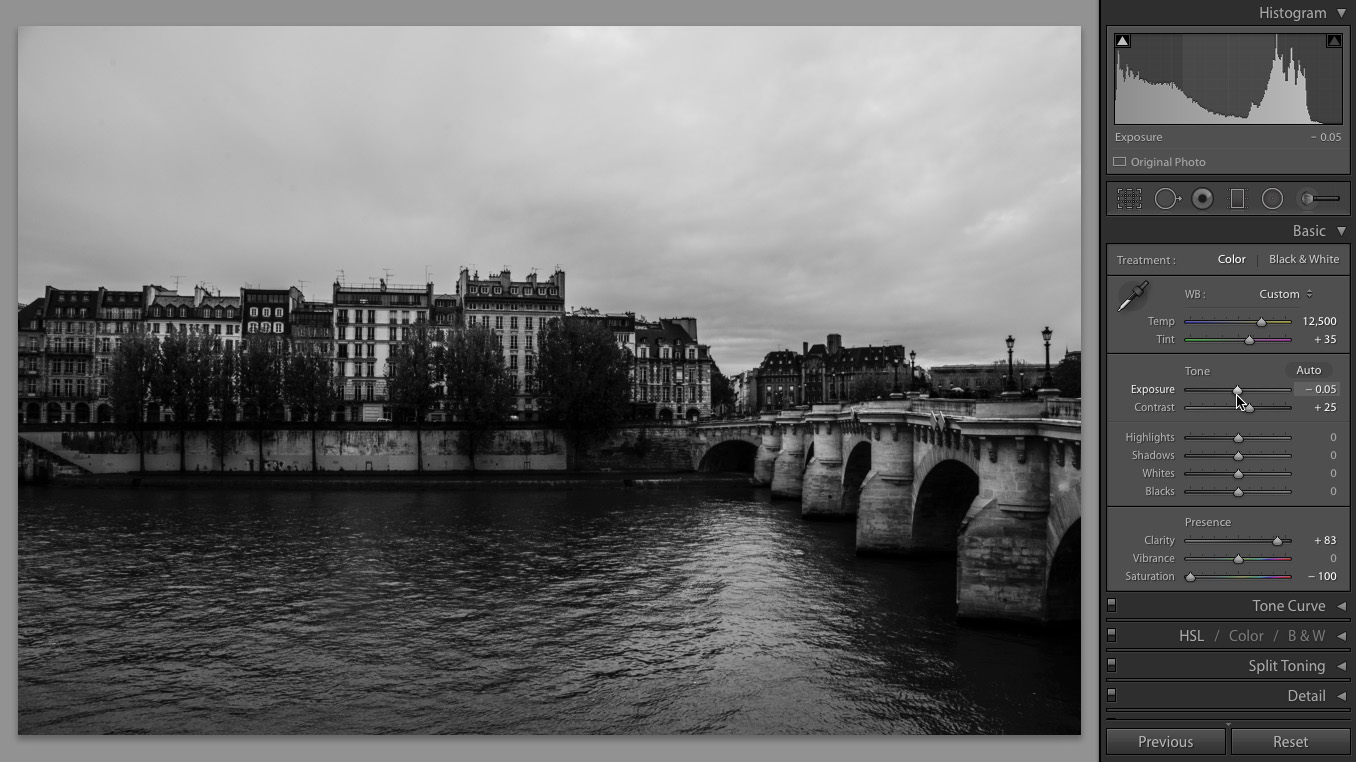
Photo Credit – Scott Kelby
Step Two:
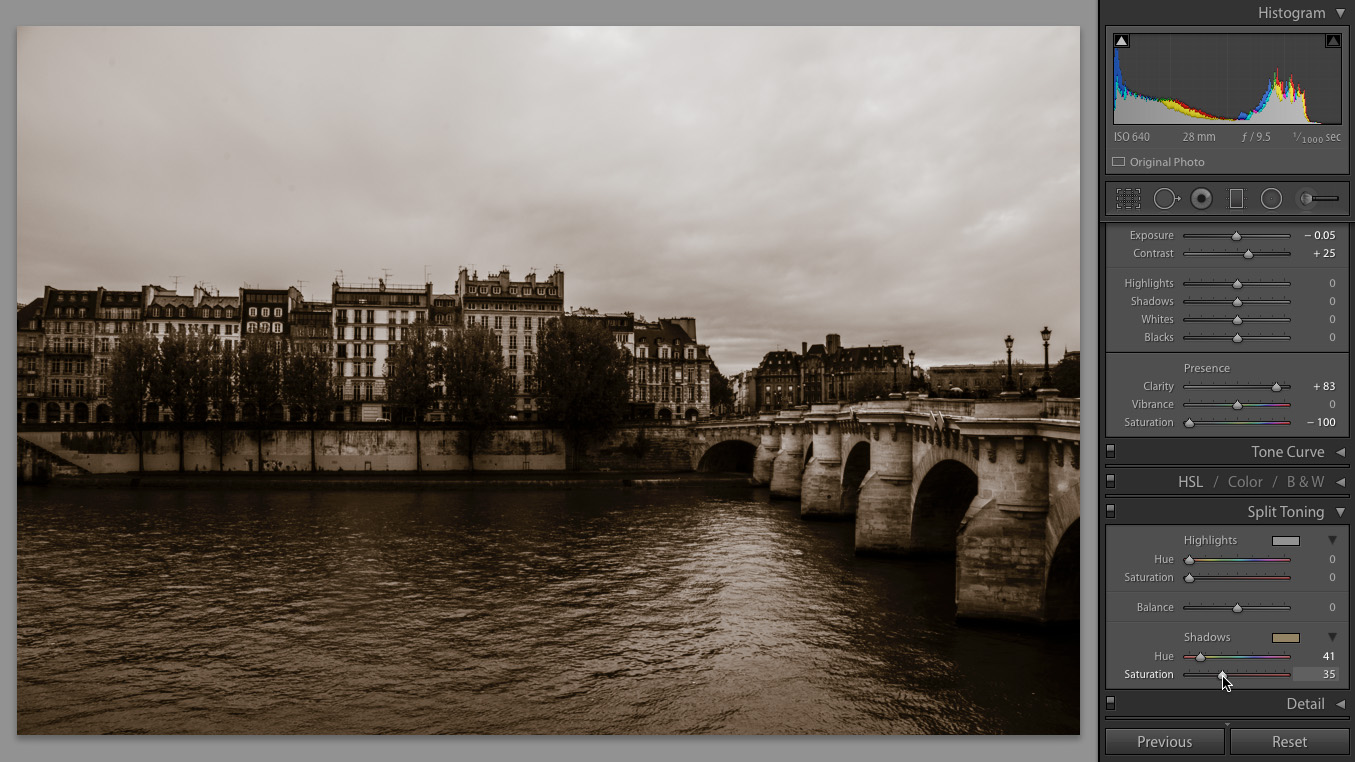
The trick to creating duotones is actually incredibly simple: you only add the color tint in the shadows, and you leave the highlights untouched. So, go to the Split Toning panel, in the right side Panels area, and start by dragging the Shadows Saturation slider to around 25, so you can see some of the tint color (as soon as you start dragging the Saturation slider, the tint appears, but, by default, the hue is a reddish color). Now, drag the Shadows Hue slider over to 41 to get more of a traditional duotone look (while you’re there, increase the Saturation amount to 35, as shown here). That’s it. Couldn’t be simpler. Of course, you can choose any hue you want (this one just happens to be my favorite for duotones).
TIP: Reset Your Settings
If you want to start over, press-and-hold the Option (PC: Alt) key, and the word “Shadows” in the Split Toning panel changes to “Reset Shadows.” Click on it to reset the settings to their defaults.
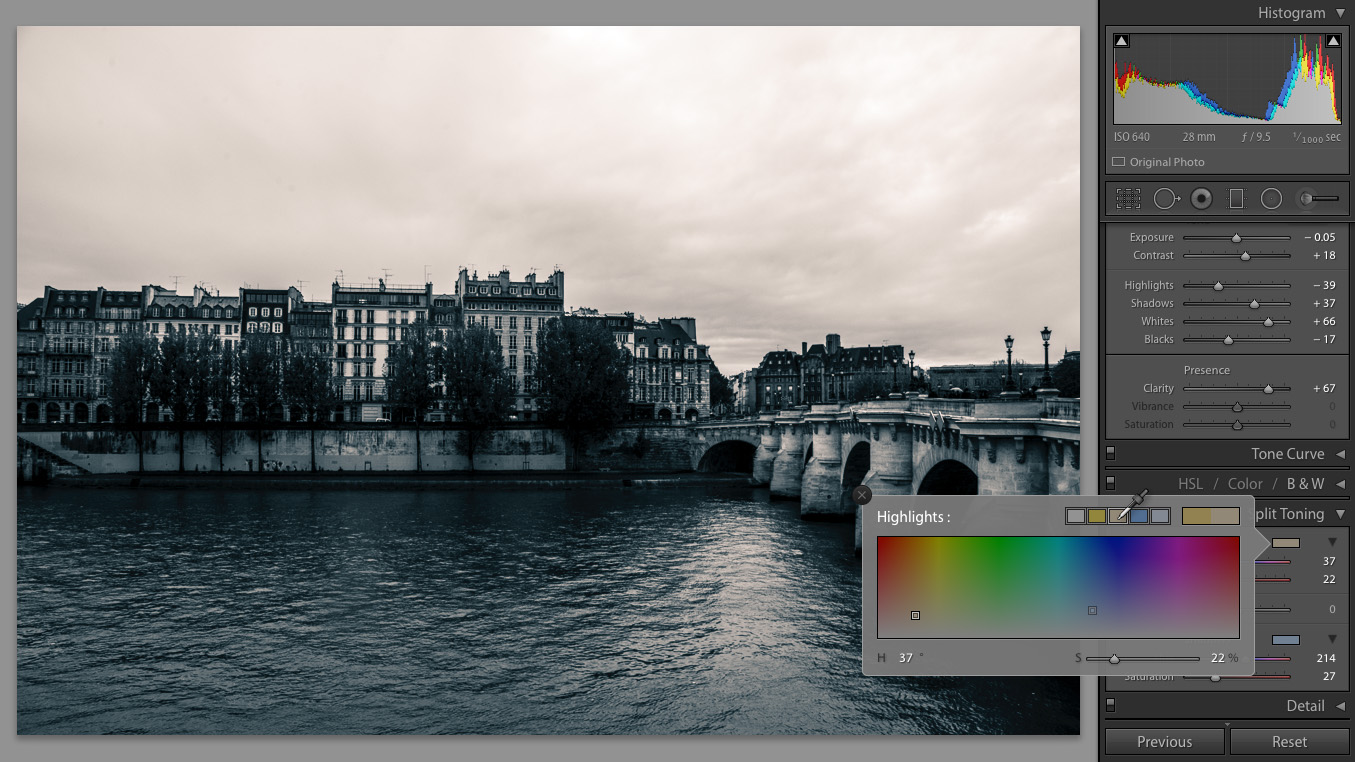
Step Three:
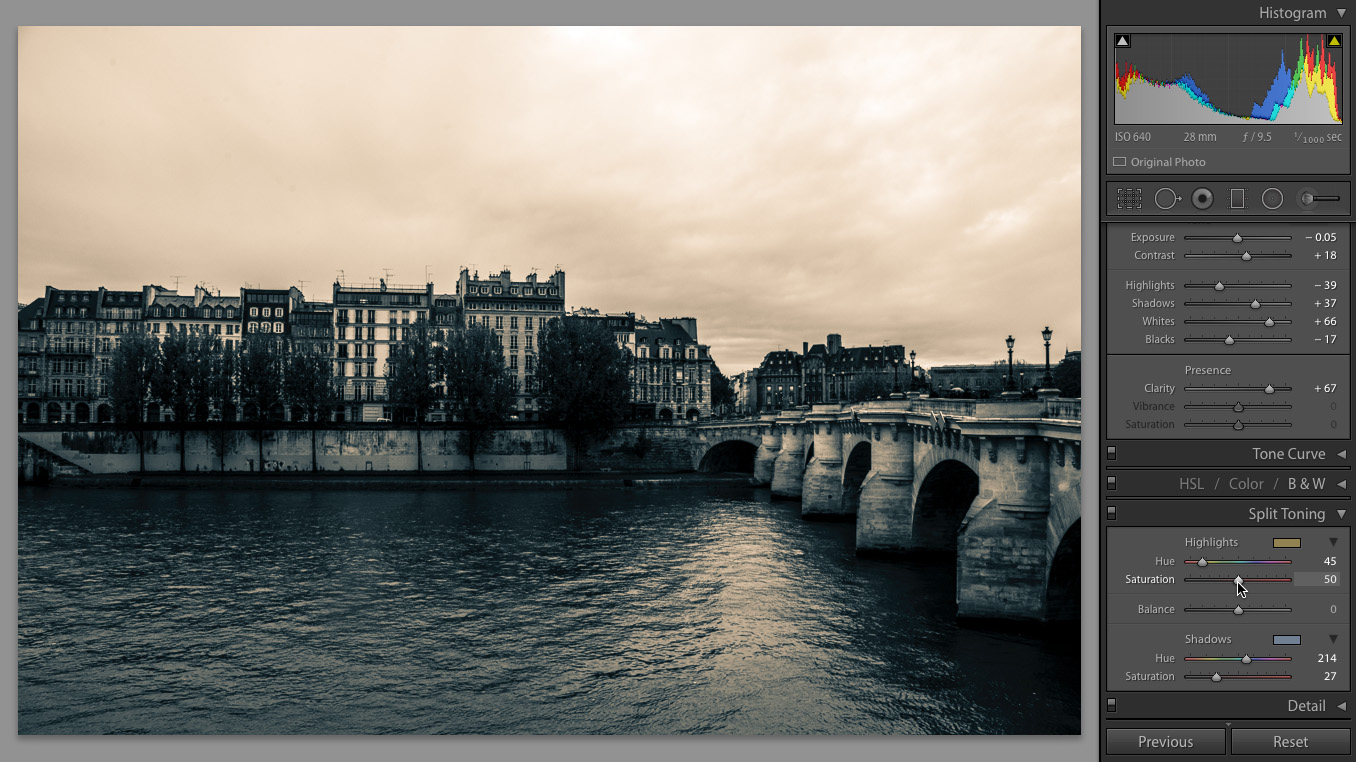
Now, on to split tones. To create a split-tone effect, start with a good-looking B&W photo (you know how to convert from color to black and white now), then you’re going to do the same thing you did to create a duotone, but you’re going to choose one hue for the highlights and a different hue for the shadows. That’s all there is to it (I told you this was easy). Here, I set the Highlights Hue to 45 and the Shadows Hue to 214. I then set the Shadows Saturation slider to 27 and the Highlights Saturation slider to 50 (a little bit higher than usual, just to add more color).
TIP: See a Tint Color Preview
To make it easier to see which color tint you’re choosing, press-and-hold the Option (PC: Alt) key and drag the Hue slider, and it will give you a temporary preview of your color tint as if you bumped up the Saturation amount to 100%.
Step Four:
You can also choose your colors from a color picker: click on the color swatch next to Highlights to bring up the Highlights color picker. Along the top are some common split-tone highlight colors. For example, click on the beige swatch (the third from the left) to apply a beige tint to the highlights (you can see the result in the Preview area). To close the color picker, click on the X in the upper-left corner. The Balance slider (found between the Highlights and Shadows sections) does just what you’d think it would—it lets you balance the color mix between the highlights and shadows. For example, if you want the balance in your image more toward the beige highlights, you’d just click-and-drag the Balance slider to the right. Now, if you’ve created a particular duotone or split-tone combination that you like, save it as a preset by going to the Presets panel and clicking the little + (plus sign) button on the right side of the panel header.
By Scott Kelby
Excerpt from The Adobe Photoshop Lightroom CC Book for Digital Photographers
Learn how to do more from The Adobe Photoshop Lightroom CC Book for Digital Photographers here: http://kel.by/lrccbook