Some effects look best when applied to an entire photo, while other effects look best when used only in certain areas. By nature, the filter used in this technique will affect the entire photo, but with a little (easy) work, you can create an interesting outline effect on just part of your photo.
[If you’d like to download the image used in this tutorial to practice the technique, click here. All files are for practice purposes only.]
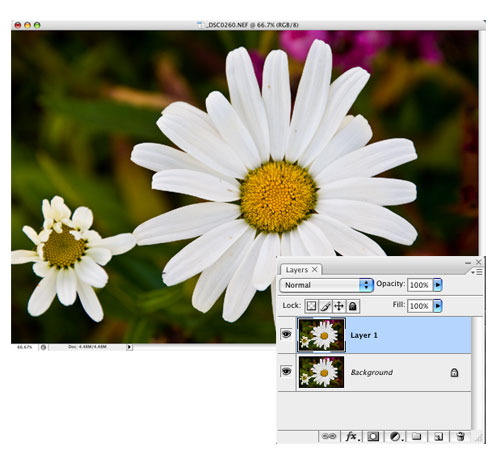
1 DUPLICATE THE BACKGROUND
This effect will work on all types of images, but may work best when you have a main object you want to draw attention to. After opening and sizing your image, press Command-J (PC: Ctrl-J) to duplicate the Background layer.
DAVE CROSS
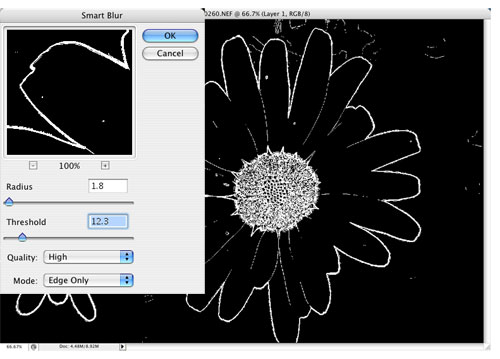
2 APPLY SMART BLUR AND INVERT
Make sure the duplicate layer is active, and then from the Filter menu, choose Blur>Smart Blur. Change the Mode to Edge Only, the Quality to High, and adjust the Radius and Threshold to get mostly outline details. (Generally, you’ll probably end up with a low Radius and a Threshold in the 10–20 range.) Click OK to close the dialog and press Command-I (PC: Ctrl-I) to invert the image.
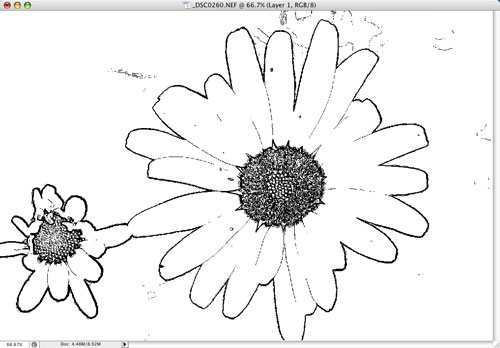
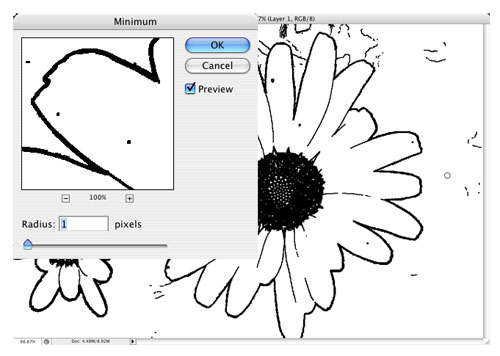
3 APPLY THE MINIMUM FILTER
To make the black lines thicker, go to the Filter menu, choose Other>Minimum, and set the Radius to 1 (for higher resolution images you may need to increase the Radius to 2 or 3). Click OK.
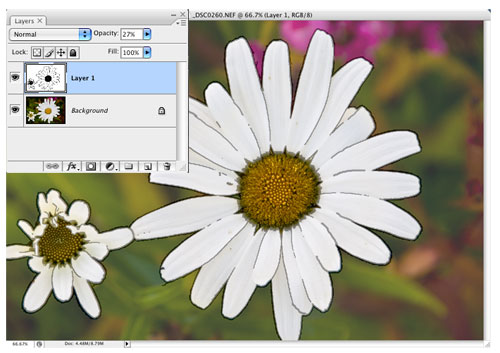
4 PAINT IN MORE DETAIL
Now fine-tune the effect by using the Brush tool (B) to paint over the areas with white where you don’t want to have any outlines. Then, lower the Opacity of the outline layer in the Layers panel and paint with black to add more detail to the outline where needed (use a brush size that matches the width of your outline). When you’re finished, return the Opacity to 100%.
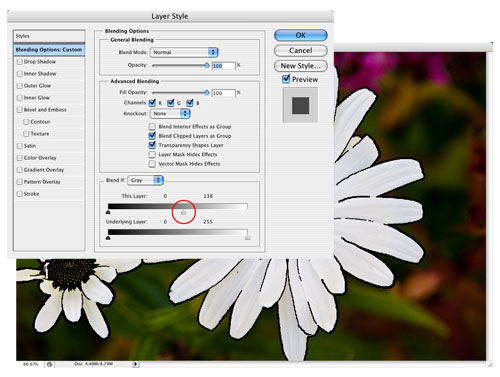
5 MAKE THE WHITE SEE-THROUGH
To make the white areas see-through, double-click to the right of the layer name in the Layers panel to open the Blending Options. Go to the Blend If sliders at the bottom of the dialog and drag the white triangle on the This Layer slider to the left. As soon as you do, the white areas should become completely transparent. Click OK to close the dialog.
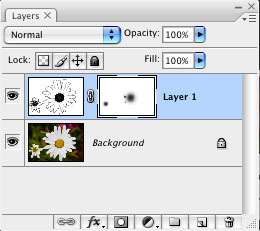
6 MASK IF NECESSARY
If there are any areas where the outline effect is too strong (such as the center of the flower in this example), add a layer mask by clicking on the Add Layer Mask icon at the bottom of the Layers panel. Using black as the Foreground color and a brush Opacity of 30–40% in the Options Bar, paint over the areas where you want a less obvious outline.
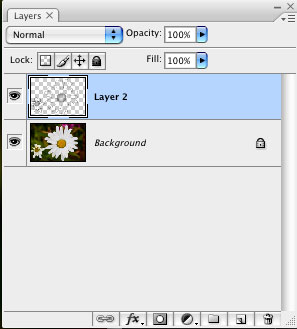
7 CHANGE THE COLOR, PART 1
There are a couple of steps to change the color of the outline. First, click on the Create a New Layer icon at the bottom of the Layers panel. Drag this new layer below the outline layer. Click on the outline layer and press Command-E (PC: Ctrl-E) to merge the two layers together (this will permanently change the white areas to transparent).
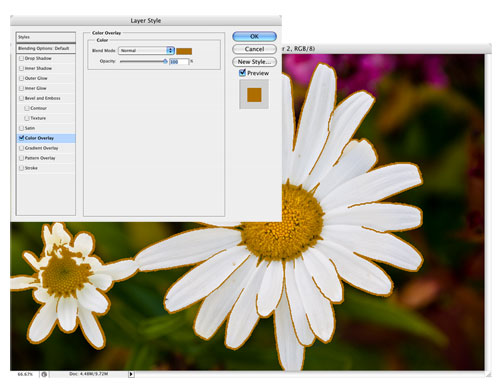
8 CHANGE THE COLOR, PART 2
Use the Add a Layer Style pop-up menu at the bottom of the Layers panel to add a Color Overlay. Click on the red color swatch to access the Color Picker, choose a color, and click OK twice. (By using the Color Overlay layer style you can easily change the color by double-clicking on Color Overlay in the Layers panel.)
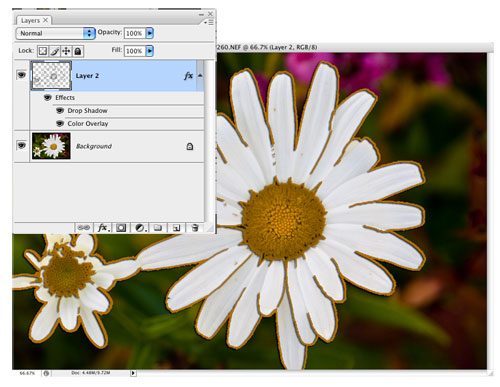
9 ADD A LAYER STYLE
If you want the outline to stand out, you can try adding other layer styles such as a drop shadow (shown here), bevel and emboss, inner shadow, etc. (Note: You can only add these styles if you completed step 7.)