Automation Modes: Live Audio Mixing in Premiere Pro

A little-known fact about Premiere Pro is that it contains a live Audio Mixer. This means you can make adjustments to volume (and other audio properties) while your sequence is playing. Premiere Pro will record those adjustments as keyframes in the Timeline. To use this technique, you have to understand the various Automation Modes.
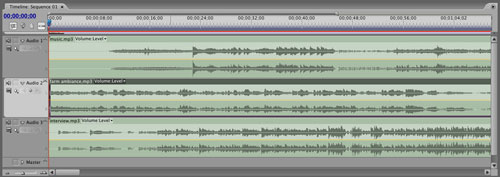
1 THREE AUDIO TRACKS
In this example we have added three tracks of audio to our sequence: music, ambiance, and dialog. On preview, we notice that some of the audio levels are a bit off. At times, the music and ambiance drown out the dialog; at other times, the dialog is a bit too loud.
2 SWITCH TO AUDIO WORKSPACE
As the first step in remixing the audio, switch to the Audio Workspace by choosing Window>Workspace>Audio from the menu. This Workspace includes the Audio Mixer—the perfect tool for the changes we want to make.

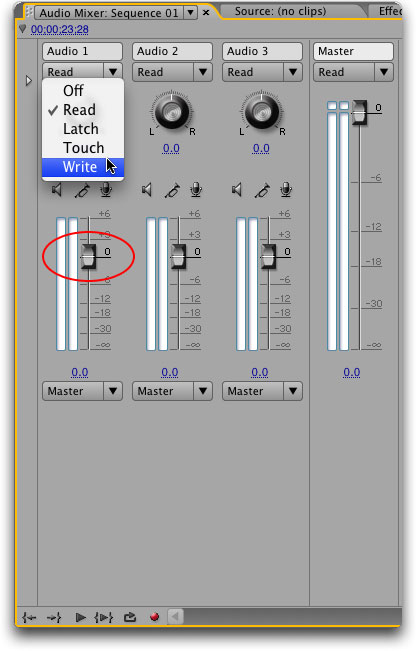
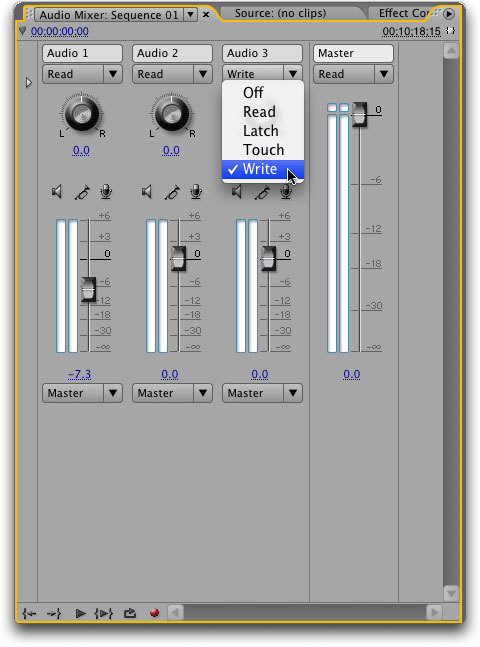
3 SET AUTOMATION MODE TO WRITE
Our first task is to set new levels for the music track. This isn’t as simple as lowering the volume because we want the music to fade and swell at various times during the sequence. To record volume changes in real time while listening to the sequence, set the Automation Mode for the Audio 1 track to Write in the Audio Mixer panel. Note that the volume slider is currently at zero.
4 PLAY AND ADJUST
Hit the Spacebar to start playing (you can also click the Play/Stop Toggle icon at the bottom of the Audio Mixer panel). While listening to the audio, drag the slider up and down, raising and lowering the volume, as appropriate. At some point, press the Spacebar to pause playback and then press it again to continue. Notice the volume slider jumps back to zero when you continue playback.
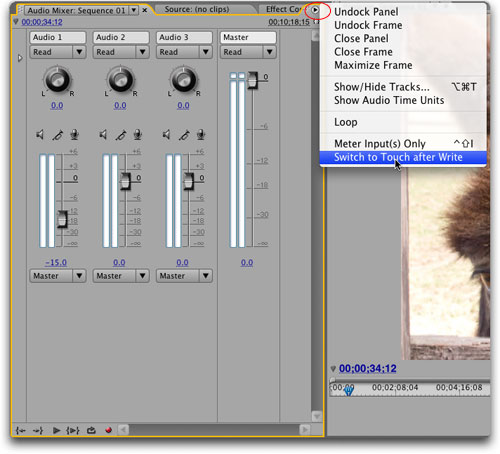
5 DISABLE SWITCH TO TOUCH AFTER WRITE
We don’t want that return to zero. So via the Audio Mixer flyout menu, turn off the Switch to Touch after Write option. When this option is on, the Automation mode switches from Write to Touch when you press the Spacebar to pause playback. Touch mode records a keyframe when you pause playback, and that keyframe always returns the property to whatever value it was before you started adjusting it. That’s why our audio jumped back to zero.
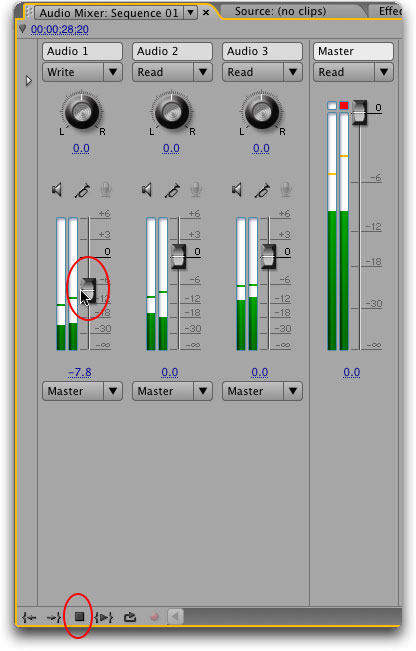
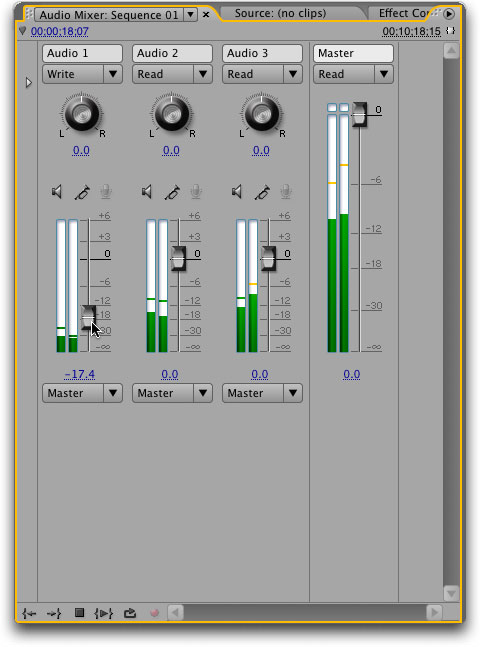
6 TRY AGAIN
With the Switch to Touch after Write option disabled, return the Current Time Indicator (CTI) to the beginning of the sequence, set the Automation Mode back to Write, press Play, and remake your adjustments. This time, when you pause while you’re making adjustments, the rest of the track will stay at your new ending volume level, which is what we want. In this example, we pressed the Spacebar again to pause playback after about 34 seconds.
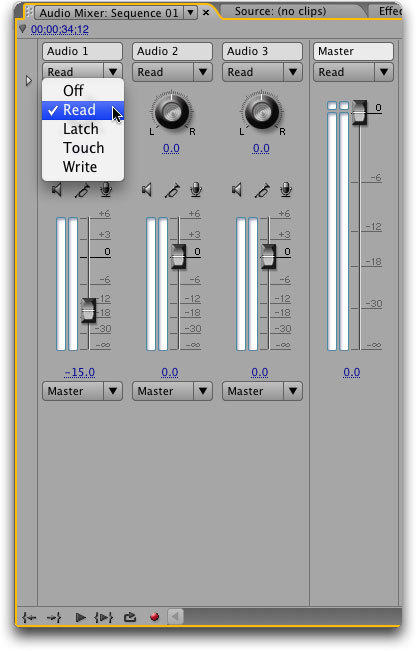
7 SET AUTOMATION MODE TO READ
When you’re finished making adjustments, immediately set the Automation Mode back to Read (the default). This ensures that you don’t accidentally record more changes to the volume during subsequent playbacks when you’re just previewing the audio.
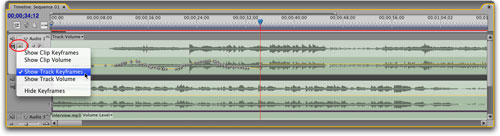
8 REVEAL KEYFRAMES IN THE TIMELINE
While you were in Write mode, Premiere Pro added keyframes in the Timeline. To see them, twirl down the music track in the Timeline (if it isn’t already), click the Show Keyframes icon, and select the Show Track Keyframes option. Notice the keyframe at 34 seconds. That was when we quit making adjustments. By default, Premiere Pro adds a keyframe as soon as you switch the Automation mode back to Read, returning the property to its setting before you started adjusting.
9 ANOTHER TRACK
Repeat this process with another track (in our example, the dialog). Set its Automation Mode to Write and leave all other tracks set to Read. Return the CTI to the start of the sequence, hit the Spacebar, adjust the volume slider while listening, and when you’re done making adjustments, hit the Spacebar once again to pause playback. While you were recording changes to the dialog, did you notice the music track’s slider moving up and down by itself, as if a ghostly hand were adjusting it? It was really just displaying the changes you made earlier.
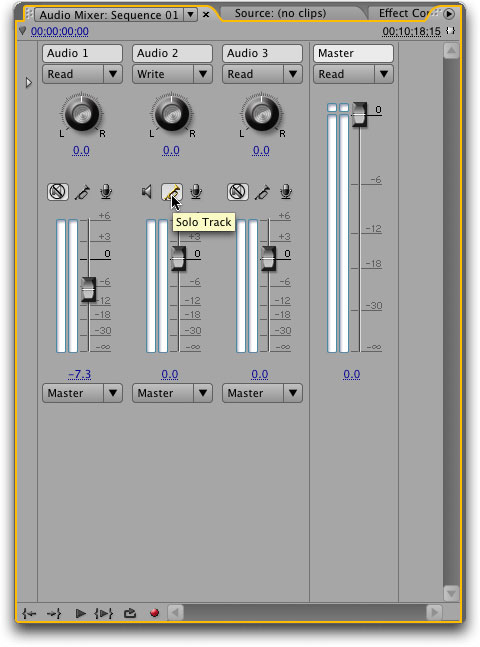
10 SOLO TRACK
While repeating the same steps with other tracks, you might find yourself getting distracted by the music and dialog. In this example, we want to record adjustments to the ambiance track without hearing the other tracks. So click the Solo Track icon. Once you’re done recording new levels, click the Solo Track icon to toggle it off so you can hear all the tracks again.
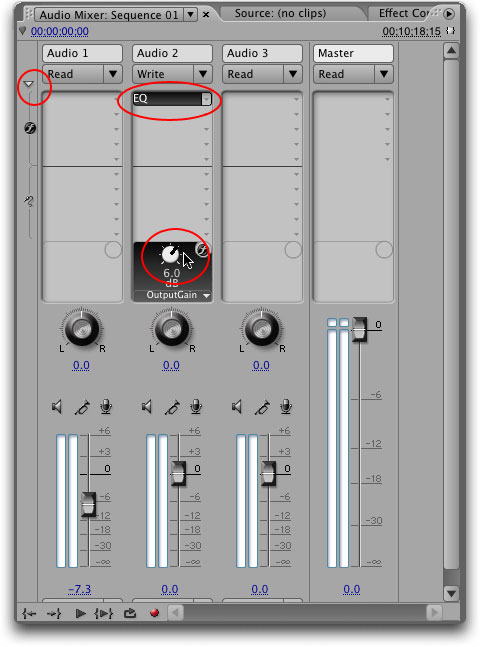
11 ADDING AN EFFECT
We decided to add an effect to the ambiance track. Click the right-facing arrow to the left of the mode drop-down menus in the Audio Mixer to show the effects for each track. Click on one of the down-facing arrows in one of the tracks to choose an effect. Premiere records keyframes to an effect the same way it records them for volume. Just set the track’s Automation Mode to Write and adjust the effect’s control in real time, while listening to the playback. Premiere wrote the appropriate keyframes to the Timeline.
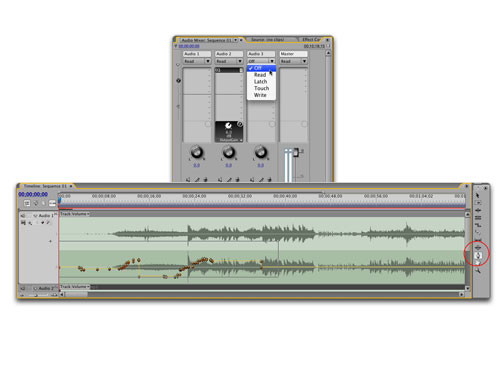
12 AUTOMATION OFF
If you have second thoughts about changes that you’ve made to a track, play back the audio again, but this time change that track’s Automation Mode to Off. This will allow you to hear what the audio sounded like before you made adjustments. In our example, we decided the keyframes were a mistake. To remove keyframes, switch to the Pen tool and drag a rectangle around the keyframes in the Timeline to select them all. Then press Delete (PC: Backspace) on the keyboard.
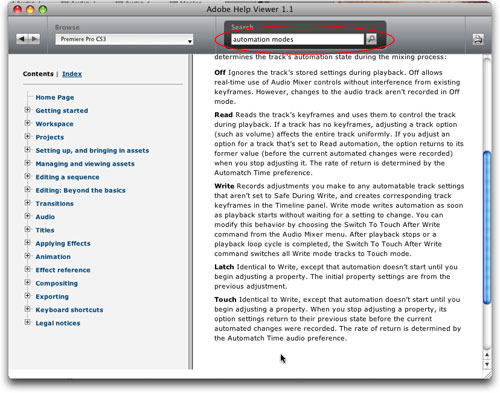
13 OTHER MODES
As for the other Automation modes, Latch and Touch don’t immediately start recording keyframes during playback like the Write mode. They start when you begin making adjustments. So if you hit play and then don’t make an adjustment until two seconds into the sequence, Premiere won’t start laying down keyframes until two seconds. When you pause playback, Latch (like Write) sets the rest of the Track to the level of your last adjustment; Touch returns the rest of the track to whatever level it was before you began making adjustments. Visit the Help Viewer under the Help menu to learn more about each of the Automation modes.