Action on the Water with Chris Garrison

As a commercial photographer who shoots a healthy mix of action sports and lifestyle advertising, I rely heavily on high-powered Elinchrom Ranger strobes and PocketWizard’s HyperSync technology (more on this later) for outdoor shooting. When working with water sports, there’s a lot of production that goes into getting a single image from the day. Trying to get a few different looking images from a single shoot is almost unimaginable, but with a little planning and athlete knowledge, we’ll explain how you can pull off a few different lighting styles in a single session.
Preparation
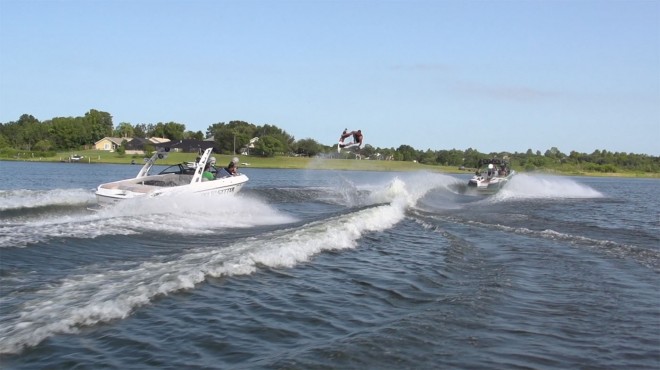
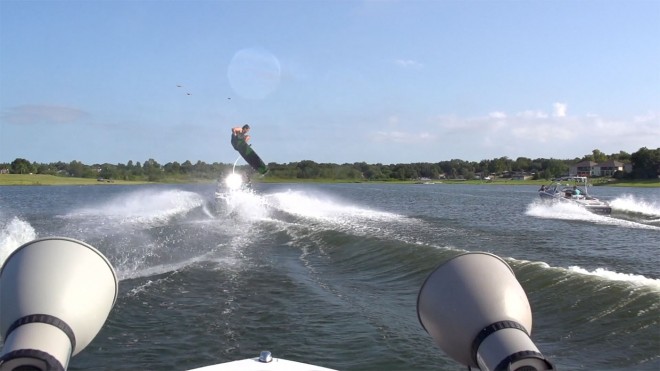
When preparing for any water sports shoot (wakeboarding, skiing, Jet Skiing, boating, etc.), you must remember you’re shooting on water, which means you’re limited to relying on boats, people, weather, wind, and outdoor lighting conditions. When shooting wakeboarding, I’ll shoot with at least two boats and a Jet Ski or third boat for chase. For this particular shoot, we used three boats and a driver for each. With three boats, you can do different light setups and get a few different styles. Having the ability to move the flashes around on the water, turn them on and off, and to turn them down is key to getting the different styles. I’ve shot these riders many times, so they plan to do tricks that look good from the side chase position. This is where you chase the riding boat from the side with the athlete coming toward or away from you.
Beyond boats, equipment, people, and favorable conditions by the weather gods, the next most important thing is athlete and sport knowledge. When shooting most action sports, you really want a few points of reference in your photo, the most important being the athlete’s style. Make sure you capture the athlete and trick in the perfect position. Study before you shoot to make sure you know what’s considered good style for that particular sport. Next up, look at the entire photo itself. You want to have the take off and landing spots in the photo. These points of reference in the photo will show where the athlete came from and is going to tell the story. Remember that every athlete has different tricks that he or she is better at doing. Know those tricks and plan the angles for the shot. This will help in the prep of the light setup on the different boats.
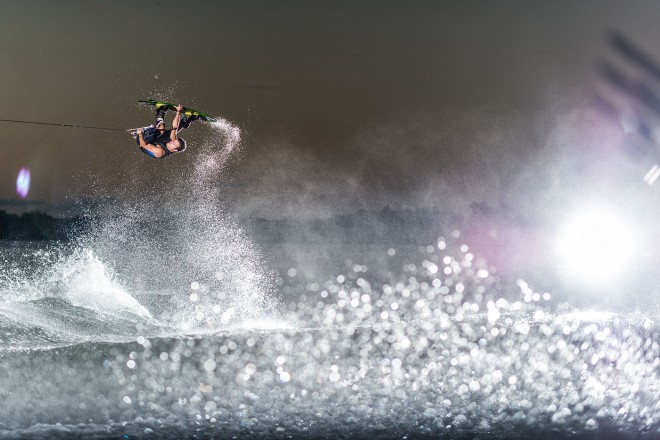
Nikon D3s, NIKKOR 85mm f/1.4, 1/800 at f/2, ISO 160, two Elinchrom Rangers from the boat at full power, one Elinchrom Ranger from chase boat (behind) at full power. Copyright: Chris Garrison
You can easily shoot with just one boat doing drive-by shots. When doing drive-by shooting, you’re limited to a single style shot and one chance every 5 minutes to get a shot as the boat has to turn around. You’ll have a greater chance of getting a shot from a second boat or chase Jet Ski, but then you’re limited to using the same lighting for the entire shoot. Remember, even with HyperSync technology, you’re still limited to the amount of time you can shoot. Once the sun goes down, the athlete cannot see the wake or the landing.
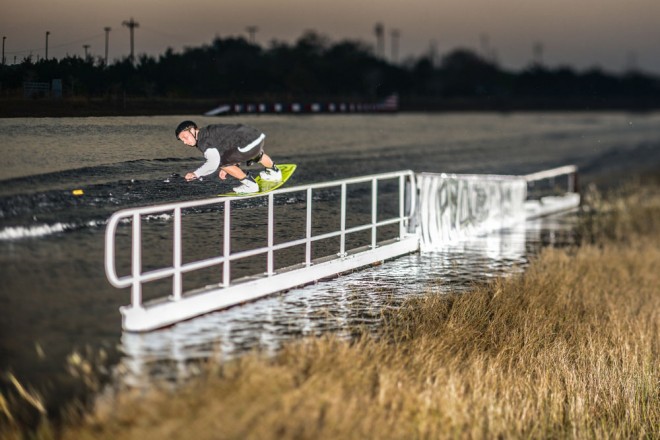
Chris Garrison
Equipment
When working on water you have to remember everything will get wet, take impacts, get stepped on, and take the worst abuse imaginable, so you need lights that can take it. You’re also dealing with the worst environment possible for syncing flashes with water, radios, electronics, and the distance of the receivers. If that’s not enough, there are ever-changing distances and lighting conditions. With the right equipment choices, you can tackle all of this with ease. It’s important to have the right grip equipment or assistants to handle the lights for you. A few extra steps or another phone call can save your flashes and you a headache.
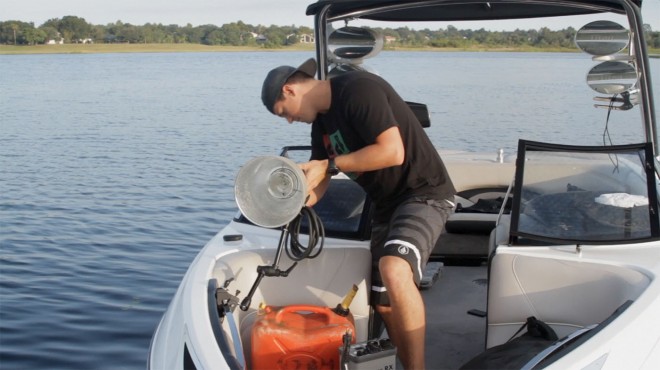
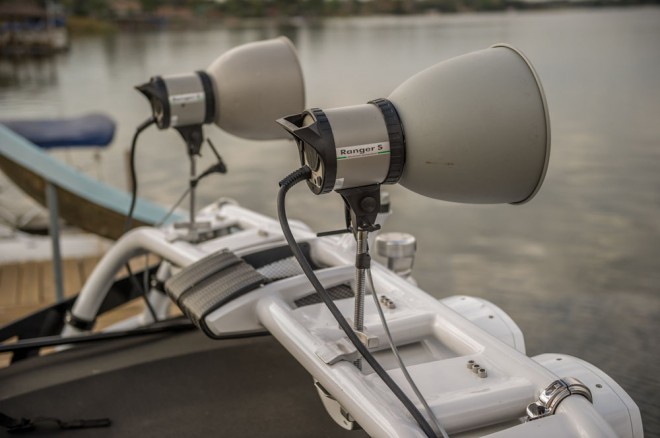
The first step is getting the right lights on a boat. There are no power outlets, so you need to use battery-powered strobes. The athletes are at least 80′ from the riding boat, and 20–40′ from any chase boat. The lights and packs will take a lot of abuse, from the boat hitting rollers to people stepping on them. I use Elinchrom Ranger RX Speed AS packs with S or A Heads. These battery packs will take a beating and are water-resistant. They also offer a lot of power for shooting over long distances and overpowering the sun. The Speed AS pack offers a larger battery for more flashes and faster recycling. The S Head has a longer flash duration, which is preferred for HyperSync but not required. The A Heads have a supershort duration, which still works well with HyperSync and is awesome for freezing the motion in darker environments. Always use a long-throw reflector to get the maximum power and light distance with wake. The 10.5″ sports reflector is the best all-around reflector for this. In short, PocketWizard’s HyperSync allows you to use much faster shutter speeds (up to 1/8000, depending on the camera and flash combination) with your full-power flash than you can when relying on your camera’s x-sync.
With the flashes sorted, you have to get them to stay on the boat, and wakeboard boats aren’t too flash friendly. There will be a lot of vibration, impacts from the wake, sudden stops and starts, and uneven driving and surfaces. You’ll need a lot of weight or a solid clamp to make sure they don’t go anywhere.
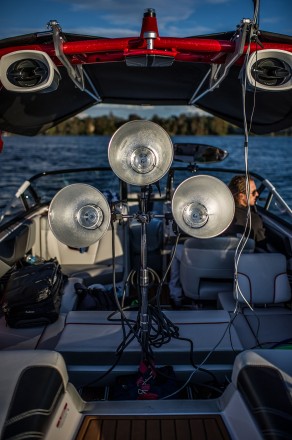
When using a stand, you’re limited to the room on a boat and the water sacs (ballast bags that weigh about 800 lbs when full) taking up most of the room. I use Master C Stands from Kupo (www.kupogrip.com) to work around the water sacs and uneven surfaces, and also attach a three-way clamp and head adapters to mount more than one light to a single stand.
Another option is to mount the lights to the wake tower. Most towers in new boats are way too thick for any super clamp, so I use Kupo 9″ Super Viser Clamps to mount lights to a tower. Viser Clamps hold extremely tight and don’t lose their grip. Every inch counts when lighting wake and every boat is different. If the tower is far forward, you may be better off using the C Stand setup, as we did for this shoot. If the boat has a lot of water sacs, you might opt for Viser Clamps. If you’re on a budget, get a few friends to hold the flashes for you and have them track the athlete with the flashes, as well.
When it comes to triggering the flashes, there will be a lot of distance between you and the flashes with all sorts of electronics, water, people on cell phones, and high-speed motion. I use PocketWizards exclusively. They have a lot of firing range, durability, and most importantly, HyperSync. Use a high shutter speed to freeze the motion. Typically when syncing flashes, you can only shoot around 1/250, which won’t freeze any motion with ambient light. This is where the PocketWizard FlexTT5 or MiniTT1 come in. These allow you to shoot with higher shutter speeds and still sync the flashes. This way you get a well-lit shot and no ambient light or motion blur. PocketWizard also makes the PowerST4 that works exclusively with the Elinchrom line. The Elinchrom Ranger, FlexTT5, and ST4 combination for Nikon is one of the best for HyperSync technology.
The lighting will constantly change during a sunset shoot. You’ll need to be able to turn flashes on or off and adjust the power levels. You can have the people on the boat change it for you, but that tends to be difficult if they’re not used to the power packs, if they can even hear you. Use the AC3 ZoneController from PocketWizard, which enables you to change the power settings on your flash directly from your camera.
The last part is your camera, lens, and settings. There’s a lot of high-speed motion and backgrounds in the images. Typically, you want to shoot around at least 1/800 to freeze motion and f/5.6 to separate the background, depending on the distance. Shoot in AF-C mode (or similar if you’re not using a Nikon) to get a constant focus. The rider will never be in the same spot, so you can almost never prefocus an image. I usually use the Nikon D3s on AF-C at around 1/1000, with an aperture of f/1.8 or f/3.2, depending on the shoot. I’ll add Hoya ND (neutral density) filters and push the flash to help drop the ambient light and brighten the athlete. The best all-around focal length for shooting from a chase boat is 50–110mm. A zoom in this range is great when you’re first learning to shoot this angle.
The Shoot
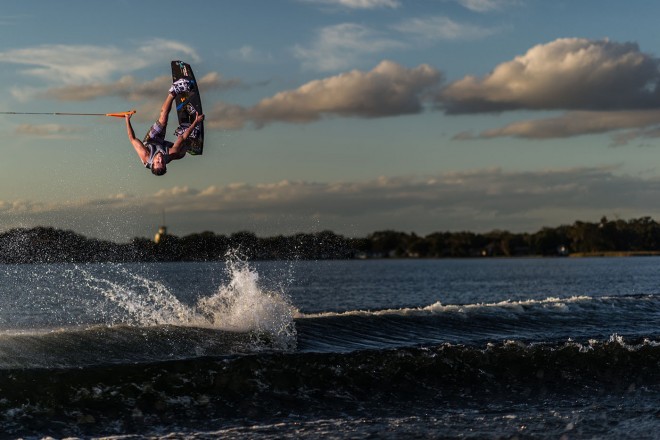
Nikon D3s, NIKKOR 85mm f/1.4, 1/800 at f/1.8, ISO 100, three Elinchrom Rangers from the riding boat at full power. Copyright: Chris Garrison
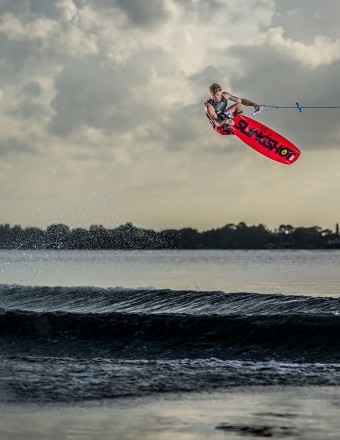
Starting the shoot early is key to getting different lighting styles in one shoot. This is well before sunset and will be very bright. Putting three Rangers on the riding boat or using around 3300 Ws of power will help add a great effect. You can use HyperSync, high-power strobes, and ND filters to bring down the ambient light and highlight the rider. This gives the effect of a sunset shoot, but in the middle of the day. You’ll be shooting alongside the riding boat in a chase both with the athlete coming at or going away from you.
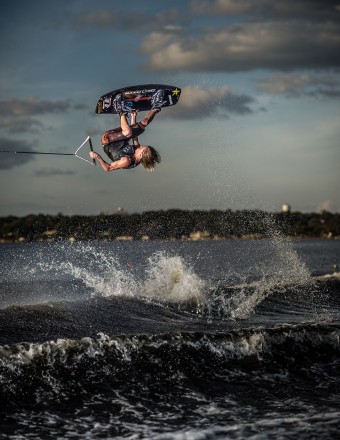
Nikon D3s, NIKKOR 85mm f/1.4, 1/800 at f/2, three Elinchrom Rangers from the riding boat at full power. Copyright: Chris Garrison
Moving into presunset, just before the sun is at the horizon, you can capture the golden haze in the sky. Changing the lighting here will help with the rest of the shoot. You can move one Ranger to a third boat to drive directly behind the rider inside of the wake. This adds a rim light or highlight to the athlete to help him pop from the background. It also adds a totally different effect and style. This is shot the same as the first part of the shoot.
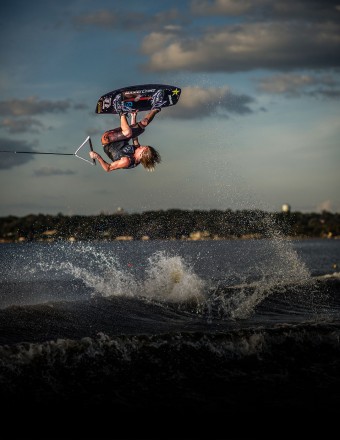
Nikon D3s, NIKKOR 85mm f/1.4, 1/800 at f/2, ISO 160, two Elinchrom Rangers from the riding boat at full power, one Elinchrom Ranger from chase boat (behind) at full power. Copyright Chris Garrison
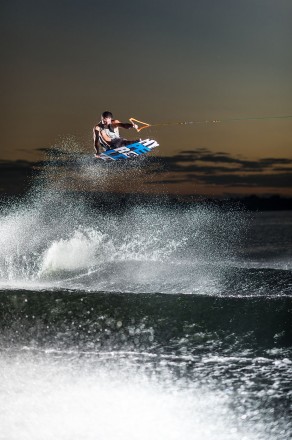
Next is shooting directly into the sun when it’s close to the horizon, which makes the images look totally different. You can have the third chase boat behind the rider, or remove it for wider shots. Remember, when shooting into the sun, the wider the lens the smaller it is in the images. Don’t zoom in because the sun will blow out the rider. Stay at a medium zoom—no more than 85mm on full frame. Just two Rangers firing from the riding boat adds a nice, natural effect to the shot and still allows the rider to stand out.
At this point, the sun will be below the horizon and you’ll have a maximum of around 20 minutes of shooting time. Moving the third chase boat directly behind the athlete, inside of the wake, provides a dramatic look to the image. You’ll get great lighting on the athlete and the water spray will show motion and style. It will almost have a studio-like look and you can add the flash to the image for a different effect, as well.
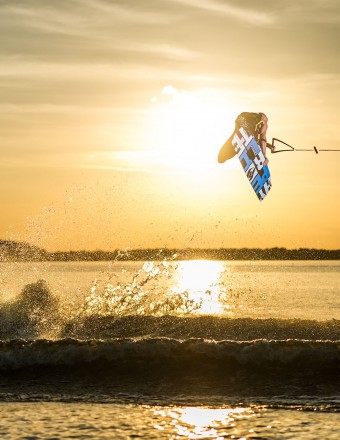
Nikon D3s, NIKKOR 85mm f/1.4, 1/1000 at f/2.2, ISO 125, three Elinchrom Rangers from the riding boat at full power.
Copyright: Chris Garrison
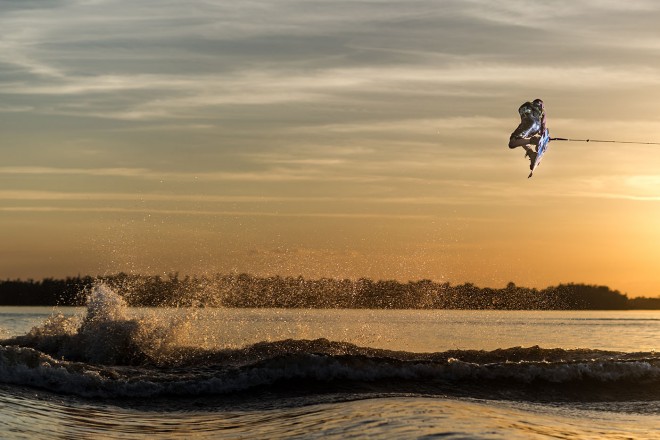
Nikon D3s, NIKKOR 85mm f/1.4, 1/800 at f/2.2, ISO 125, three Elinchrom Rangers from the riding boat at full power.
Copyright: Chris Garrison
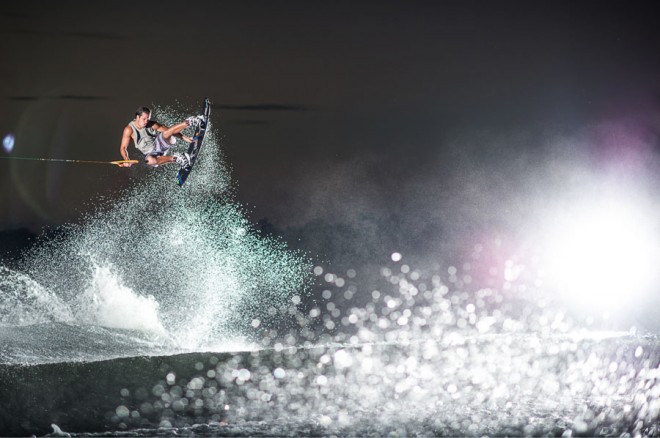
Nikon D3s, NIKKOR 85mm f/1.4, 1/500 at f/2, ISO 200, two Elinchrom Rangers from the riding boat at full power, one Elinchrom Ranger from chase boat (behind) at full power
Copyright: Chris Garrison
Practice and Style
Lighting is very important in action sports. It shows style and creativity as much as the athletes. Walking away from a single shoot with this many images is rewarding for you and the athlete. It takes a lot of practice and planning, but when you have it dialed in, you’ll be invaluable to shoot with. Remember to always push yourself and don’t be afraid to try different angles, ideas, and stay up on the newest technology.
Get inspired with more takes on light and photography with this Conversation in Light into Travel and Nature Photography. For more action based photography, try this post by Tom Bol, on location river rafting.
About the Author: Chris Garrison is photographer who specializes in shooting extreme sports as much as he does participate in them. Garrison divides his time between his home state of Florida, where he shoots wakeboarders, skimboarders in the summer sunshine and Colorado, where he captures shots of snowboarders, skiiers and the like. Chris would also like to thank all of the amazing companies that help support him in what he does. Not only do they keep him up to date, but they also help push his limits as far as the athletes or events he is shooting.

