
Finishing Fireworks Using Blend Modes & Layer Masks in Photoshop CC
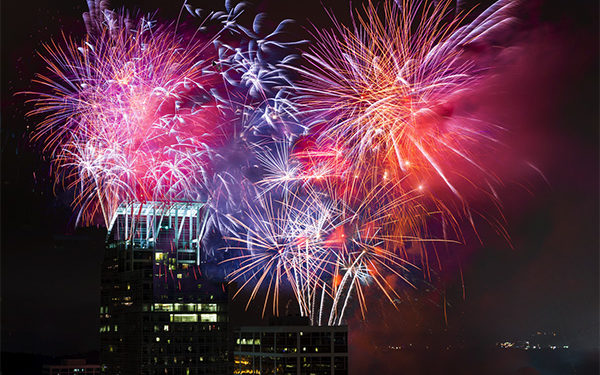
Everybody loves fireworks! Lots of us shoot them off. Even more of us set up the tripod and photograph them, hoping to capture the magnificence of the finale. For me, that last shot never measures up, so let’s create a blazing light spectacle with Camera Raw, layer masks, and blend modes in Photoshop.
KelbyOne members can download the four RAW files and four JPEG files used in this tutorial from the KelbyOne member website. [All download files are for personal use only. To learn more about KelbyOne, click here. These files are only for working this tutorial. If using your own files, you’ll need to use firework images that were shot on a tripod in the same sequence so they’ll be aligned when you open them later in Photoshop. The following steps work in Photoshop CS5, CS6, and CC.
STEP ONE: In Adobe Bridge, navigate to the folder where your RAW firework files reside. Click the first file, and then Shift-click the last file to select all the RAW files. Now, press Command-R (PC: Ctrl-R) to open them in Camera Raw hosted in Bridge.
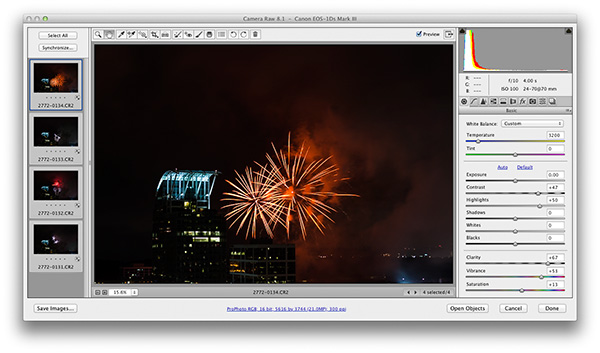
STEP TWO: Start by clicking the Select All button in the upper-left corner of the Camera Raw dialog or by typing Command-A (PC: Ctrl-A). If you’re using the practice files, move the Temperature control to 3200. Increase the Contrast (+47), Highlights (+50), Clarity (+67), Vibrance (+53), and Saturation (+13.) I recommend you experiment with these settings for your own files. See what you like. With all of the RAW files selected in the Filmstrip, the changes made to the one framed in blue are propagated to the rest automatically. Click Done to return to Bridge.
STEP THREE: The adjusted RAW files are still selected in Bridge. Choose Tools>Photoshop>Load Files into Photoshop Layers. These four files were shot in sequence with the camera on a weighted tripod, so they’re already aligned. All of the tonal changes were made in Step Two. Choose Image>Mode>8 Bits/Channel.
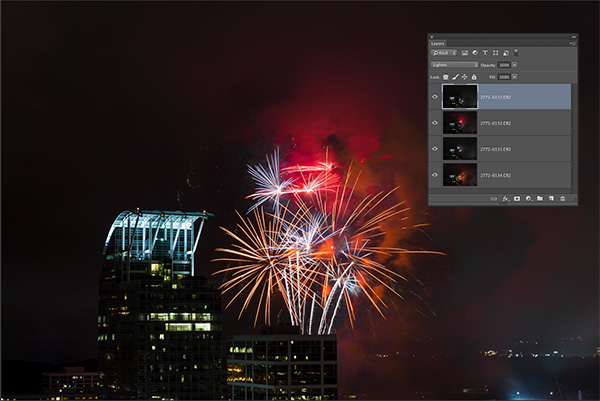
STEP FOUR: If you’re using the download files, drag the layers in the Layers panel so they are in the following order from top to bottom: 2772-0133, 2772-0132, 2772-0131, 2772-0134. Click on the layer thumbnail of the top layer. Change its blend mode to Lighten. If you would like to use the keyboard shortcut for Lighten, press V to switch to the Move tool, hold down Shift-Option (PC: Shift-Alt), then press the G key. The Lighten blend mode will reveal the fireworks in the layer below. Repeat for the next two lower layers. Leave the bottom layer’s blend mode at Normal. The result is reasonably spectacular. It’s still something short of a true fireworks finale that I pictured in my mind. Let’s add some more fireworks.
STEP FIVE: Choose File>Place and either navigate to the downloaded folder or to another one of your fireworks photos in the same image sequence. Choose 2772-0162.jpg, then click Place. The file appears in the image in Free Transform. Resize as needed, and click the Commit checkmark in the Options Bar.

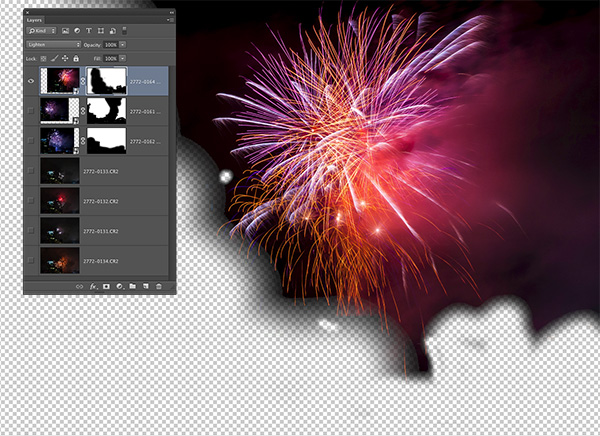
STEP SIX: Drag this new layer to the top of the layer stack in the Layers panel. Change the blend mode of this new layer to Lighten. Using the Move tool, drag it into position (in this example, to the left so the fireworks overlap the building with the sail). Click the third icon counting from the bottom left of the Layers panel to add a layer mask. Press D to set the default colors then X to make the Foreground color black. Using the Brush tool (B), paint out any distractions, such as the extra building in this example and any of the sparkles in front of the main building. I find it useful to Option-click (PC: Alt-click) on the masked layer’s Eye icon to see only that layer to make sure I removed all the distractions.

STEP SEVEN: Option-click (PC: Alt-click) where that same layer’s Eye icon used to be to toggle the hidden layers back to visible.
STEP EIGHT: Place another image into the stack (2772-0161.jpg if you’re using the downloads). Move it even farther to the left and change its blend mode to Lighten. Add a layer mask then paint out anything that doesn’t belong. My version shows light trails in front of the sail as if they were launched from a parking deck behind it.
STEP NINE: Place 2772-0164.jpg into the stack, or another one of your own images. Set its blend mode to Lighten. Mask it appropriately then drag it to the right so its smoke almost touches the right edge of the frame.
STEP TEN: Place 2772-0165.jpg. After setting the blend mode to Lighten and masking, move it to the left. It’s overpowering even at a lower Opacity. Let’s work with this layer’s size. The Place command in Photoshop always makes the placed layer a smart object. It can be sized down and back up again as many times as you want with no loss of quality. Press Command-T (PC: Ctrl-T) for Free Transform. Hold the Shift key then drag a corner handle inward. Adjust these fireworks’ size to taste, then click the Commit checkmark.
STEP ELEVEN: Hold down Shift-Command-Option (PC: Shift-Ctrl-Alt), then press the E key. This copies all of the visible layers into a single new layer above the active layer in the layer stack. Retouch out anything that you find distracting. For me, the flare of the parking light is simply annoying. A little bit of the Clone Stamp tool (S) and it’s gone away.

The camera can’t do this, but fortunately, Photoshop can. That’s the secret for making a spectacular fireworks finale photograph that’s both ooh- and aah-inspiring.
This article courtesy of Photoshop User magazine, the official publication of KelbyOne, which provides quality online education for creative people. For more information, visit KelbyOne.com.