
Excerpt from The Adobe Photoshop Lightroom CC Book for Digital Photographers
Let’s say you added a vignette to a bridal shot. Well, what if you wanted to see a version in black and white, and a version with a color tint, and then a real contrasty version, and then maybe a version that was cropped differently? Well, what might keep you from doing that is having to duplicate a high-resolution file each time you wanted to try a different look, because it would eat up hard drive space and RAM like nobody’s business. But luckily, you can create virtual copies, which don’t take up space and allow you to try different looks without the overhead.
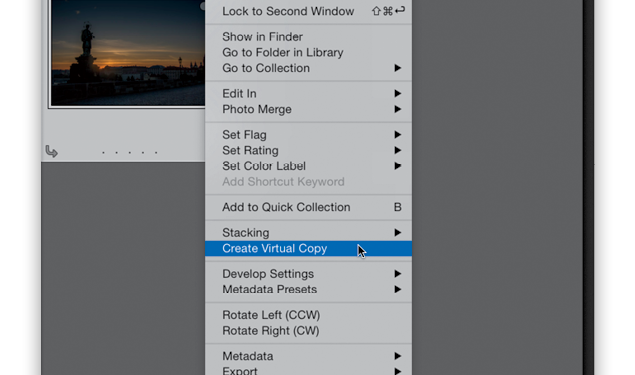
Step One: You create a virtual copy by just Right-clicking on the original photo and then choosing Create Virtual Copy from the pop-up menu (as shown here), or using the keyboard shortcut Command-‘ (apostrophe; PC: Ctrl-‘). These virtual copies look and act the same as your original photo, and you can edit them just as you would your original, but here’s the difference: it’s not a real file, it’s just a set of instructions, so it doesn’t add any real file size. That way, you can have as many of these virtual copies as you want, and experiment to your heart’s content with-out filling up your hard disk.

Step Two: When you create a virtual copy, you’ll know which version is the copy because the virtual copies have a curled page icon in the lower-left corner of the image thumb-nail (circled in red here) in both the Grid view and in the FilmÂstrip. So now, go ahead and tweak this virtual copy in the Develop module any way you want (here, I increased the Exposure, Contrast, Shadows, Clarity, and Vibrance), and when you return to the Grid view, you’ll see the original and the edited virtual copy (as seen here).

Step Three:Â Now you can experiment away with multiple virtual copies of your original photo, at no risk to your original photo or your hard drive space. So, click on your first virtual copy, then press Command-‘ (PC: Ctrl-‘) to make another virtual copy (that’s right- you can make virtual copies of your virtual copy), and then head over to the Develop module, and make some adjustments (here, I made changes to the White Balance, adding lots more blue and magenta [I took the Temp to 10 and set my Tint at +55] to give this a twilight look. I also decreased the Exposure a little). Now, make some more copies to experiment with (I made a few more copies and made some more White Balance, Exposure, and Vibrance setting changes). Note: When you make a copy, you can hit the Reset button at the bottom of the right side Panels area to return the virtual copy to its original unedited look. Also, you don’t have to jump back to the Grid view each time to make a virtual copy that keyboard shortcut works in the Develop module, too.

Step Four: Now, if you want to compare all your experimental versions side by side, go back to the Grid view, select your original photo and all the virtual copies, then press the letter N on your keyboard to enter Survey view (as shown here). If there’s a version you really like, of course you can just leave it alone, and then delete the other virtual copies you don’t like. (Note: To delete a virtual copy, click on it and press the Delete [PC: Backspace] key, and then click Remove in the dialog that appears.) If you choose to take this virtual copy over to Photoshop or export it as a JPEG or TIFF, at that point, Lightroom creates a real copy using the settings you applied to the virtual copy.

Learn how to do more from The Adobe Photoshop Lightroom CC Book for Digital Photographers here: http://kel.by/lrccbook and check out some of Scott’s Lightroom classes.

