Using Image Overlay in Lightroom to Preview Layouts While Shooting Tethered

This is one of those features in Lightroom that once you try it, you fall in love with it, because it gives you the opportunity to make sure an image you’re shooting for a specific project (like a magazine cover, brochure cover, inside layout, wedding book, etc.) looks and fits the way you want it to, because you get to see the artwork as an overlay in front of your image as you’re shooting tethered. This is a big time and frustration saver, and it’s simple to use (you just need a little tweaking in Photoshop to set up your artwork).
Step One:
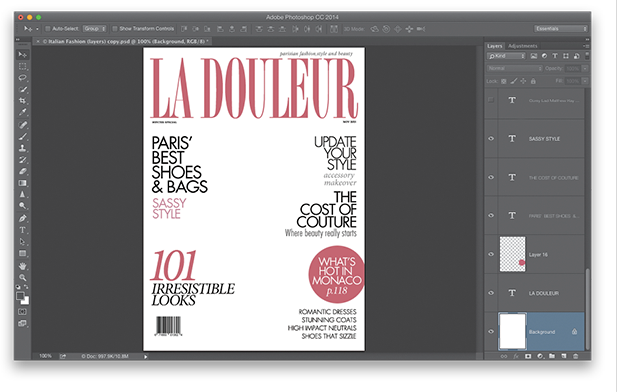
You’ll need to start in Photoshop by opening the layered version of the cover (or other artwork) you want to use as an overlay in Lightroom. The reason is this: you need to make the background for the entire file transparent, leaving just the type and graphics visible. In the cover mock-up we have here, the cover has a solid white background (of course, once you drag an image in there inside of Photoshop, it would simply cover that white background). We need to prep this file for use in Lightroom, which means: (a) we need to keep all our layers intact, and (b) we need to get rid of that solid white background.
Step Two:
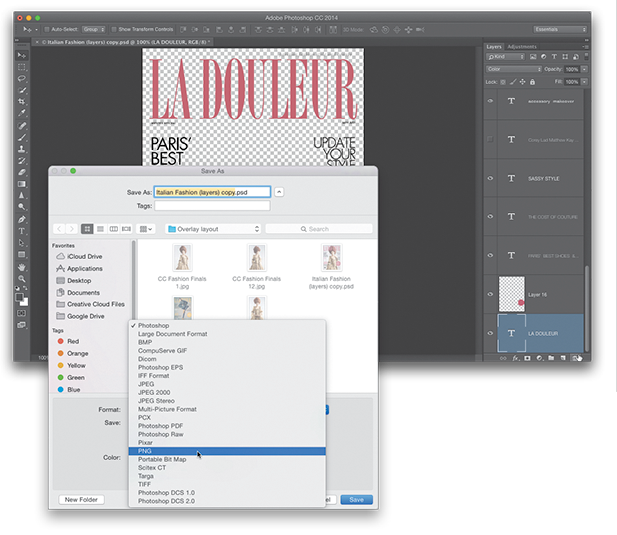
Luckily, prepping this for Lightroom couldn’t be simpler: (1) Go to the Background layer (the solid white layer in this case), and delete that layer by dragging it onto the Trash icon at the bottom of the Layers panel (as shown here). Now, (2) all you have to do is go under the File menu, choose Save As, and when the Save As dialog appears, from the Format pop-up menu (where you choose the file type to save it in), choose PNG. This format lets you keep the layers intact and, since you deleted the solid white background layer, it makes the background transparent (as seen here). By the way, in the Save As dialog, it will tell you that it has to save a copy to save in PNG format, and that’s fine by us, so don’t sweat it.
Step Three:
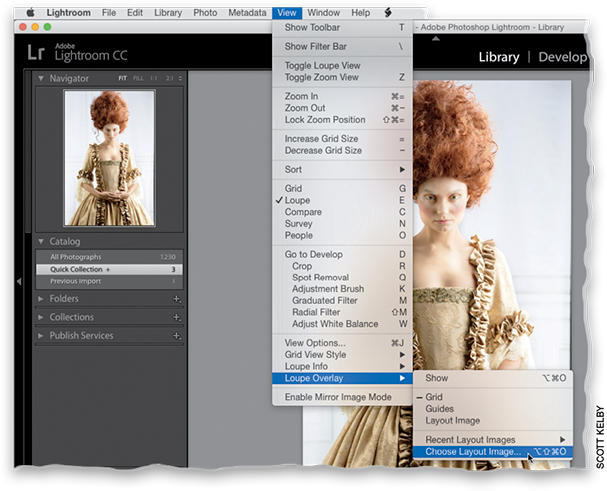
That’s all you have to do in Photoshop, so head back over to Lightroom and go to the Library module. Now, go under the View menu, under Loupe Overlay, and select Choose Layout Image (as shown here). Then, find that layered PNG file you just created in Photoshop and choose it.
Step Four:
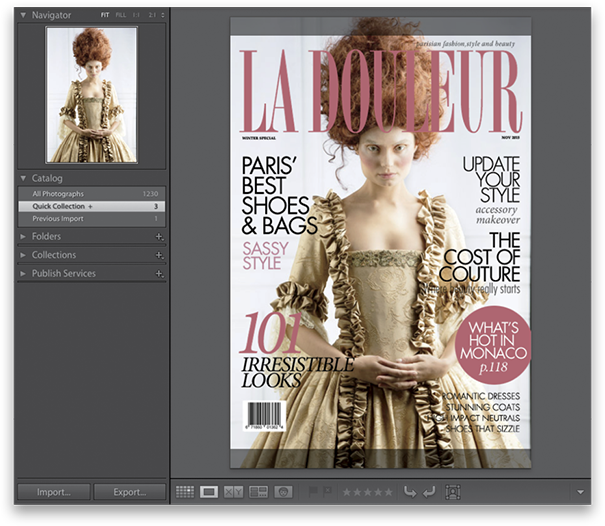
Once you select your layout overlay image, your cover appears over whichever image you currently have onscreen (as shown here). To hide the cover, go under the same Loupe Overlay menu, and you’ll see that Layout Image has a checkmark by it, letting you know it’s visible. Just choose Layout Image to hide it from view. To see it again, choose it again. Or press Command-Option-O (PC: Ctrl-Alt-O) to show/hide it. Remember, if you hadn’t deleted the Background layer, what you’d be seeing here is a bunch of text over a white background (and your image would be hidden). That’s why it’s so important to delete that background layer and save in PNG format. Okay, let’s roll on, because there are a few more features here you’ll want to know about.
Step Five:
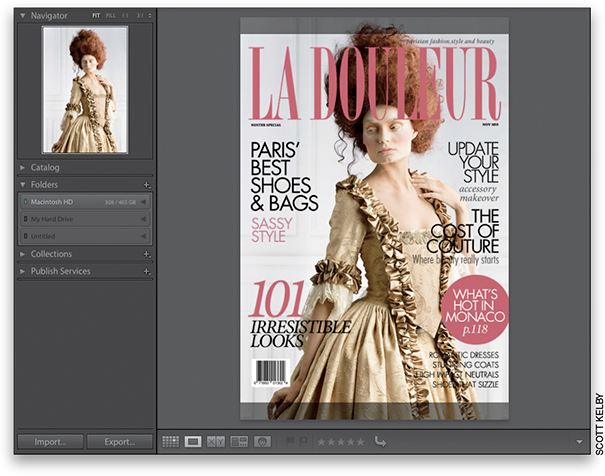
Now that your layout image overlay is in place, you can use the Left/Right Arrow keys on your keyboard to try different images on your cover (or whatever file you used). Here’s what it would look like with a different shot.
Step Six:
When you look at the image in the previous step, did you notice that she’s positioned a little too high? Luckily, you can reposition the cover to see what it would look like with her a little lower. Just press-and-hold the Command (PC: Ctrl) key and your cursor changes into the grabber hand (shown circled here in red). Now, just click-and-drag on the cover and it moves left/right and up/down. What’s kind of weird at first is that it doesn’t move your image inside the cover. It actually moves the cover. It takes a little getting used to at first, but then it becomes second nature.
Step Seven:
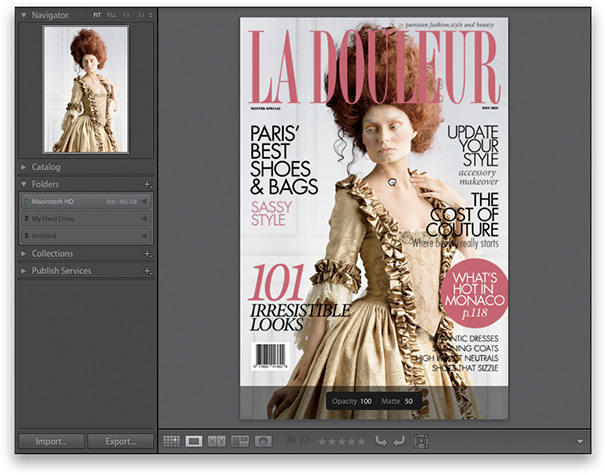
You can control the Opacity level of your Overlay Image, as well (I switched to a different image here). When you press-and-hold the Command (PC: Ctrl) key, two little controls appear near the bottom of the overlay image. On the left is Opacity, and you just click-and-drag to the left directly on the word “Opacity” to lower the setting (as seen here, where I’ve lowered our cover image to 60%). To raise the Opacity back up, drag back to the right.
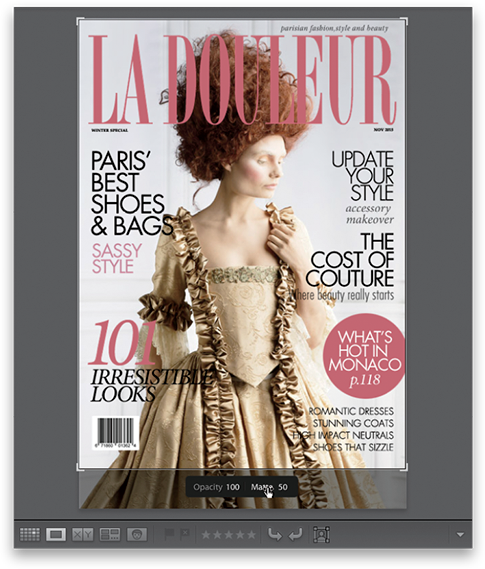
Step Eight:
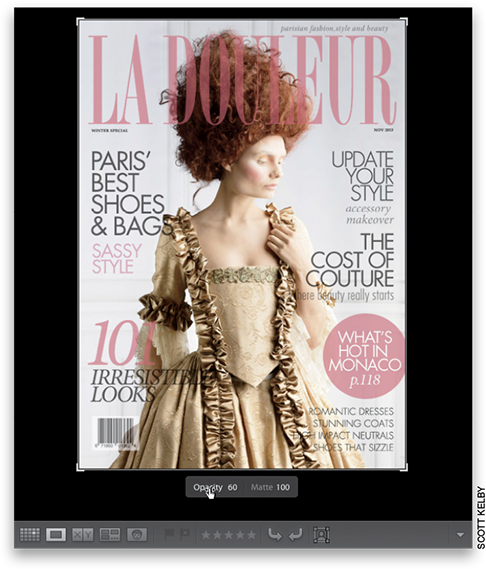
The other control, which I actually think is more useful, is the Matte control. You see, in the previous step, how the area surrounding the cover is solid black? Well, if you lower the Matte amount, it lets you see through that black background, so you can see the rest of your image that doesn’t appear inside the overlay area. Take a look at the image here. See how you can see the background outside the cover? Now I know that this image has room for me to move her either up or down, and parts of her are still there. Pretty handy, and it works the same as the Opacity control—press-and-hold the Command key and click-and-drag right on the word “Matte.”
Excerpted from The Adobe Photoshop Lightroom CC Book for Digital Photographers. Learn how to do more here: http://kel.by/lrccbook and check out some of Scott’s Lightroom classes.