Not all PDF files are created equal. There are many methods for creating PDF documents, both from within the Creative Suite and through other applications. You can create simple RGB, low-resolution, compressed PDFs with a one-step, one-button method through many Microsoft applications. At the other end of the spectrum are high-quality, high-resolution, uncompressed RGB or CMYK PDFs created through Adobe InDesign and Acrobat Distiller. Distiller has one role in life: create PDFs. With InDesign and Distiller, there are a multitude of settings for creating PDFs for just about any purpose. Here’s how to quickly and easily create PDFs using Distiller watched folders and InDesign print styles.
Create a Watched Folder in Distiller
STEP 1 Create a Distiller Watched Folder
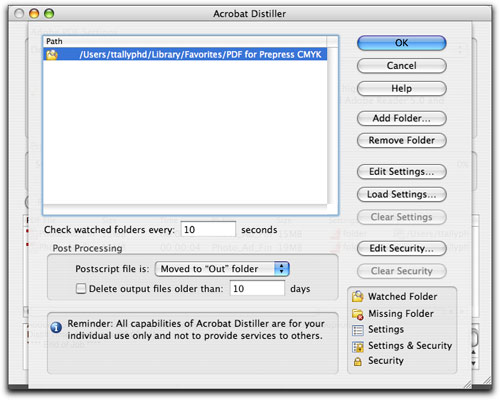
A watched folder is a hot folder into which you’ll print a PostScript file that in turn will be converted into a PDF document using an associated Adobe PDF preset. To create a watched folder, first navigate to an easy-to-access location on your hard drive and make a folder named “PDF for Prepress CMYK.” Then, launch Distiller and choose Settings>Watched Folder. Click on the Add Folder button. Select the folder you just created and click Open. This creates a watched folder that contains an In and Out folder and will also add the folder to the list in the Watched Folder dialog.

STEP 2 Assign PDF Settings to Watched Folder
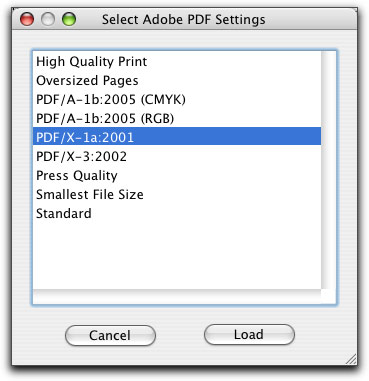
Once you’ve designated a watched folder, you need to assign a set of PDF settings that will be used to process any PostScript files printed or saved to this folder. You have several avenues for assigning PDF settings. The first option is to click the Load Settings button located on the right side of the Watched Folder dialog. From this you can select one of the Acrobat 8 Adobe PDF settings, including one of the PDF/X prepress standards. If the PDF settings you want aren’t available, you can add any of your own Adobe PDF settings to this list.
STEP 3 Add Custom PDF Settings
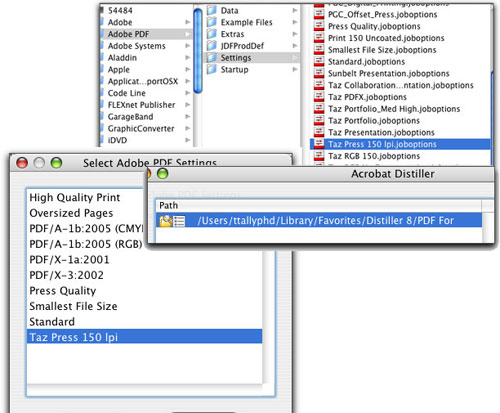
To add previously created Adobe PDF settings to your Distiller 8 list, first close your Watched Folder dialog, then choose Settings>Add Adobe PDF Settings. In the resulting dialog, navigate to the folder where you’ve stored any previously created PDF settings, or to the default Library:Application Support:Adobe PDF:Settings folder (PC: C:\Documents and Settings\All Users\Shared Documents\Adobe PDF\Settings). Once you’ve added the PDF setting(s) you want, click the Load Settings button back in the Watched Folder dialog to assign the PDF setting to your folder. This will add a Settings icon next to the watched folder in the list.
STEP 4 Edit PDF Settings for Watched Folder
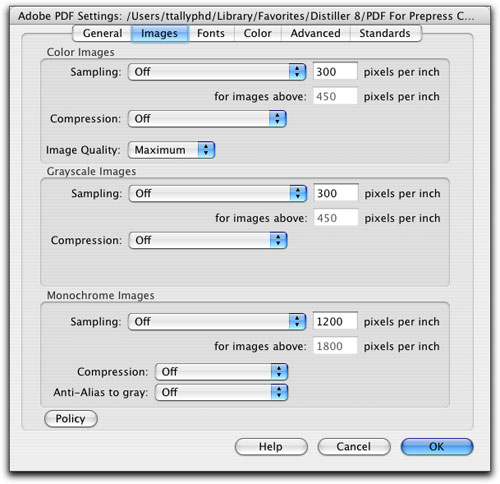
Once you’ve loaded a PDF setting and assigned it to a specific watched folder, you can edit that PDF setting. Click the Edit Settings button located on the right of the Watched Folder dialog. There are six tabs to configure. Here are some key settings to address: In the General tab, Acrobat 4.0 is good for flattened images, but Acrobat 5.0 is required if your document contains transparency. The Images tab controls sampling and compression. Turn off all sampling and compression for the highest quality files. Be aware this creates large PDFs, which is okay for prepress but not for the Web.
STEP 5 Edit PDF Settings, Part 2
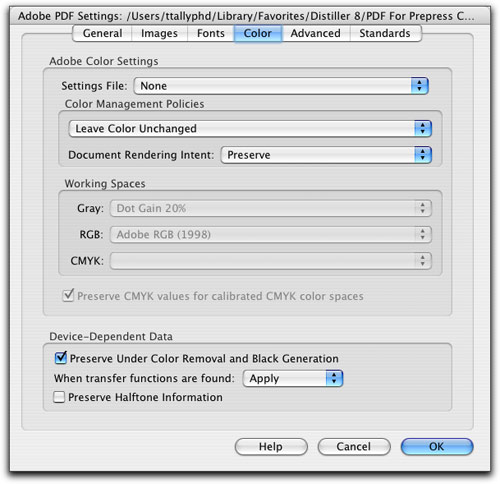
Click on the Fonts tab. Fonts should be embedded in PDF files to maintain the typesetting integrity of your document. Remove any fonts listed in the Never Embed Font area. The Color tab is where you’ll control how the distilling process will handle color in your document. You can use Distiller to convert colors if you like, such as RGB to CMYK, but if you’ve already converted your images (a good idea so you can control the RGB to CMYK process), you can pass the color through by choosing Leave Color Unchanged under the Color Management Policies section. Click OK when you’re done.
STEP 6 Choose Preferences for Watched Folder
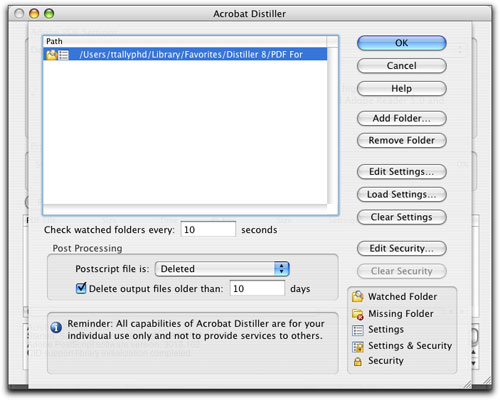
Now that you’ve created a watched folder and assigned it an Adobe PDF setting, you can configure the other settings. Set the PostScript File Is pop-up menu to Deleted so the PostScript file is thrown into the trash after processing. Check the option to Delete Output Files Older than X (here 10) Days, which requires Distiller to trash any PDFs left in the watched folder for more than the assigned number of days—you’ll likely move any PDF you want to keep. Click Edit Security to assign security to your PDF (not recommended for prepress PDFs).
Print a PostScript File from InDesign
STEP 7 Preflight Your InDesign Files
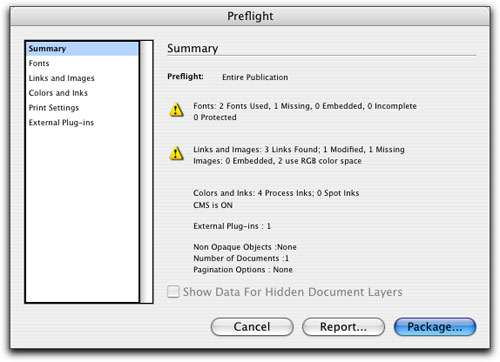
The first step to creating a high-quality PDF document from within InDesign is to make sure you have all the font files and high-resolution graphic files attached or linked to your open InDesign document. These are critical resources that must be available to include in your PDF document. The easy way to check this is to run InDesign’s Preflight utility. Choose File>Preflight. The Preflight dialog will show yellow warning signs next to any missing font or graphic resources. PDFs destined for prepress applications should also have CMYK rather than RGB color space images.
STEP 8 Choose Print Settings for PostScript File
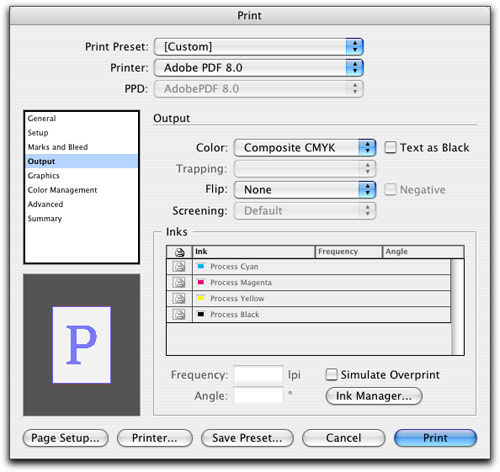
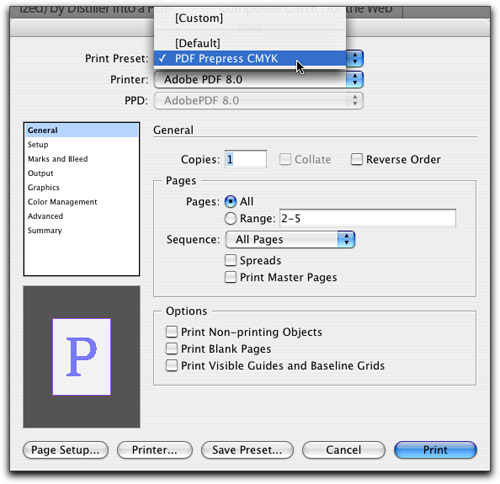
You’ll be creating a PostScript file that will be processed by Distiller into a PDF document. In InDesign, choose File>Print. Some of the key print characteristics to configure are: Under the Setup category, set Printer to Adobe PDF (or PostScript File); Scale to 100%; and Page Position to Centered. Under the Output category, select the Color space you want to use—for commercial printing, choose Composite CMYK; for the Web, choose Composite RGB; and for proofing separations, choose Separations (creating PDF separations is a fast and easy way to see if your print colors will separate correctly).
STEP 9 Print Setup, Part 2
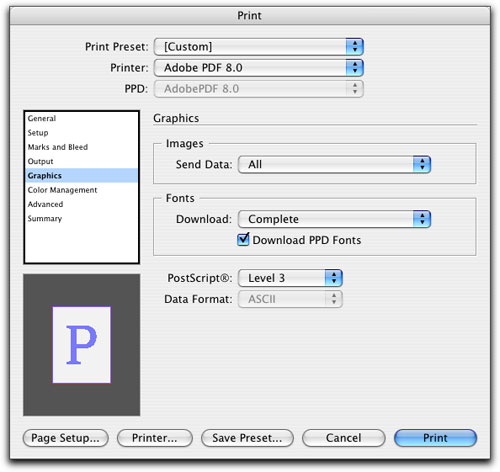
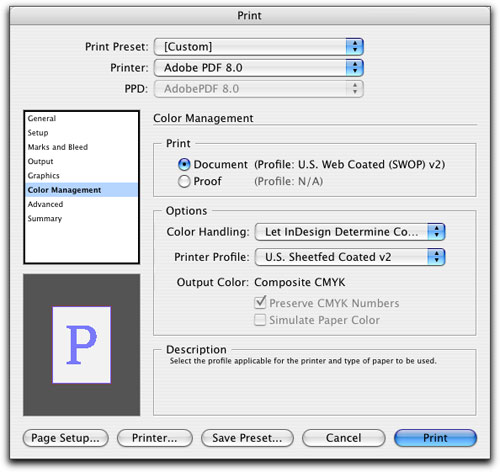
Under the Graphics category, set Send Data to All, to ensure highest quality and to make sure the image data is not compromised. Under Fonts, set Download to Complete, to make sure all of your font files are present for printing and editing of your PDF. Under the Color Management category, select Document in the Print section to create a print PDF, or Proof to create a simulation of another device. Set Color Handling to Let InDesign Determine Colors. For Printer Profile, select the profile (here U.S. Sheetfed Coated v2) of the final device you intend to print to (or simulate, if proofing).
STEP 10 Create Print Presets
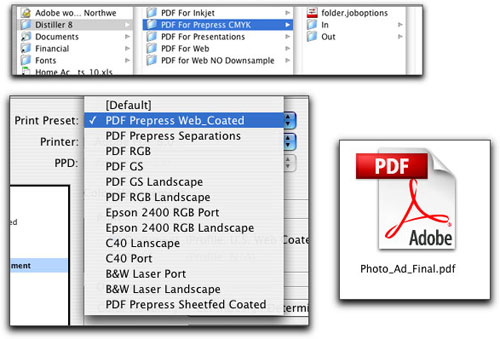
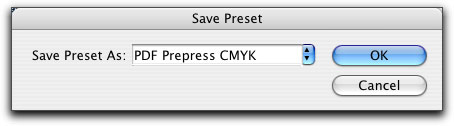
Once you’ve navigated through this sequence of print dialogs a couple of times and had to reconfigure them for various output devices, you’ll know how easy it is to make a mistake on one setting. Print presets to the rescue! Once you have your Print dialog configured, click the Save Preset button. Name the preset to indicate the type of output (here “PDF Prepress CMYK”). This preset will then be available in the Print Preset pop-up list. Choose this preset for a one-step configuration of all your print settings. Create print presets for all of your output variations.
STEP 11 Save PostScript File to In Folder
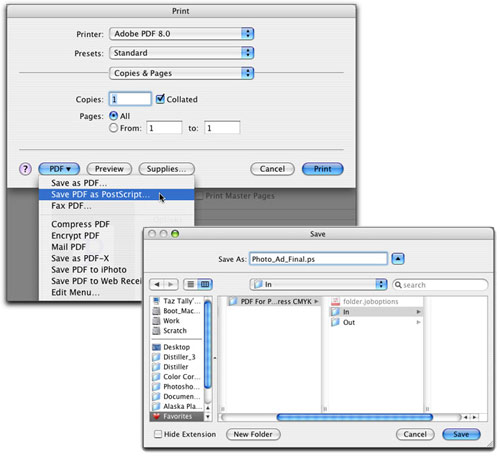
Now it’s time to print your PostScript file. As noted earlier, you can assign either a PDF or a PostScript File printer driver. Here we’re using the PDF printer driver. Click the Printer button at the bottom of the Print dialog. From the resulting Print dialog, select Save PDF as PostScript from the PDF button. In the Save dialog, locate the In folder in your watched folder and note the presence of the PDF settings file. Click the Save button. Back in the original Print dialog, click Print to initiate the creation of the PostScript file.
STEP 12 PostScript File Processing
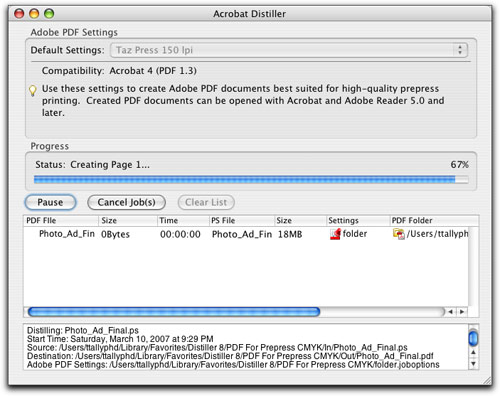
Distiller senses the presence of the completed PostScript file in the In folder and begins processing it into a PDF, using the PDF settings file located in the watched folder. Distiller automatically deletes the PostScript file after the PDF creation (as we designated in Step 6). While the PDF is processing (known as distilling or normalization), you can return to InDesign (or any other application) and continue working. You can save multiple files to watched In folders, and they’ll be lined up in a queue and processed sequentially.
STEP 13 Locate the Distilled PDF in the Out Folder
Distiller automatically saves the PDF file to the Out folder, and it automatically adds the .pdf extension to the end of the filenames. If there are any errors in the PDF creation process, an Error Log file containing information about any problems or why the distilling process wasn’t successful is generated and placed in the Out folder. If you print multiple versions of the same file, name them differently (i.e., “Alaska Photo_1,” “Alaska_Photo_2,” etc.). This will allow you to easily distinguish one version from another.
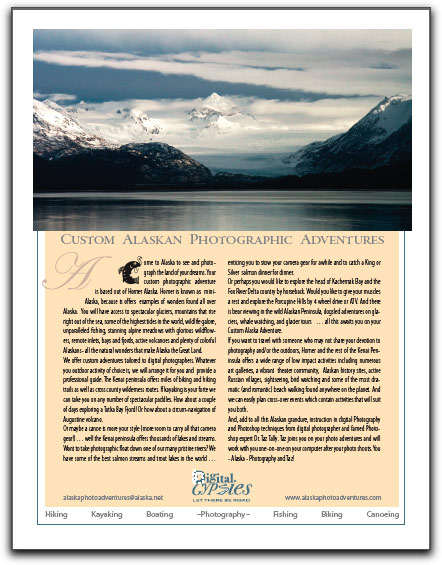
CREDIT: TAZ TALLY
STEP 14 Print Styles and Watched Folders
If you add up all the data fields, checkboxes, and menus in the various Print and Acrobat dialogs, they exceed 100 choices—Yikes! The good news is that these 100+ settings can be narrowed down to two choices: (1) Select a print preset for creating your PostScript file, and (2) select a watched folder to print/save this PostScript to—that’s it! To really simplify your output life, create print styles and watched folders for every type of printing and PDF creation you use.