Two Really Handy Uses for RGB Curves in Lightroom
Excerpt from The Adobe Photoshop Lightroom 5 Book for Digital Photographers
Although Curves have been in Lightroom for a while now, Lightroom 4 was the first version to let you adjust the individual Red, Green, and Blue channels (just like Photoshop does), which can come in really handy for things like fixing sticky white balance problems by adjusting an individual color channel, or for creating cross processing effects (which are very popular in fashion and fine art photography). Here’s how to do both:
Step One:
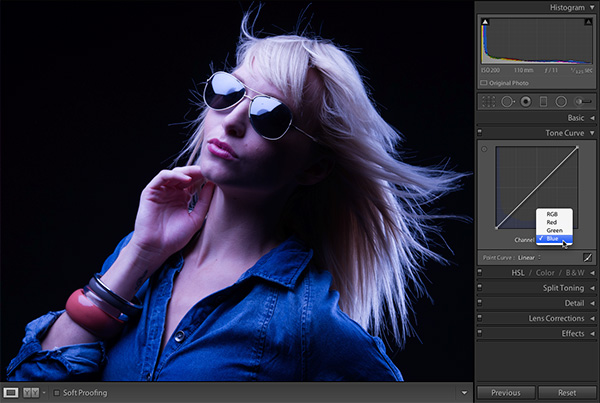
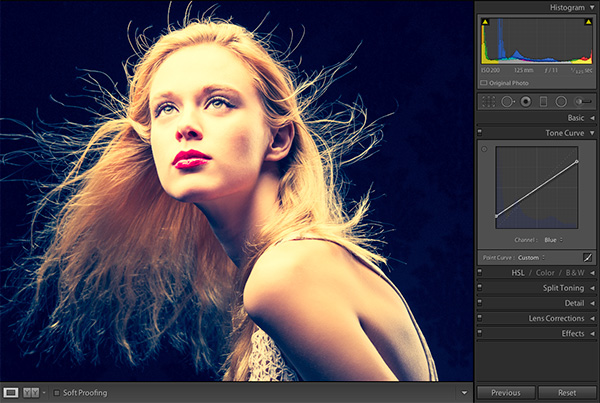
You choose which RGB color channel you want to adjust by going to the Tone Curve panel, and then choosing the individual color channel from the Channel pop-up menu (as shown here, where I’m choosing the Blue channel to help me remove a color cast from her skin and hair—she isn’t supposed to be “bluish”). So, now that you have just the Blue channel selected, notice that the Curve readout is tinted blue, as well, to give you a visual cue that you’re adjusting just this one channel.
—CREDIT—SCOTT KELBY
Step Two:
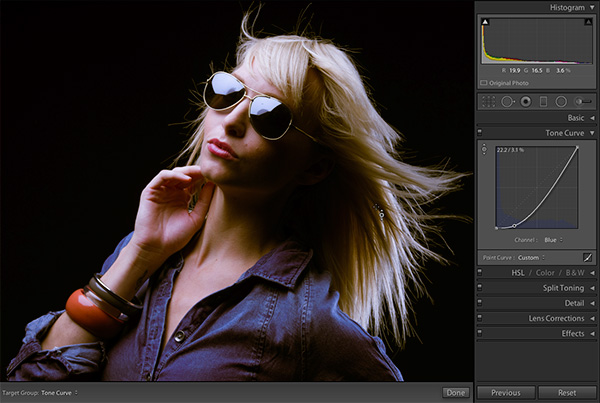
So, how do you know which part of the curve to adjust to remove this blue tint problem? Well, Lightroom can actually tell you exactly which part to adjust. Get the TAT (Targeted Adjustment tool) from the top-left corner of the panel and then move it over the area you want to affect (in this case, her hair), and you’ll see a point appear on the curve as you move your cursor. Just click once while you’re over her hair and it adds a point to the curve that corresponds to the area you want to adjust. Take that new curve point and drag at a 45° angle down toward the bottom-right corner and it removes the blue from her skin and hair (as seen here). Of course, since you have the TAT, you can use it, instead—click it directly on her hair and drag your cursor downward, and it edits that part of the curve for you.
Step Three:
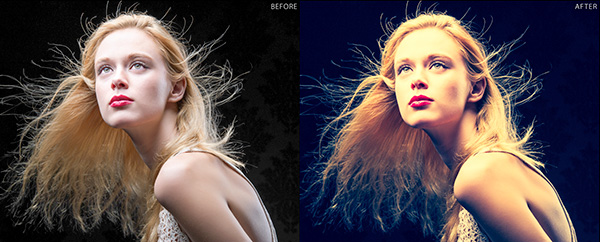
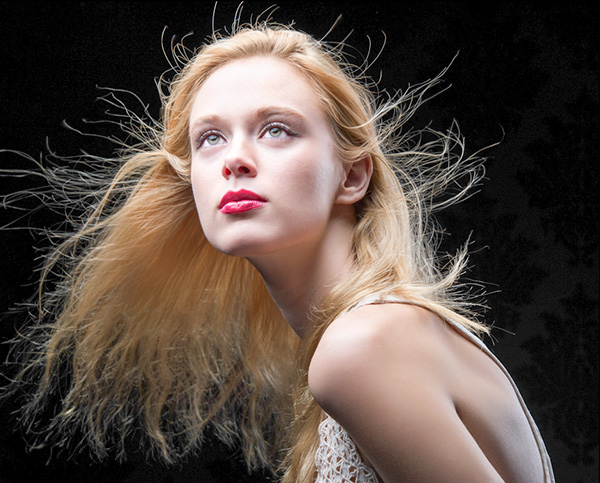
If you want to use these RGB curves to create a cross processing effect (a classic darkroom technique from the film days), it’s actually fairly easy. There are dozens of different combinations, but here’s one I use: Start by choosing Red from the Channel pop-up menu. Create kind of a steep S-curve by clicking three times along the diagonal curve—once in the center, once at the next major grid line above, and once at the next major grid line below, so they’re evenly spaced along the line. Leave the center point where it is, and click-and-drag the top point upward and the bottom point downward to create the curve you see here. By the way, I put the original image, without any RGB curves applied, at the bottom here, just so you can see our original starting point.
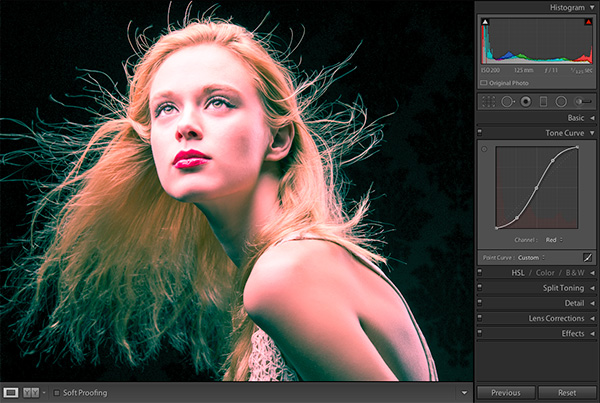
—CREDIT—SCOTT KELBY
Step Four:
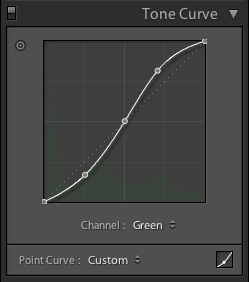
Then, switch to the Green channel and make another three-point S-curve, but one that’s not as steep (as seen here at the bottom). Lastly, go to the Blue channel. Don’t add any points—just drag the bottom-left point straight upward along the left edge (as shown here). Then, drag the top-right point down along the right edge, as well. Of course, based on the particular image you use, you might have to tweak these settings (usually it’s the amount you drag in the Blue channel, but again, it depends on the photo). By the way, if you come up with a setting you like, don’t forget to save it as a Develop module preset (click the + [plus sign] button in the right side of the Presets panel header. When the New Develop Preset dialog appears, click Check None, then just turn on the checkbox for Tone Curve).
Learn how to do more from The Adobe Photoshop Lightroom 5 Book here: http://kel.by/Zim7Wz