
The Digital Camera: From Snapshot to Art Shot

If you’re like me, you work hard at getting a great in-camera image, using the best digital SLR you can afford so you can capture the highest quality RAW file. After all, your pictures are a reflection of your personality—especially if you adhere to the old photo adage: “The camera looks both ways; in picturing the subject, you are also picturing a part of yourself.” (By the way, that’s my favorite photo adage—something I share with all the participants in my workshops and seminars.)
And like me, you probably also carry around a compact digital camera for fun shots, which can look pretty darn good, too—especially if you adhere to this old photo adage: “Cameras don’t take pictures, people do.”
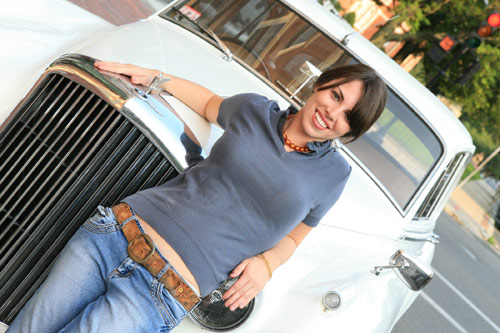
The straight-out-of-the-camera shot of my friend Andrea in this article is one such example. A few of my friends and I were taking a break and playing our guitars and singing during one of my photo workshops in Salem, Massachusetts. Music filled the air! For some reason, I thought about taking a photo for a CD cover. Andrea leaned on my friend’s Bentley and I snapped off a photo. It’s an okay shot, except for the fact that the Bentley’s rearview mirror is “growing” out of her right ear.
As with my serious shots, I try too see how I can improve my snapshots in Photoshop. I also try to see how much fun I can have with them. After all, like you, I work and play in Photoshop.
In this article, I’ll share with you the Photoshop fun I had turning this snapshot into a more artistic image—something that you can easily do with your images. So that’s the main point of this article: to encourage you to turn your snapshots into art shots.
STEP ONE:
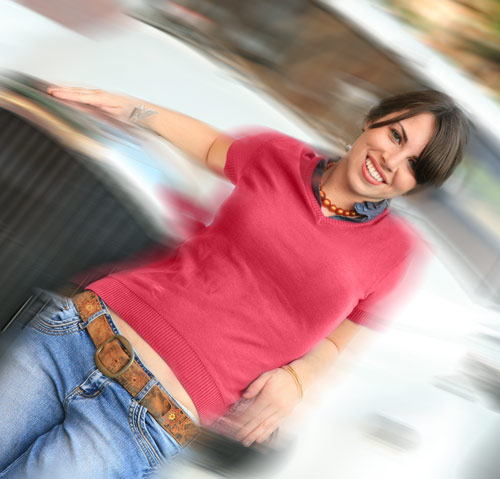
Here’s the original picture. As you can see, the picture is tilted. In photography, we call this the disequilibrium effect—a technique used to make a picture look more creative. It’s created in-camera by tilting the camera downward toward the left or right while looking through the viewfinder. You’ve probably seen this technique on MTV and in fashion magazines. It works well when photographing people, but forget about it when photographing the Grand Canyon or the United States Capitol. Use it in those instances and your pictures will as though like they were taken during an earthquake.
The first thing we need to do is crop the image so that it matches the dimensions of a typical CD cover. Select the Crop tool (C) and set both the Width and Height in the Options Bar to 4.75 in. Drag over the area of the image that you want to keep and press Enter to commit the crop.
STEP TWO: The picture needs to have more impact, and bright colors add impact to an image. So let’s change the color of Andrea’s sweater from blue to red.
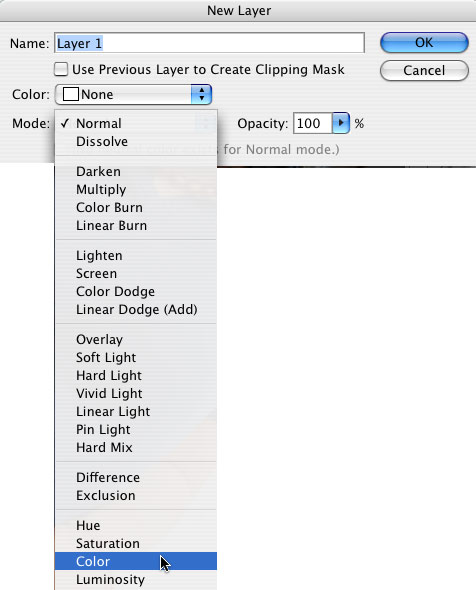
In Photoshop, there are several ways to change the color of an object. In this case, we’ll hand-color the sweater by creating a color layer. To do that, go to the Layer menu and choose New>Layer. In the dialog that appears, choose Color from the Mode pop-down menu and click OK.
STEP THREE:
The next step is to find just the right red color. Click on the Foreground color swatch at the bottom of the Toolbox to bring up the Color Picker dialog. In that dialog, select the red color for Andrea’s new sweater (we used R:215, G:61, and B:86) and click OK. At this point in the process, the color layer (Layer 1) is empty and on top of the Background layer. Let’s add some color to the color layer.
STEP FOUR:
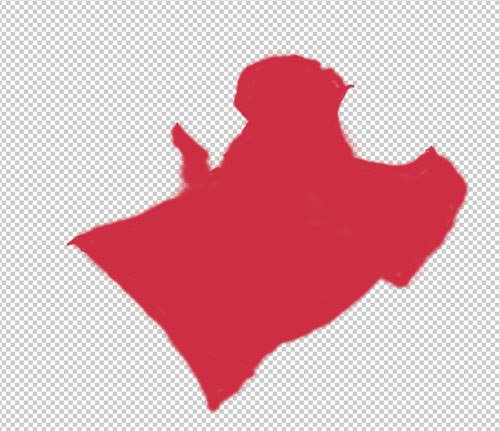
Choose the Brush tool (B), select a soft-edged brush, and paint over Andrea’s sweater to make it red. Use the Left and Right Bracket keys to make your brush smaller and larger, respectively. To see only the top layer, turn off the visibility of the Background layer by clicking on its Eye icon in the Layers palette.
STEP FIVE:
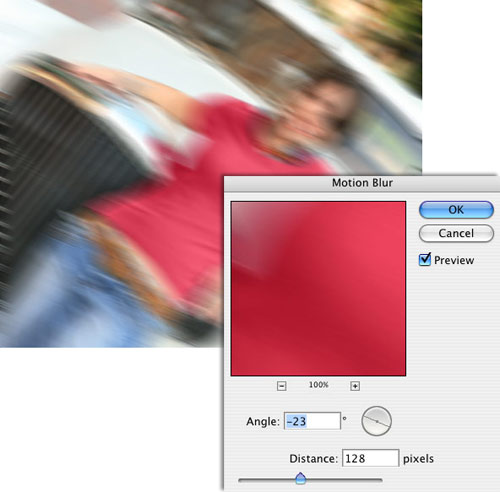
For added impact, let’s add some motion to the photograph—well, actually to only part of the photograph. First, flatten the two existing layers (Layer>Flatten Image), then duplicate the new and improved layer (Layer>Duplicate Layer). Next, with the top layer selected, choose Filter>Blur>Motion Blur. In the Motion Blur dialog, we set the Angle to –23° and the Distance to 128 pixels, which blurs the entire image. As you can see, at this point the picture looks ruined. We can’t even tell who the heck is in the photo! However, this is exactly the expected effect.
STEP SIX:
To reveal Andrea, use the Eraser tool (E) and erase the blurred area over Andrea’s body. Here’s a tip for erasing in this manner: Start at the center of the area with the Eraser’s Opacity set at 100% in the Options Bar. As you move outward, reduce the Opacity so that the area between the sharp and blurred areas of the image won’t be so stark. Now that’s exactly the effect I want. I have the image for my CD cover.
STEP SEVEN:
Now it’s time to add some type. Choose the Type tool (T) and position the curser in the image area. Experiment with different type sizes and fonts (available in the Character palette under the Window menu). As you can see, the color of the type is exactly the same color as Andrea’s new sweater. That’s because the color of the type is determined by the Foreground color, which was still set to red. If you don’t like the position of the type, use the Move tool (V) to move it to a different position in the image.

STEP EIGHT:
Although I like the CD cover, the image still doesn’t look as cool as I think it could. I want to transform the image so it looks as though I’m looking at the CD from an angle on a countertop. To do that, let’s flatten the image and then select the entire image (Select>All). Then, go to Edit>Transform>Distort and drag the corner handles of the bounding box so the photo is rotated counterclockwise and the right side is slightly shorter than the left side. This will add some perspective and depth to sell the effect. Press Return (PC: Enter) to apply the effect to the image.
STEP NINE:
As a final touch, go to Edit>Copy (which copies only the image because it’s still selected). Then, go to Edit>Paste to paste the cover onto a new layer. To create the drop shadow, choose Layer>Layer Style>Drop Shadow and play around with the options until you’re pleased with the results.
STEP TEN:
And speaking of results, here’s the end result of those Photoshop enhancements. Now the only thing Andrea has to do is get a record contract!

So, now it’s your turn to transform your snapshots into more artistic images. In fact, give yourself an assignment this weekend. Pick one image and let the fun begin.
