In addition to using PDFs for final print and Web output, PDF and Acrobat are excellent proofing tools, as well. PDF documents can be used for composite content proofs, color-separated proofs, color-managed soft proofs, and for printing color-simulation proofs. This issue we cover composite and color-separated proofs, next issue soft and color-simulation proofs.
[composite content proofs]
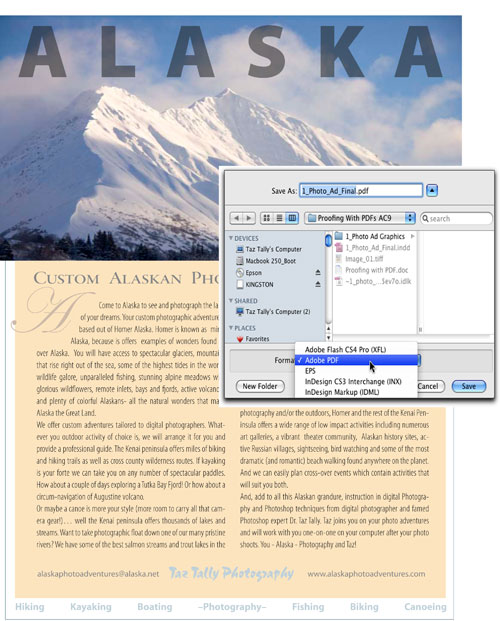
1 EXPORT PAGE LAYOUT TO PDF
Composite content proofs are designed to primarily show the content of a document—the layout of text and graphics. Composite proofs are usually viewed at 100% of the final output dimension, but usually use low-resolution images (for small file size to facilitate rapid distribution) and may or may not show accurate color. You’ll typically create a content proof from within your page-layout application such as InDesign. To begin, open your page layout in InDesign, choose File>Export, and select Adobe PDF from the Format drop-down menu in the Export dialog.
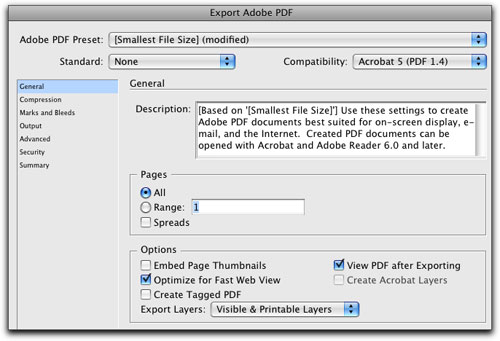
2 CHOOSE GENERAL OPTIONS
In the General section of the Export Adobe PDF dialog, choose Smallest File Size as a starting point from the Adobe PDF Preset drop-down menu. Select Acrobat 5 (PDF 1.4) for Compatibility to provide wide compatibility of your PDF proof. For Pages choose All. In the Options area check both Optimize for Fast Web View (this provides page-by-page delivery of a multipage PDF displayed over the Internet) and View PDF after Exporting (to automatically view your PDF in Acrobat). Note the designation “(modified)” will be added to the name “Smallest File Size” in the Adobe PDF Preset drop-down menu.
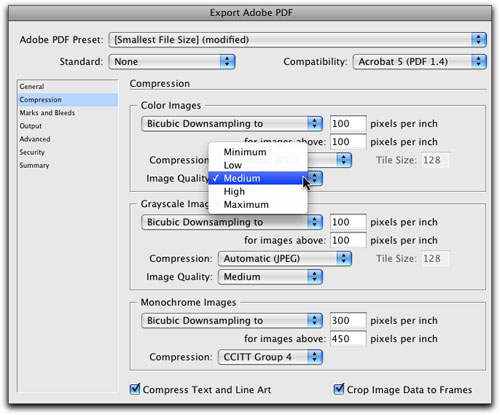
3 CHOOSE COMPRESSION SETTINGS
In the Compression section, set Bicubic Downsampling to 100 Pixels Per Inch for both Color Images and Grayscale Images (this will significantly reduce the file size of your PDF by lowering the resolution of your images). Set the Compression to Automatic (JPEG) for “smart” JPEG compression. Set the Image Quality to Medium. The default Image Quality for the Smallest File Size preset is Low—experiment with Low to evaluate image quality. Use the default settings for Monochrome Images, and then check on Compress Text and Line Art, and Crop Image Data to Frames (both of these will reduce the file size of your PDF without affecting viewing quality).
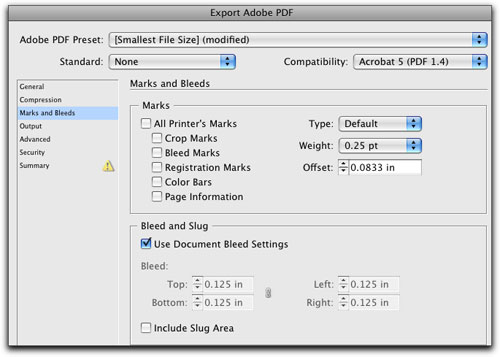
4 CHOOSE MARKS AND BLEEDS OPTIONS
In the Marks and Bleeds section, check Use Document Bleed Settings (this will ensure that any bleed elements you’ve created in your page layout will display properly at the edge of your document in your PDF). You can also check Include Slug Area if you’ve added any text to the slug area at the bottom of your document that you want included in your proof. Note: To create a slug area at the bottom of your InDesign document, choose File>Document Setup, click on the More Options button in the Document Setup dialog, and enter dimensions in the Slug fields.
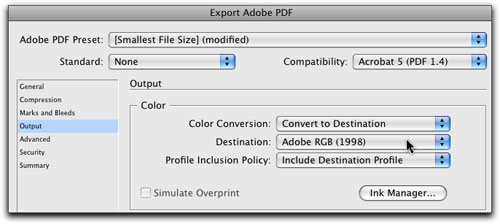
5 CHOOSE OUTPUT OPTIONS
In the Output section, set Color Conversion to Convert to Destination. Set the Destination to Adobe RGB (1998) (the default sRGB is okay for Web output proofs; however, many print-oriented users have Adobe RGB assigned to their monitors). Make sure the Profile Inclusion Policy drop-down menu is set to Include Destination Profile (including the profile will help provide more accurate viewing on the receiving monitor). If your images are already in an RGB color space you may not see much reduction in file size, but CMYK images will be reduced by a minimum of 25%, along with file size reductions from Step 3.
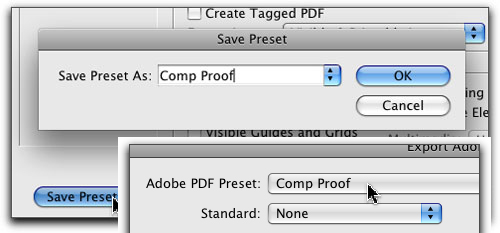
6 SAVE AS PRESET; EXPORT PDF
Before you click the Export button to create your PDF, press the Save Preset button located in the lower left-hand corner of the Export Adobe PDF dialog. Name your new preset “Comp Proof,” and click OK. Your Comp Proof preset will now appear as a choice in your Adobe PDF Preset drop-down menu located at the top of the Export Adobe PDF dialog. You can now use this as a one-step method for creating composition proofs. Now click the Export button to create your content-accurate proof of your document that’s small enough to quickly email or post on the Internet.
[color-separated proofs]
1 USE PRINT DIALOG INSTEAD OF EXPORT
Creating color-separated PDFs is a quick-and-easy way to make sure you’ve assigned your print colors properly. High-quality PDFs can be created either directly from InDesign or through Distiller, a standalone application used specifically for creating PDFs from PostScript. If you’re creating multiple PDFs from large documents, Distiller is a better option than working through InDesign. Here we’re going to use InDesign to create a color-separated PDF. Instead of using the Export function as we did for the composite proof, let’s go to the Print dialog (File>Print), which provides ready access to controlling separations.
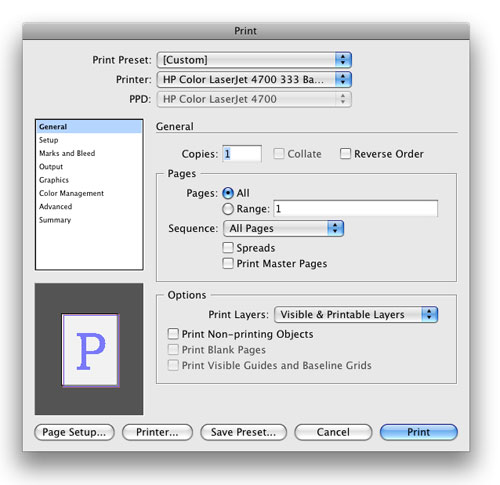
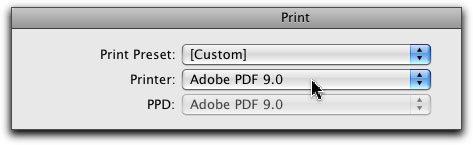
2 CHOOSE ADOBE PDF 9.0 FOR PRINTER DRIVER
Print dialogs vary depending upon application version and operating system. Here you see InDesign CS4 with Mac OS 10.5. In your print dialog, choose Adobe PDF 9.0 as your printer driver (in this example, we selected the driver from the Printer drop-down menu). Note: If you decide to use Distiller, you’d typically choose a PostScript printer driver rather than a PDF printer driver.
3 SELECT PAPER SIZE
In the General section, choose All to view color separations for all document pages. In the Setup section, designate the Paper Size for your PDF. Your choice here depends upon whether or not you include marks and bleeds. If you don’t include marks and bleeds, your PDF will have the same dimensions as your page layout document (here 8.5×11″). If you do include marks and bleeds, choose Custom from the Paper Size drop-down menu. When you select to include marks and bleeds (see next step), InDesign will automatically enter the proper dimensions to accommodate the additional space required.

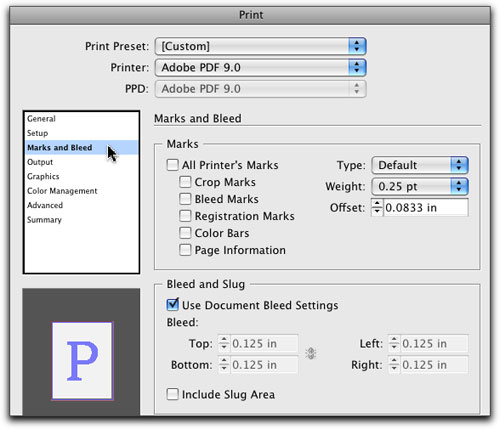
4 MARKS AND BLEEDS OPTIONS
In the Marks and Bleeds section, check on the settings based on whether or not you want to include marks and bleeds. Remember, if you choose to add marks and bleeds, you need to make sure you’ve chosen Custom for the Paper Size in the Setup section; the paper dimensions will automatically increase to accommodate your marks and bleeds. And just as we did in the comp proof above, you can choose to include the slug area if you included one in your document with a messages or notes.
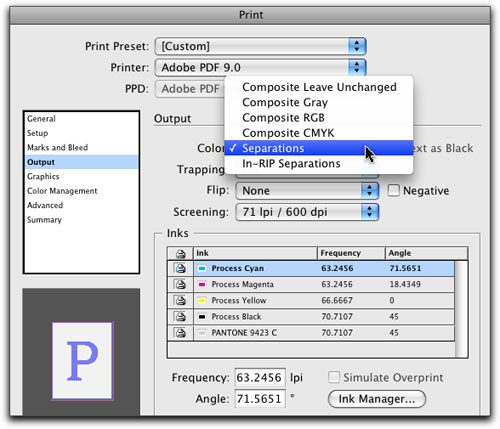
5 CHOOSE SEPARATIONS FROM COLOR MENU
The Output section is where you designate whether your output will be composite or separations. Click on the Color drop-down menu and choose Separations. Notice you have a variety of composite outputs, as well as an In-RIP Separations choice. Choose Separations because you want the colors to separate in the PDF prior to the document information going to the RIP. Also note under the Inks section there’s a list of all the assigned colors in this document. This example shows four process and one spot color available for separation.
6 CHOOSE PDF PRESET
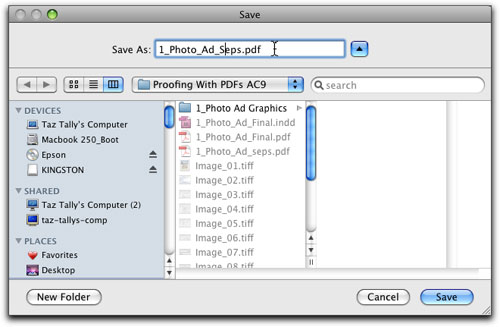
Click the Printer button located near the lower-left corner of the Print dialog. This will activate a second Print dialog in which you can choose the PDF Preset you’d like to use. Choose PDF Options from the unnamed drop-down menu located near the middle of the dialog. From the Adobe PDF Settings drop-down menu choose the PDF preset you want to use (here High Quality Print), and the application you’d like to use to view the PDF after creation (here Adobe Acrobat Pro). Click the Print button to activate a Save dialog, name your PDF, and select a location to save it.
7 VIEW COLOR SEPARATIONS IN ACROBAT
After clicking the Save button, you’ll be returned to the original Print dialog. Click the Print button to initiate the creation of your PDF. If you monitor your print queue you’ll notice that Distiller is automatically launched to create the PDF. A color-separated version of the PDF will appear in Acrobat. Navigate through the PDF file to view each color-separated page (here the cyan and spot color pages are shown). Note your specific dialogs may vary somewhat from those shown throughout this tutorial, but the basic steps are the same. The most important setting is to locate the Composite and Separations choices.