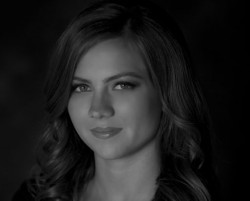
Portrait Lighting
[tps_header]When setting up to create portraits, start with a background that’s opposite of the flesh tone, preferably blue. This is done so it doesn’t blend in with the skin tone of the subject. The background is usually placed 3–4′ behind the subject so it goes out of focus. Next, you’ll need a posing stool that’s adjustable for height. Allow the subject’s feet to touch the floor. I usually have the subject sit at the edge of the stool for better posture. You also have to chose the proper lens for your camera. I use a 70–200m f/2.8 lens and try to take my portraits at a distance from the subject of at least 12–15′. The camera is mounted on a tripod at a height parallel to the subject’s face. Four lights will be used: fill, main, hair, and background.
[/tps_header]
Step One:
Place the fill light next to the camer a as close as possible without creating any shadows. The job of the fill light is to give detail to the shadows that are produced by the main light. You can make the shadows lighter or darker depending on the key of the photograph. (If the subject were wearing a dark outfit against a dark background, it would be proper to allow deeper shadows. If the subject has a white outfit on a white background and you allow a dark shadow, the shadow would be the main focus instead of the subject.)
When it comes to ratios between the main and the fill lights, the photographer needs to control the amount of fill light based on the key of the photograph. Most of all, make sure the shadows have detail—there’s no such thing as a black shadow in a portrait. The fill light is normally a soft light or large light size.

