Melanie Kern-Favilla on Monday Motivation

I am fortunate enough to live about one hour east of New York City. There is an area in NYC known as ‘the floral district’ (located on 28th Street), where wholesale florists sell their wares to businesses, as well as individuals like me. There, you will find the most amazing flowers, ranging from common carnations to the rarest of blooms, which are imported from overseas. It’s a feast for the senses. They are not inexpensive, however, so I have to limit my visits to a few times a year.
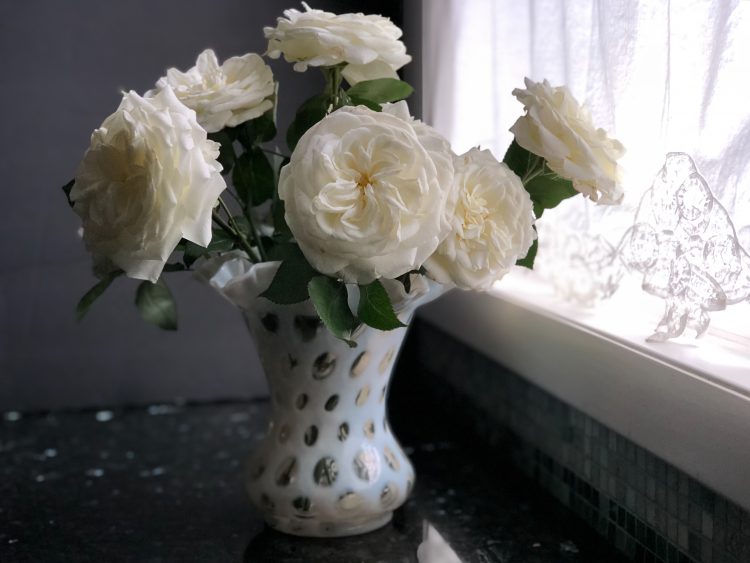
I recently decided to take a trip to my favorite wholesaler and came across these beautiful Alexandra Alabaster roses, imported from Germany. I loved how the seemingly endless layers of petals gently settled in on themselves. I gasped upon seeing the $40 price tag for 12 stems, but I decided that they were worth it.
I brought the delicate blooms home and immediately put them in water, being sure to cut the base of each stem at a 45° angle. They filled the vase beautifully and the fragrance filled the room.
The Setup
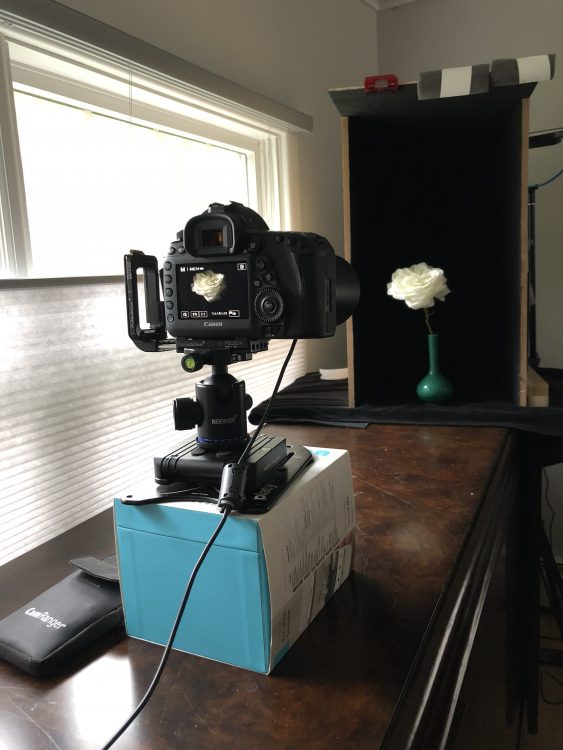
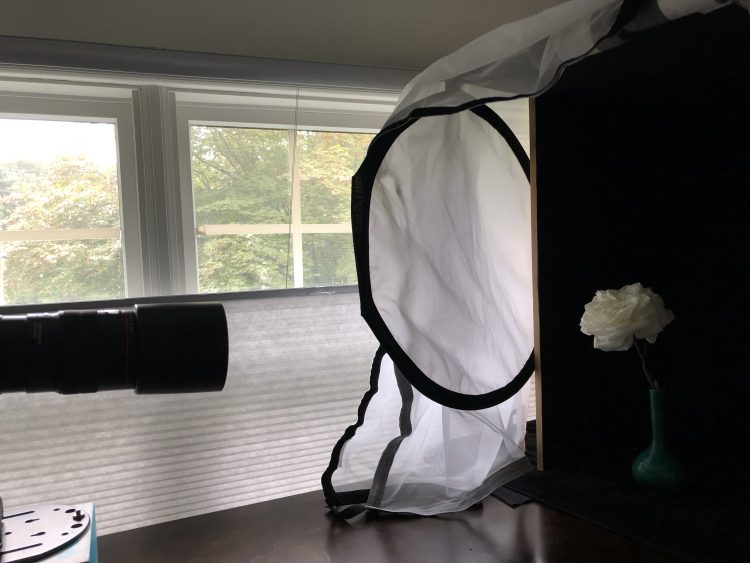
In the image above, you can see that I have placed a single bloom in a vase. I placed the vase inside a black box that I built specifically for my floral images. The inside of the wooden box is painted with black matte paint and it sits on a piece of black velvet. This is to absorb any errant light that might be reflecting off the surrounding surfaces. It also helps in minimizing post processing, by allowing my background to be completely black.
I have my Canon 5D Mark IV set up on my trusty Platypod Max. I am simply using a sturdy box as a riser. Using my Platypod is a much simpler setup than trying to use a tripod. I am using a Canon 100mm f/2.8 L IS Macro lens. I shoot in Manual mode, ISO 100, f/9 and a long exposure, varying from 1 second to 4 seconds, depending on how much I diffuse the light. I usually shoot two full stops underexposed, in order to maintain the shadows.
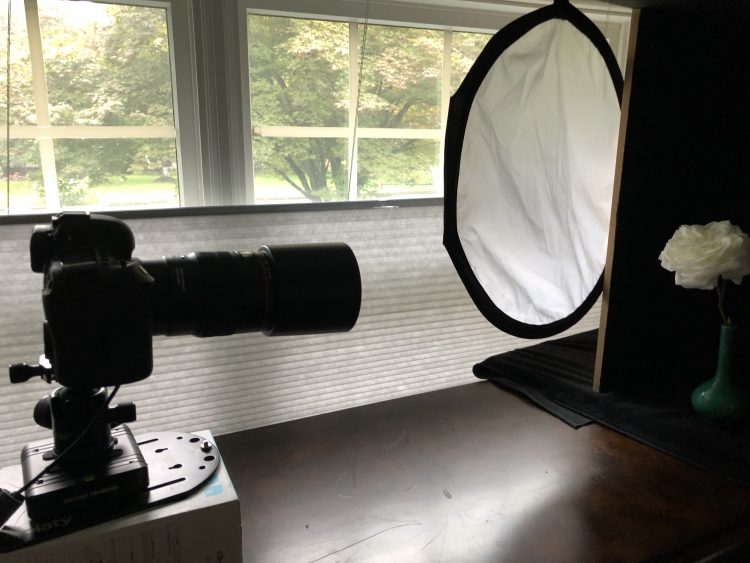
You can see in the image above that the window is at a 90° angle from the black box and my subject. I often move the box and the subject, depending on the lighting situation. On this particular day, it was overcast, so the lighting was soft and flat. This is my starting point.
The Shoot
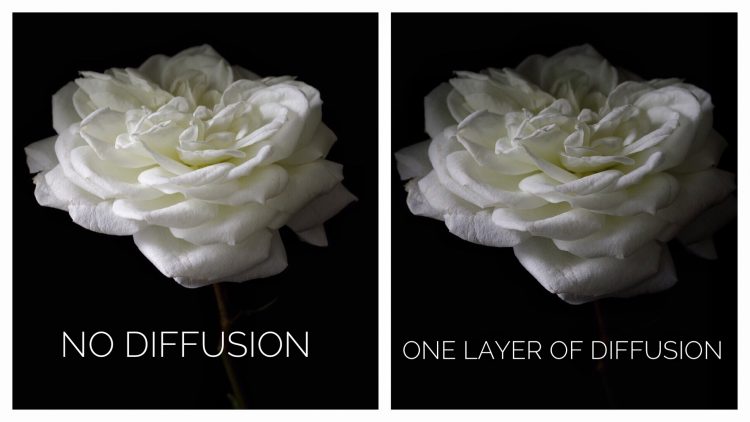
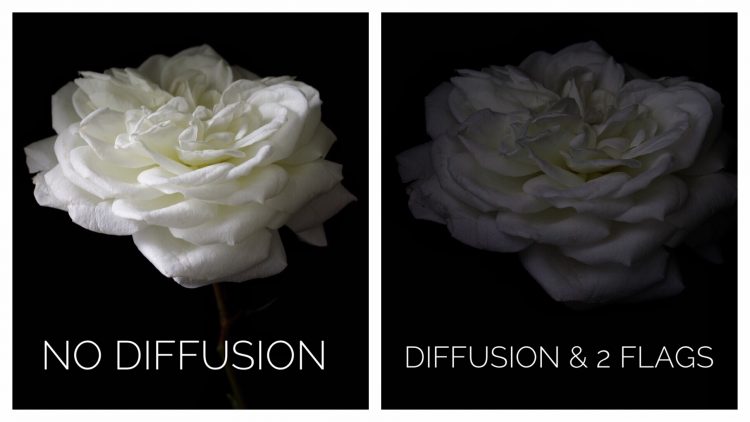
This is where I begin to bring in my layers of diffusion. You can see in the images above, I have placed an inexpensive diffuser between the window light and my subject. It instantly softens the light, compared to no diffusion at all, as you can see in the images below:
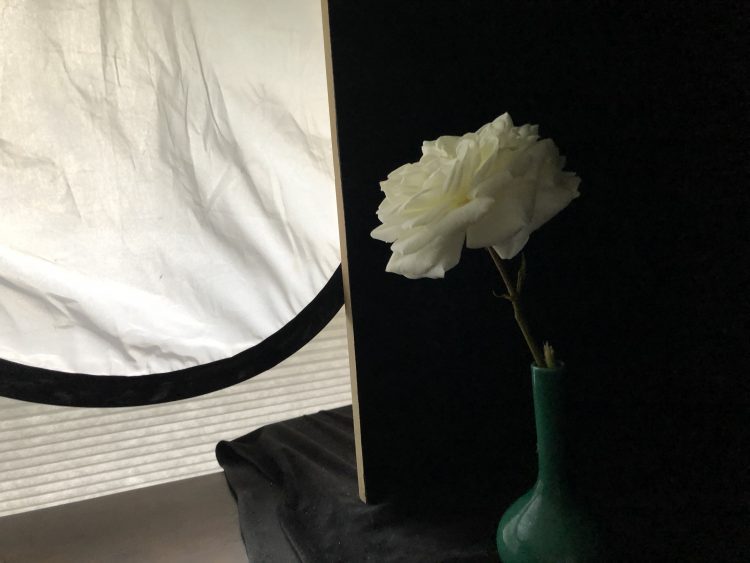
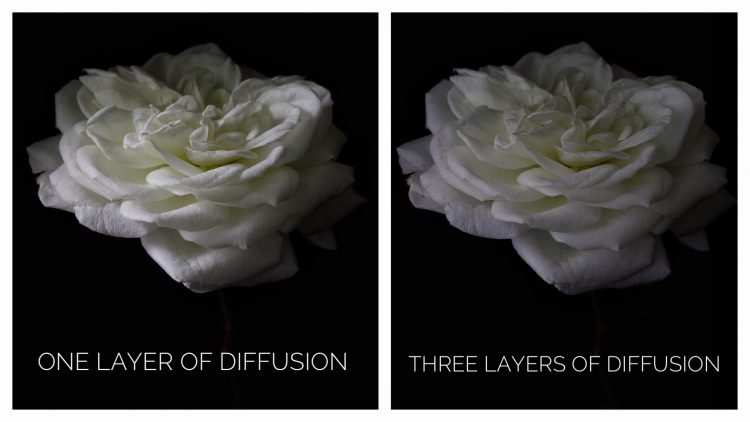
I am liking the diffused image better, but the bright areas of the flower are still a little too harsh for my liking, so I add another layer of diffusion. In the image below, I have added a scrim on top of the cheap diffuser (folded on itself to increase the level of diffusion), but you can use any diffuser. Sometimes I use sheer white curtain panels that I get at the thrift store for about $1.00 each.
I now have three layers of diffusion (one cheap diffuser and one scrim, doubled). You can see in the image below that the highlights have softened greatly by adding this extra level of diffusion. The amount of light is reduced by the extra diffusion, so I had to slow down my shutter to allow more light to strike the sensor.
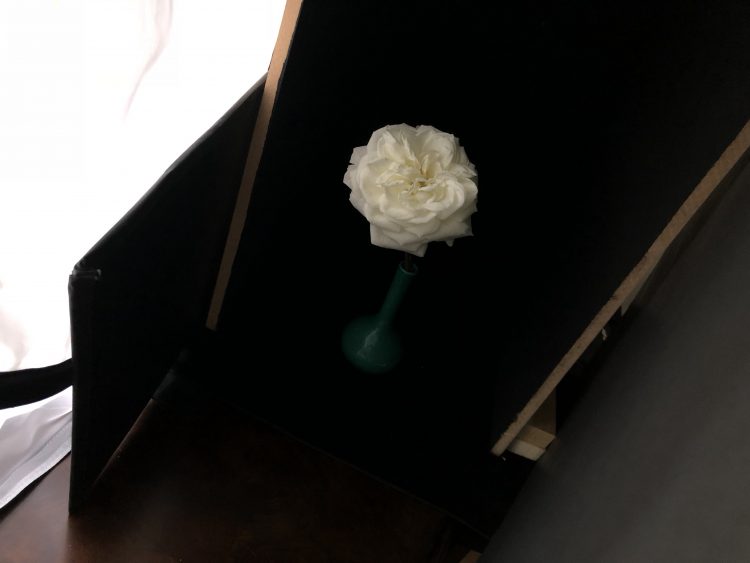
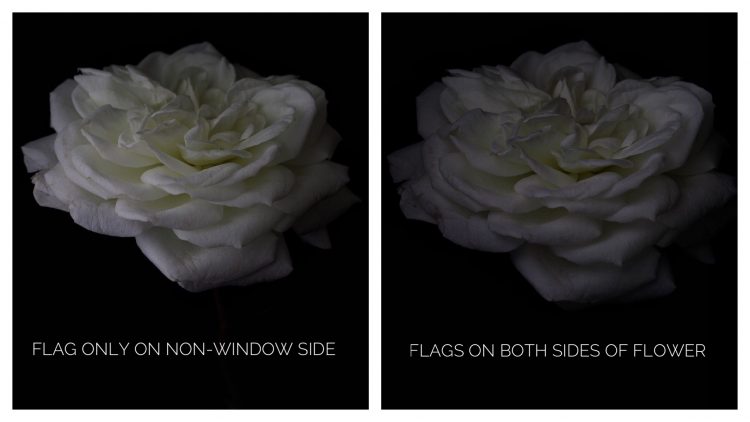
I notice now, that I am getting some light hitting the flower from the non-window side. So I placed a flag (black foam core) on the non-window side of the flower, in order to prevent ambient light from striking the petals, as seen below:

It’s getting better, but I still want to control more of the light coming from the window. So I now place a flag between the flower and the diffusion, so that I am blocking most of the indirect light coming in from the window, which you can see below:
Now, you might be asking, “Why doesn’t she just push the flower back into the box further?” Well, I don’t want to cut off all of the light coming in. Notice in the image above that the light is falling over the top of the flag on the left, onto the flower. If I pushed it further into the box, none of the window light would be hitting the flower at all, directly. I would only be getting indirect light. You can see the difference that the flag on the left makes, in the image below:
Now you can see the comparison between no diffusion or flags versus three levels of diffusion with two flags, below:
Now, I realize that the difference here is really a matter of taste. You might look at the undiffused flower on the left, above, and prefer that image to the diffused one on the right. But I usually prefer a more shadowy, moody image versus a bright, airy image, as seen on the left. If you prefer the left, then just leave out the last three steps.
Post processing
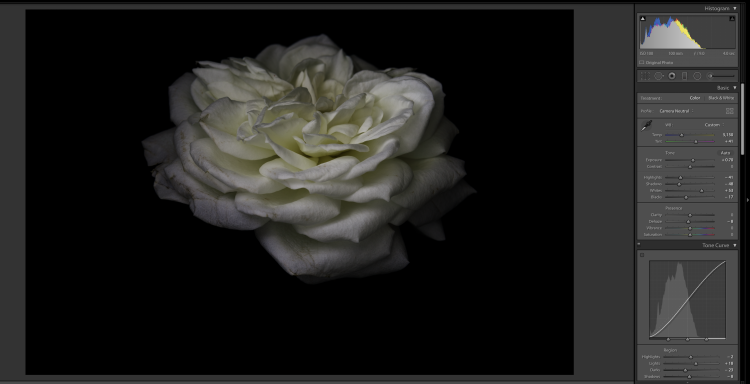
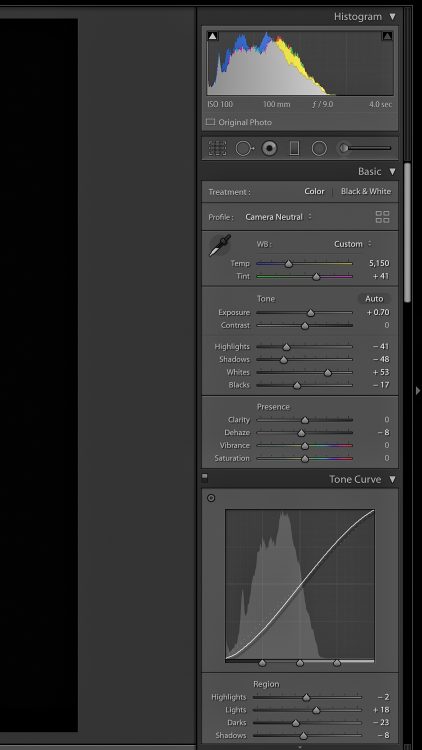
I opened my image in Lightroom and did some initial adjustments, as you can see in the image below:
I then opened my image in Photoshop. I made sure that the background was completely black. I spent some time cleaning up some imperfections on the petals with Content Aware Fill and the Spot Healing Brush. I swapped out the stem from an image with a brighter exposure. I enlarged the canvas to add more black background above the bloom and made the stem a bit longer.
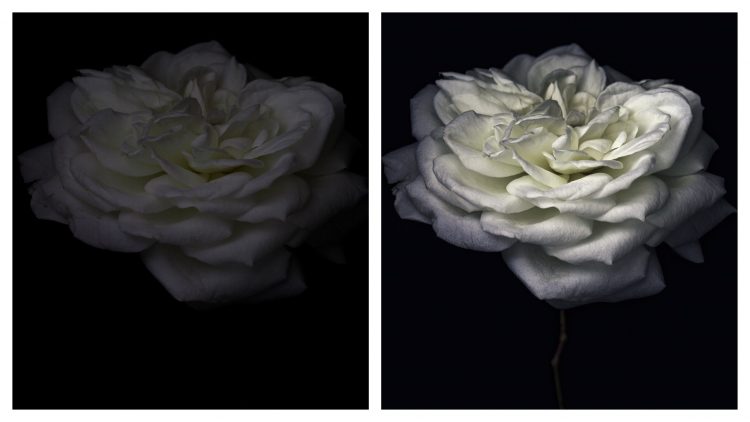
I opened my image in the Skylum Luminar plug-in and adjusted sharpness, details enhancer and microstructure. I then, finally, opened my image in the Alien Skin Exposure 3 plug-in and played around with some presets until I achieved the final look that I was going for. Here is the final image, below:
Below is the original image, unretouched, (converted to JPEG) next to the final image.
Thanks a lot to Melanie for a great piece of Motivation for today! You can find more about her on her website, Instagram, or Twitter, and you can take her KelbyOne class, Breathtaking Floral Photos, through the thumbnail above this text!