Liquid, Stretchy Design with GoLive
Have you been to a website whose design was optimized for a browser? The banners and colors extend the entire width of your browser window, and images and textures seem to “flow” with your window. There are a few terms you may hear to describe this: “fluid,” “stretchy,” or “liquid” design come to mind. It doesn’t matter what you call it; what matters is that you create it.
If you design for any medium’s strengths, your design will benefit from what the medium has to offer. Many websites look like print pages, stopping short on the right or using layout techniques optimized for paper. In this tutorial, we want to show you how to take an image and turn it into a tile (in Photoshop) and create the necessary HTML and CSS (in GoLive) to make a liquid design element.
Create Banner in Photoshop
STEP 1 Open New Document; Add Image to Tile
Create a wide canvas and make the height the same as your desired banner. In Photoshop, choose File>New and enter 1000 pixels for Width and 175 pixels for Height. Open the image you want to tile, select the Move tool (V), and drag the image onto your new document. Now drag your image layer onto the Create a New Layer icon to create a duplicate. Position the images so they span the width of the canvas. Click the Add Layer Mask icon, choose the Gradient tool (G), and drag out a short linear Black, White gradient to blend the images.

STEP 2 Style Your Banner; Make Area for Logo
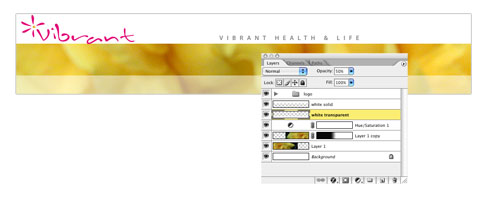
Click the Create New Adjustment Layer icon, choose Hue/Saturation, and boost the Saturation (we used +4). Now click the Create a New Layer icon, select the Rectangular Marquee tool (M), press D to set your default Foreground/Background colors, and drag out a selection across the bottom of the banner (ours is 1000×40 pixels). Press Command-Delete (PC: Control-Backspace) to fill the selection with white, lower the Opacity to 50%, and rename it “white transparent.” Follow the same steps above to create a 1000×65 pixel selection across the top of the banner (leave Opacity at 100%) and rename this layer “white solid.”
STEP 3 Add a Rule; Merge Layers
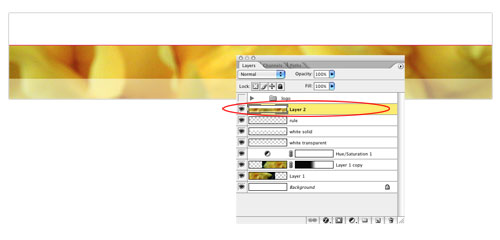
Click the Create a New Layer icon, choose the Line tool (in the Rectangle tool’s flyout menu), and click the Fill Pixels icon in the Options Bar. Select a pinkish Foreground color and drag out a 1-pixel rule across the image (use the Shift key to keep the rule straight). Name this layer “rule.” Create another new layer and hide any other layer that’s not part of the tiled image (click each layer’s Eye icon to hide it). With your new layer selected, press Command-Option-Shift-E (PC: Control-Alt-Shift-E) to merge a copy of all visible layers into the new layer.
STEP 4 Find the Seams
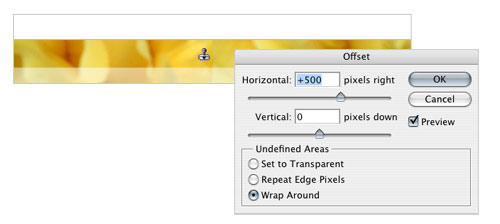
Select the merged layer (Layer 2), hide all the others, and choose Filter>Other>Offset. In the dialog, enter +500 in the Horizontal field, choose Wrap Around, and click OK. This takes the pixels on the rightmost edge and wraps them around next to the pixels on the leftmost edge, and puts this seam in the center. Now use the Clone Stamp tool (S) or the Smudge tool (under the Blur tool’s flyout menu in the Toolbox) to obscure this transition. Once you hide this seam you’re done with the tile.
STEP 5 Make Some Slices
Make the layer containing your logo visible again. Select the Slice tool (K) and drag out a selection across the top (logo) portion of the image that’s 760×65 pixels. Double-click the slice, name it “logo,” and click OK. Now make a slice for the tiling artwork that’s 1000×110 pixels, name it “tile,” and click OK. Choose Save for Web from the File menu, Shift-click to select the two slices, choose a JPEG preset, and click Save. In the dialog that appears, navigate to the Web folder you’ll be using, and click Save again. Now, we’re ready for GoLive!

Create Liquid Effect in GoLive
STEP 1 Make a New Webpage
In GoLive, choose File>New and select Web from the list on the left. Now click Pages then HTML Page, set your Options (as shown above), and click OK. Choose File>Save As, name your file “banner.html,” navigate to the Web folder (where you put the images in Step 5), and click Save.

STEP 2 Make a CSS Class
Find your logo image and drag it into the webpage. Click the Open CSS Editor icon on the far right to open the CSS Editor. In the dialog, click the Create a New Class Style icon to create a class named “.banner.”

STEP 3 Make a DIV
Control-click (PC: Right-click) in the webpage (not on the image) and select CSS Div>Banner. This will create a DIV in our page and assign it the class of banner (that we just defined in our CSS Editor). You can click the Source Code Editor tab on your HTML page to peek at the source code to see what GoLive is actually doing.

STEP 4 Style Your DIV
Now let’s assign some properties to our DIV. Back in the CSS Editor, select the .banner definition, and click on the Block Properties tab. Enter a Height of 175 pixels and a Width of 100%.

STEP 5 GoLive Represents DIV Area
You should now see a dotted line around your DIV. You may need to switch to Source mode then back to Layout view to give GoLive a chance to render the new DIV settings.

STEP 6 Add the Background Tile
Back in the CSS Editor, select the .banner definition and click on the Background Properties tab. Next to the Image setting in the right side, select URL from the pull-down menu. Then click the Folder icon and navigate to your tile.jpg file. Notice the tile image fills the DIV area.

STEP 7 Repeat Only Horizontally
To make sure the tile only repeats horizontally, select the Repeat setting and choose “Repeat X.” You’ll see GoLive update the DIV preview, representing the tile only repeating across. Now set the Horizontal field to 50%.

STEP 8 Vertical Offset
Next, in the Vertical setting, enter an amount of 65 px (the height of the logo graphic). This tells the Web browser to start the background image’s first pixel at the 65-pixel mark on the y-axis. Lastly, Control-click (PC: Right-click) in the page area and choose Document>Set Page Margins to Zero (to make the banner touch the edges of the browser).

STEP 9 Preview the Page
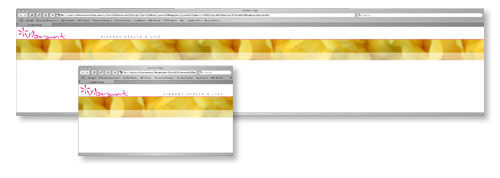
Click the Preview in Browser icon in the Toolbar to open the banner.html file in your Web browser. As you resize the browser window, notice how the banner fills in the window. This banner now has a “liquid” quality, and given the irregular texture (as opposed to a solid color or vertical blend), the visual appeal is much greater.
Note: You can do the same background image techniques on table cells. Some Web browsers won’t honor height settings in