From Graphic Designer to Product Photographer
Today’s graphic artists are using a lot more crossover skills to be competitive in their market. Many graphic arts studios and company advertising departments have found the need to start shooting their own in-house photography. It might be as simple as photo-comping a layout to sell an idea to a potential client, or creating their own quality photos for Web and print. Either way, when your boss comes to you and says you need to set up a small shooting studio in your office, you’re going to have to be ready to go.
Getting Started
First thing’s first. Establish a working budget. Then consider all the different pieces of equipment needed to begin, and break down how much to allocate to each category. Camera, lens, and tripod should be your first priority. A point-and-shoot camera isn’t going to work for this. Find out where the local pro photographers shop and give the store a visit. Start a relationship from the beginning with the local dealers. There are several good online stores to browse for pro equipment. Saving a few dollars to buy online sounds good until you need some help. Since you’re just starting out, if you buy from your local dealer you’ll feel more comfortable going back and asking questions. There are going to be lots of questions.
A basic digital single lens reflex (SLR) camera with a zoom lens will be your first priority. Canon, Nikon, and Fuji all make good entry-level digital SLR cameras packaged with a medium zoom lens. These lenses are good enough to get you started, and you can expand to other lenses later as needed. Plan on spending anywhere from $1,000 to $1,800 for a good quality starting camera. If that sounds high, remember pro photographers will spend 10 times that amount for the top-of-the-line models. You’ll also need a couple of flash memory cards, a card reader, and a sturdy tripod.
Next is the camera support. There are countless models of tripods to from which to choose. Think about how high you’ll need to go with a camera and the weight of the camera. There’s nothing worse than an expensive camera on a cheap, flimsy tripod. Most cameras can be tethered to the computer through either a USB or FireWire cable for added control during shooting. That can come later as your photographic skills grow. For now, shoot to a memory card and drop it in a card reader to download the images to the hard drive.
Into the Light
Lighting equipment will be a big part of the working budget. A camera’s built-in flash, or an on-camera flash unit, is good for your grip-and-grin photos, but for product photos and portraits of people you’ll need some additional lighting equipment. We can break this down into two categories: strobe lighting and continuous (tungsten) lighting. Both have advantages and disadvantages to consider.
Tungsten lights are also referred to as “hot lights.” The first time you use them on a photo set you’ll see why. “Ouch!” You need to be careful not to get burned. The advantage is lower price and the ability to really see what the lights are doing. When using multiple lights, it’s a kind of what-you-see-is-what-you-get type of lighting. Multiple strobe lights, on the other hand, can be adjusted electronically to each emit different amounts of power and may look different to the eye than what’s in the camera.
Strobe lights break down into two more basic categories. Self-contained, single-powered units (usually called monolights) are the first type. These would be good starting lights. The power for each light is self-contained in each unit. They have a continuous modeling light for viewing and will flash at the time of exposure, syncing with the camera’s shutter. Each lighting unit will have an adjustable ratio of power based on full power, half power, and one-quarter power. The higher the power, the brighter the flash. Luckily, digital SLR cameras don’t need that much power to work efficiently.
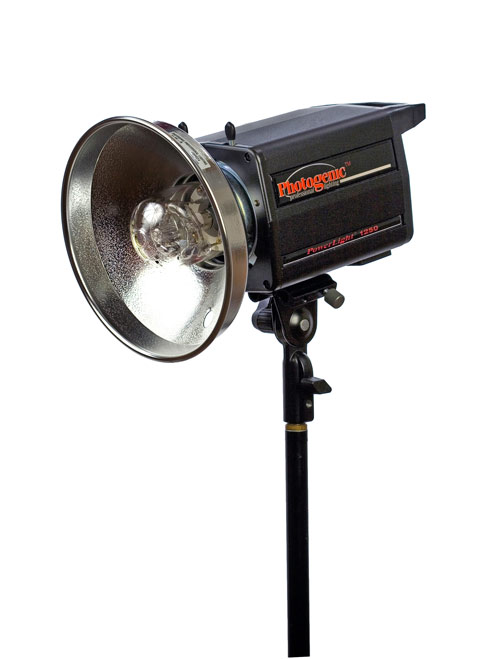
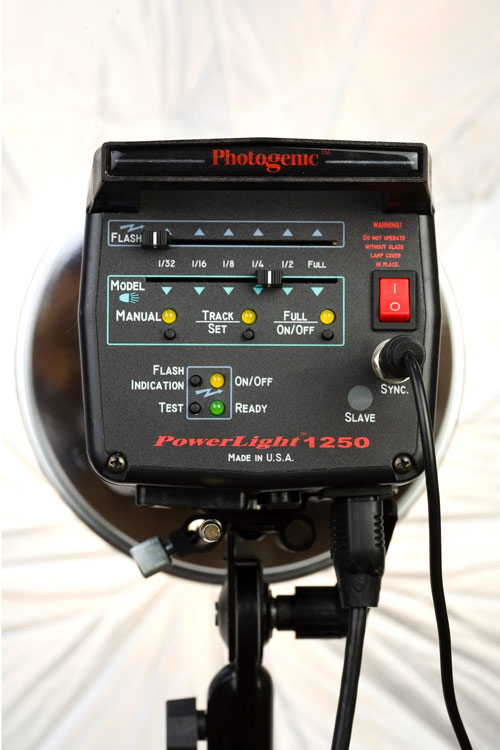
The second type of strobe light is the separate power pack and strobe head set up. These come in different models based on power and size. The higher the power and smaller the size translates into more money spent and can eat up your budget if you’re not careful. They have more power and features than the monolights and are a lot more expensive. Strobe power is based on the amount of watt seconds (WS) it’s rated at. Monolights usually come rated between 400 and 1800 WS. Power pack and strobe head units run between 800 and 4000 WS.
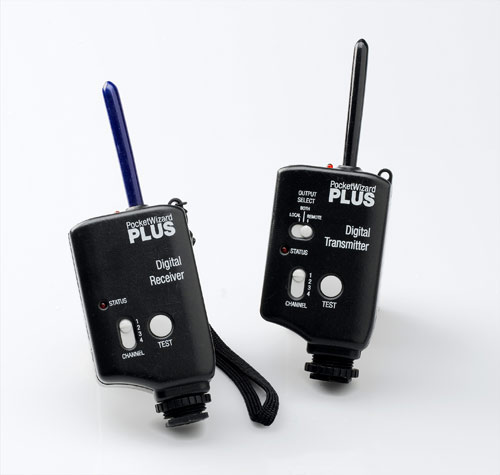
Both types need to be synced to the camera shutter. A wire called a sync cord connecting the camera to the strobes is needed to fire the flash. A radio controlled wireless sync is a much better choice. One unit, the receiver, is plugged into the strobe lights and the transmitter is attached to the camera’s flash hot shoe—fewer wires to worry about and safer for the camera. Digital cameras really don’t like being plugged into powerful strobe units directly. There’s a lot of power floating around through all those wires.
The lights can be purchased separately, or in kits with light stands and a carrying case. Either way, you’ll need at least two lights with light stands. If you find that you need more, you can purchase them later. The good thing is your local pro photo store will have salespeople who are very knowledgeable in the different lighting product choices, and can help guide you through the maze of confusion. Show up with a list of what you need and they’ll be all too happy to make recommendations.
Diffusing the Light
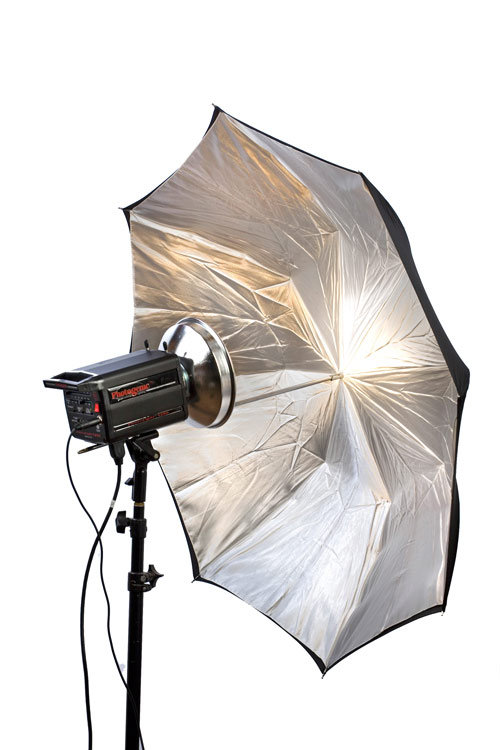
Tungsten and strobe lights by themselves yield a very harsh and direct quality of light not suitable for many situations. They have to be modified through some type of diffusion device. For portrait applications, the simple flash umbrella works well and can be very inexpensive. The light bounces into the umbrella and softens the harshness of the light source. This will make a more pleasing gradation between light and shadow on the subject you’re photographing. A disadvantage to the umbrella is that it’s a broad, scattered light source not as adaptable for product photography.
A soft box would be the better choice for product photography. It’s a self-enclosed box that goes around the light and forces the light to go through a diffused white material before reaching the subject. They come in many sizes and shapes for different applications. The larger the box, the softer the light and shadows. Some are lined inside with a silver material for a harder lighting effect. Being a self-enclosed unit, the light cannot escape around the sides of the unit and is forced out the front, creating soft shadows. The soft box is connected to the light with a connecting bracket that is made for the specific brand light unit.
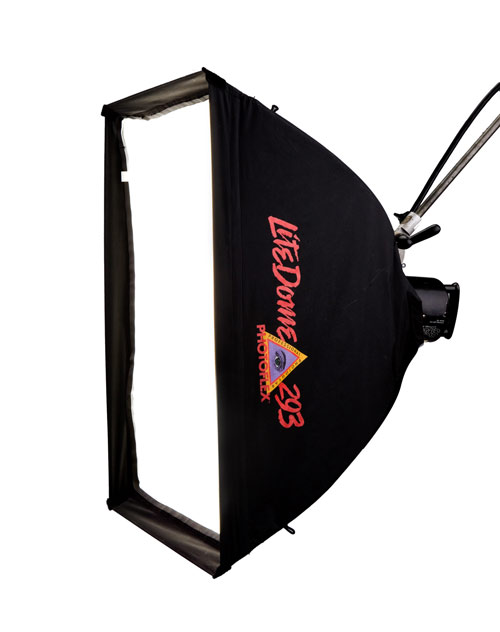
To achieve a similar type of lighting, you could also use a diffusion material stretched over a frame and aim the light to pass through it. They come in premade panels from the photo store, or you can simply buy some photographic division material on a large roll and stretch it over any size panel frame. Frames can be made out of PVC tubing or cut from 2×2″ pieces of wood in 2′, 4′, or 8′ lengths from the local hardware store. In pro photo studios, you’ll find all sizes of handmade frames covered with diffusion material for various applications.
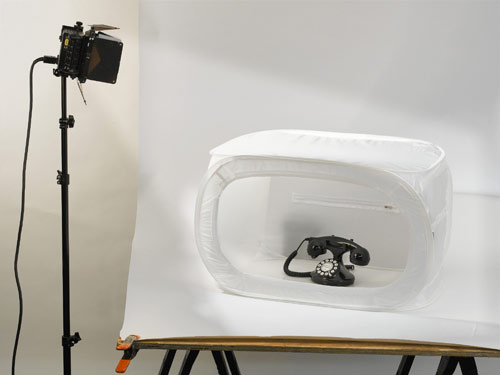
If you really want to make things simple for product shooting, and you don’t feel that comfortable with soft boxes or light panels, a light tent might be the perfect solution. A light tent is a simple pop-up box made of the same diffusion material as the front of the soft boxes. It comes in a few different sizes and has detachable panels around the sides and top.
Place the product inside the light tent and shoot through the open hole in the front or top. A single lighting unit pointed down at the tent will illuminate it with a soft and even lighting that lets the light wrap around the product, creating very soft shadows. This is especially good for products with reflective metal surfaces. With highly reflective products, you need to light what is reflecting into the product, instead of the product itself. These light tents work well with both tungsten and strobe lights.
In the Background
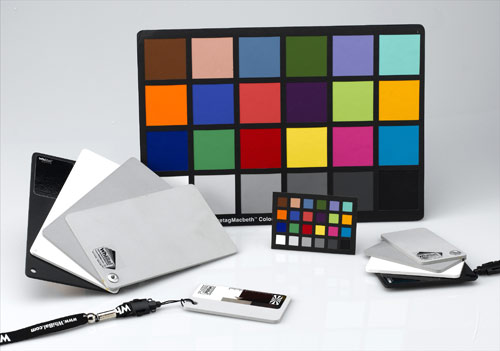
Other accessories you’ll need to check out while shopping at the photo store are a background stand kit, a light boom stand, background supplies, and a color reference chart. A background stand kit is a package containing two stands and a collapsible background pole in a carrying case. This is set up to hold up to a 9′ roll of seamless background paper. By having it available to collapse into a case, you can take it on location if you need to. Seamless background paper comes in 3 sizes: 4 1/2′, 9′, and some colors in 12′. Color samples are available to pick from and can be found at most photo and art supply stores.
A light boom stand is used to hold a light and soft box above a set to create an overhead light source. A color reference chart is used in the first photo of any shooting session to help get the color balance perfect by the numbers. Once the camera, background, and lights are set up, shoot a frame of the reference card with the proper exposure and color balance settings configured on the camera. This image can later be used in Adobe Photoshop to balance all of the following images shot under the same conditions.
Now it’s off the hardware store. Two sawhorses and a 4×8′ piece of 1/2″ plywood will make a good tabletop for setting up your products to shoot on. Anything less than 1/2″ thickness might bow in the middle and cause unnecessary problems with product arrangements. Some assorted-sized squeeze clamps are good to have on hand to hold backgrounds and cards. Also, a few pieces of white mount board or foam core can be useful and can be found at the local art store. You can use these as fill cards for both product shots and portraits. Fill cards are used to bounce the light onto the subject to help fill in the light from the strobes or tungsten lights.

Setting up a product photography studio similar to this should cost you well below $2,000 (not counting the camera, of course).
On the Computer
We’ll assume that you already have a computer loaded with the latest version of Photoshop. Color management has an important role in getting consistent results with your digital photography. It just can’t be ignored or turned off. Consider what color space you want to work in as your photograph travels through it’s workflow route. To make this simple for right now, go to Edit>Color Settings to open the Color Settings dialog. Under the Settings pop-up menu, scroll to the North American Prepress option. This will set up most of the settings for good, clean digital photography. Change the color space from sRGB to Adobe RGB (1998) in the RGB pop-up menu in the Working Spaces section. This is a good all-around space for digital photography when having to go to both print and Web from the same images.
If you’re strictly creating photos for Web, then sRGB might be the best choice. It’s based on what the average color monitor is set up for. If you were only creating photos to be converted to CMYK, ColorMatch RGB is a good choice for that. Whichever space you choose, lock it in to preserve profiles and you can then relax and just concentrate on shooting good photos. Think of it as a set-it-and-forget-it approach as long as the color is set from the beginning. The color profile, which determines the formula in how the color is reproduced, will be tagged to the file as it moves along to different applications.
Get Shooting
Time to shoot a photo. Pro photographers have a little saying they like to use when it comes to equipment and taking photographs: “It’s not the camera, but the two feet standing behind it that really maters.” With today’s digital camera automation, it’s easy for a well-trained graphic artist to pick up a camera and get some good images right from the start. Perfecting the craft of good digital photography will come later as you spend time shooting in the studio.
The first big rule of professional studio photography: If you’re looking for quality and continuity between multiple photos, shoot RAW files. If you’re thinking good enough is good enough and you don’t want the extra hassle, you’re being shortsighted on the big picture. It’s not just good composition and lighting that makes a good studio photo; it’s a good file processing workflow procedure that’s predictable and repeatable.
Second rule: If you want to take advantage of Photoshop’s incredible power to process multiple files at once, you’re going to have to start moving away from the “Auto” setting on your camera. All digital SLRs have the ability to create a custom white balance of the set by shooting a white card and locking in the color temperature. All the following images will then be the exact same color balance. If the camera is set to “Auto White Balance,” the color can be influenced by the dominant color the camera is pointing at. If all the images are slightly different, you’ll see it when they’re lined up next to each other.
In addition to a custom white balance set in the camera, you can also shoot the color reference chart that we mentioned earlier in the first frame of the photo shoot. All the RAW images can be opened at once in the Photoshop Camera Raw dialog. Click on the frame with the color chart so that it’s featured in the preview window. Click the Select All button so all the frames are selected along the left vertical column of images. Click on the White Balance tool in the Camera Raw’s toolbar and click on the gray swatch of the color reference chart in the image. All the other selected images will then be updated with the same color balance. This makes a big difference at press time if you’re shooting a small catalog to have the consistency in color by the numbers.
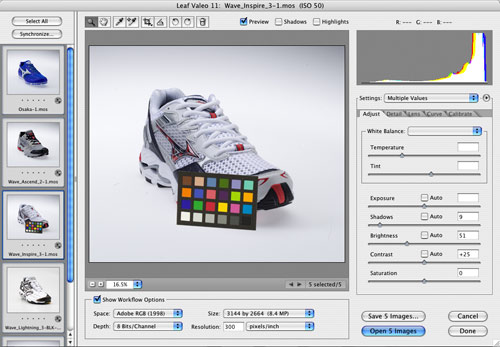
Proper exposure is another important part of the process. Digital photography files don’t like to be overexposed. One of the many reasons to shoot RAW files is the ability to adjust the exposure without damaging the dynamic range of the image. To maintain detail in the color white in the final 8-bit file, white should not be any brighter than 240–245 on your 0–255 range of RGB information (with 0 being pure black and 255 being pure white). Black with detail should fall between 20–25. Learning how to interpret a proper exposure by reading the histogram is a skill that develops with time.
Keep Learning
See if there are any local classes or workshops in your area that teach basic studio lighting. Remember, you have both height and width with a photograph. It’s up to the photographer to create the illusion of depth by lighting. Once the basic studio is established, a little lighting instruction and lots of practice will start to yield some quality digital photography in a short time.
Some of My Favorite Picks for Starting a Studio
Here are some suggestions for products and brand names for you to check out while you’re building your studio. I’ve also included some of my favorite online shopping resources. Keep your budget in mind when you’re out shopping; some higher-end equipment can be very pricey, and your budget could get out of control before you know it. And don’t forget to start a relationship with your local photography shop. They can be a valuable asset to you whenever you have any questions or need advice.
Online Shopping
B&H Photo: www.bhphotovideo.com
Calumet Photographic: www.calumetphoto.com
Samy’s Camera: www.samys.com
Cameras
Canon EOS 30D with 17–85mm lens: www.usa.canon.com
Fuji FinePix S3 Pro with 18–70mm lens: www.fujifilm.com
Nikon D70s with 18–70mm lens: www.nikonusa.com
Tripods and Heads
Bogen: www.bogenimaging.us
Gitzo: www.gitzo.com
Slik: www.slik.com
Tungsten Lights
Lowel: www.lowel.com
Photogenic: www.photogenicpro.com
Smith-Victor: www.smithvictor.com
Strobe Lights
Bowens: www.bowens.co.uk
Dyna-Lite: www.dynalite.com
Photogenic: www.photogenicpro.com
Lighting Accessories—Soft Boxes, Umbrellas,
Boom Stands, and Background Stands
Chimera Lighting: www.chimeralighting.com
Photoflex: www.photoflex.com
Westcott: www.fjwestcott.com
Radio Slave Sync Units
PocketWizard Plus Kit: www.pocketwizard.com
Quantum Radio Slave 4i Kit: www.qtm.com
Color Reference Cards
GreytagMacbeth ColorChecker Chart: www.gretagmacbeth.com
QP Card: www.qpcard.com
WhiBal Reference Card: www.whibal.com


