
Creating Custom Brushes with the Transform Each Command in Illustrator
The Transform Each command, when repeated with the Transform Again command, can create some unique designs and patterns, and even custom brushes, as we’ll see here.
1
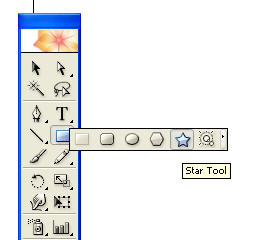
Open a new document in Adobe Illustrator. I set the art board size to Letter but yours can vary. Click-and-hold on the Rectangle tool to bring out the other options, including the Star tool. Click the Star tool.
2
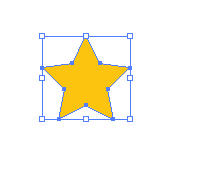
Holding down Shift to keep a correct proportion, click-and-drag to create a star.
3
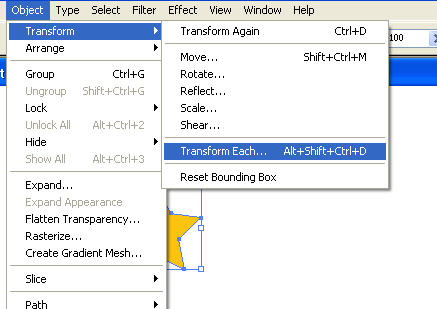
With the star still selected after drawing it, go to Object>Transform>Transform Each.
4
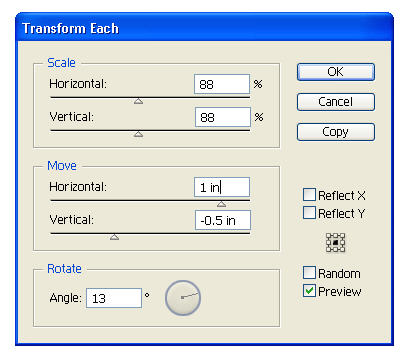
The Scale options allow you to resize the object to a certain percentage of the original and the Move options allow you to change the position of the object on the Artboard. Rotate allows you to rotate the object to a specified angle. Keep the numbers in the Scale option the same if you want the scale to be the same. Try following these setting for this tutorial. IMPORTANT: Next, click Copy. This creates a duplicate object so the original is not deleted.
5
Once you have two stars on the Artboard, press Cmd-D (PC: Ctrl-D) to repeat the same effect to the new object, therefore creating a third object off to the side, rotated a bit more and a little smaller. Press Cmd-D (PC: Ctrl-D) a few times to create a line of stars.

6
Next, we’ll use this design to create a custom brush. Open the Brushes palette (Windows>Brushes). With a Selection tool, click-and-drag a selection around all of the stars. Click-and-drag the selection into the Brushes palette.
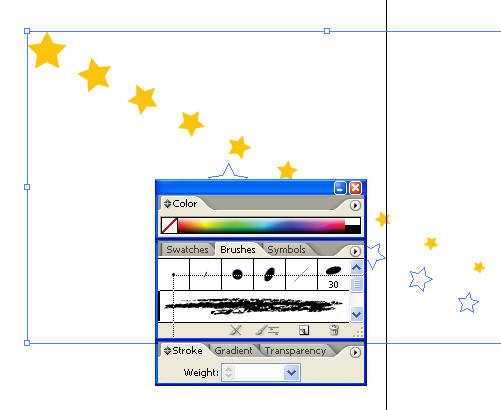
7
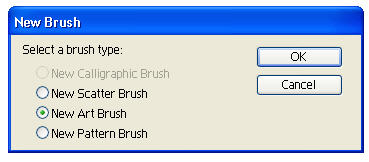
Select New Art Brush and click OK.
8
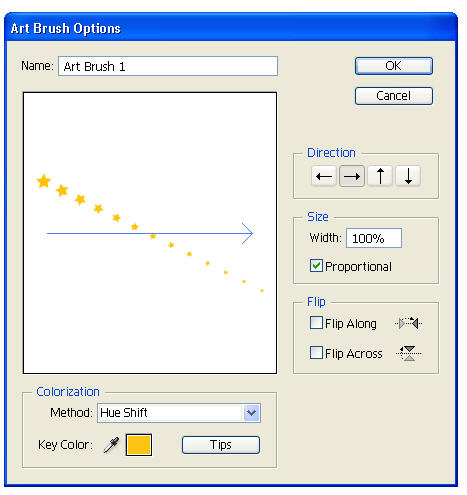
Change the Method to Hue Shift and check Proportional to keep the stars from being stretched.
9
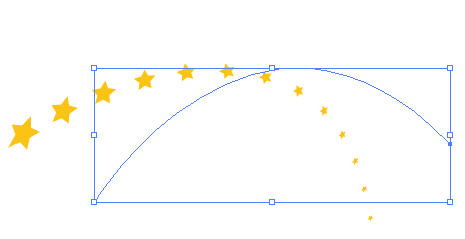
You can now apply this new art brush to any Stroke, whether it’s the Pen tool, Pencil tool, or the stroke of an object such as a rectangle or circle. Try drawing a curve with the Pen tool as seen here. Make sure you make the Fill set to None and the Stroke set to the new brush by selecting it in the Brushes palette.
10
The Transform Each command, combined with the Transform Again command, can create designs for many custom brushes and add aesthetic appeal to your designs.

ISTOCKPHOTO.COM/GUSTAVO MARTINO
That’s all folks!
