How to Get the "Instant Black Background"

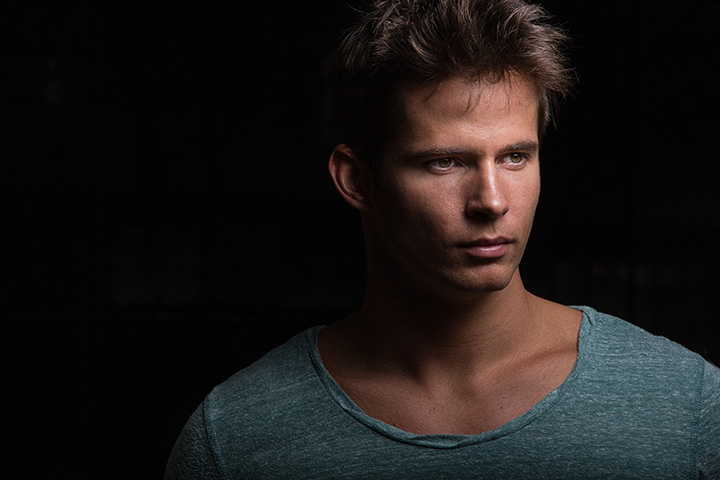
The name and idea for this technique comes from my buddy, UK-based photographer and trainer Glyn Dewis. The idea is you set your camera’s settings so that so little light comes into the camera that when you take a shot, all you get is a solid black image. Then, when you turn on your flash at full power, the only thing you’ll see in your image is whatever is lit with the light from that full-power flash—that’s all that lights your subject.
BEHIND THE SCENES:We’re out on the street in downtown and we’ve set up my go-to flash lighting setup, the Impact QuikBox.
CAMERA SETTINGS: The settings for this particular outdoor shoot are very different than usual because we’re trying to do something very different: make a regular daylight background turn solid black. I’m shooting my 70–200mm f/2.8 lens (that part is pretty much the same as always), but my f-stop is set to f/22. My ISO is set to 100 and my shutter speed is 1/250 of a second. More on the “why” of these settings below.
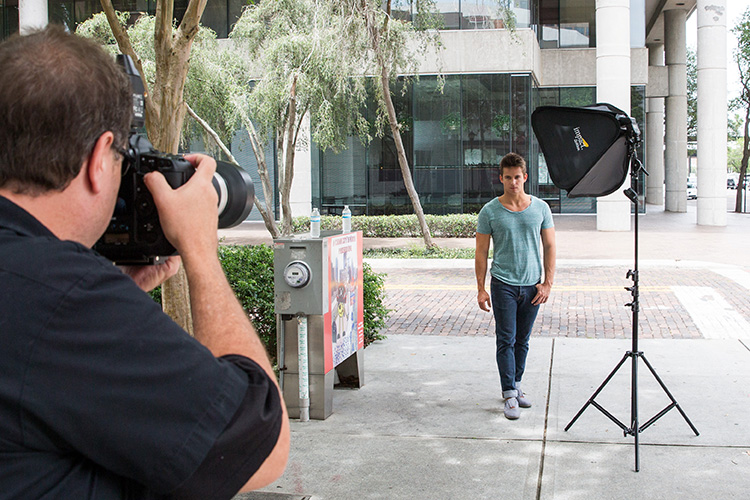
Photo by: Brad Moore
THOUGHT PROCESS: There are three things we can do to limit the light that reaches our sensor: (1) Raise the f-stop. In my case, my lens only goes to f/22, but there are plenty of lenses that go to f/32. The higher the number, the darker your scene will be. (2) Lower your ISO to its lowest setting. The lower the number, the less your camera is sensitive to light. (3) Raise your shutter speed to 1/250 of a second (that’s the highest normal sync speed for most hot-shoe flashes, but at that speed it lets in the least amount of existing light. Now, you may not need to do all three of these to create a solid black image. It may only take #1, or #1 and #2, but you’ll know it’s right when you take a photo and there’s no image, it’s just solid black. That’s your cue to turn your flash on at full power, and now you’ve created the “Instant Black Background.” Thanks to Glyn for this awesome technique.
POST-PROCESSING: Just standard portrait retouching stuff (removing blemishes, brightening the eyes, and so on) and, of course, sharpening with the Unsharp Mask filter
in Photoshop (I used: Amount 120%, Radius 1, Threshold 3).
Excerpt from The Digital Photography Book, part 5.