Digital Video Solutions
Last issue, I showed how to create an After Effects-like animation in Photoshop Extended that involved playing video inside the graphic of an iPhone. For that technique, I used a background animation clip that I’d created in Photoshop CS3. Since then, readers have been asking how they can make their own animated background—what filters to use, etc. So, I thought that would make a good tutorial for this “Digital Video Solutions” column.
While I’ll use a specific set of filters in this tutorial, you’ll find that using any of the Render choices under the Filter menu and combining them with at least one choice from the Distort folder will always yield interesting results. So, let’s begin.
STEP ONE: In Photoshop CS3 Extended, create a new document (File>New) at the size you want your final output to be (720×480 pixels in this example). In the Layers panel, this will give you a locked Background layer that you need to convert to a smart object: Click on the Layer menu, go under Smart Objects, and choose Convert to Smart Object.
STEP TWO: Double-click on the Smart Object icon that appears on the layer in the Layers panel to work “inside” that smart object. Next we’ll fill the smart object with 50% gray. Press Shift-Delete (PC: Shift-Backspace) to open the Fill dialog. Make sure Use: 50% Gray is selected then click OK.
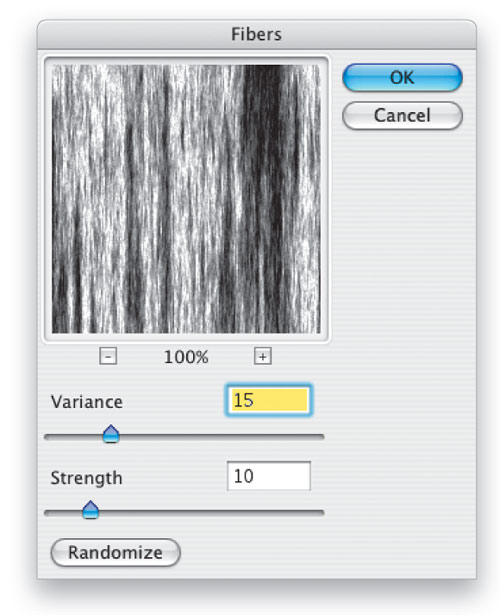
STEP THREE: Press D to set your Foreground color to black, then go to the Filter menu and choose Render>Fibers. In the dialog, type in 15 for Variance and 10 for Strength. These low settings will give you smoother-looking fibers with more “white” areas. Click on the Randomize button until you see about a 50:50 ratio of black to white fibers in the Preview, then click OK.
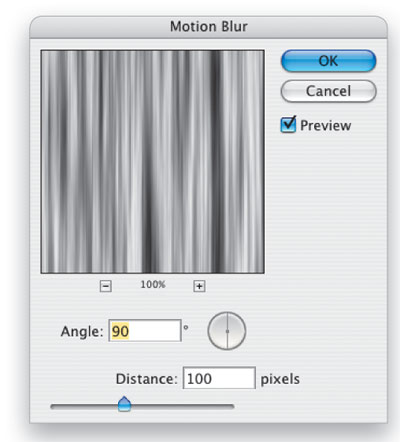
STEP FOUR: Now we’ll add a motion blur (Filter>Blur>Motion Blur) with the following settings: Angle 90˚; Distance 100. Click
OK to close the dialog.
STEP FIVE: Press Command-Option-–(minus) (PC: Ctrl-Alt-–) to zoom out while keeping your window the same size. (You might also drag out one corner of your window for better visibility.)
Make sure your layer is unlocked. If it has a little padlock beside it in the Layers panel, then it’s locked, so double-click on the Background layer, rename it Layer 0, and click OK.
Now press Command-T (PC: Ctrl-T) to bring up Free Transform. In the Options Bar, change the Width to 200% and the Height to 1600%. Press Return (PC: Enter) twice to commit the transformation. This stretches your “fibrous” object vertically 1600% and creates slightly fatter strands of fibers.
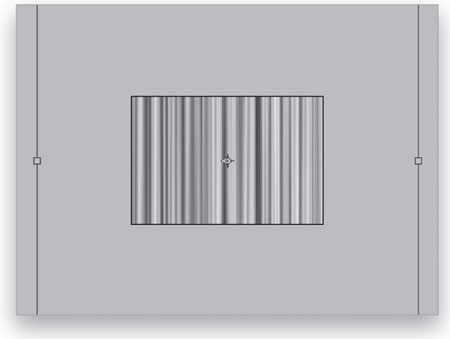
STEP SIX: Using the Move tool (V), drag the stretched fibers down so that the top of the object is aligned with the top of the canvas. This will be the starting point for your animation.
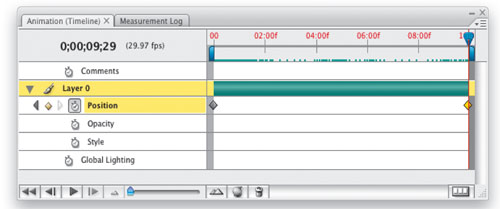
Open the Animation panel (Window>Animation) and twirl down the arrow beside Layer 0 to see the layer’s properties. Now, click on the Time-Vary Stopwatch beside Position to set a Keyframe at the 0 second mark in the Timeline.
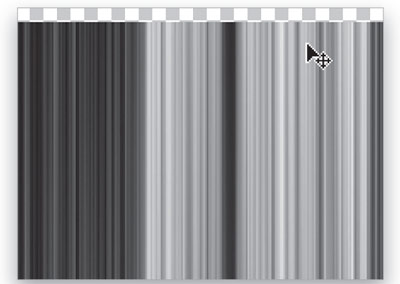
STEP SEVEN: In the Animation panel, drag the Current Time Indicator (CTI) to the 10-second mark. Drag the stretched fibers straight up so that the tail end of the object is aligned with the bottom of the canvas. This should automatically add a keyframe for the Position property at 10 seconds.
STEP EIGHT: Close the smart object (Command-W [PC: Ctrl-W]) and Save your changes. You’re now back in your regular document with a single smart object layer containing your animation.
We’ll now add a layer to colorize the animation as well as bring dimensions to our background clip.
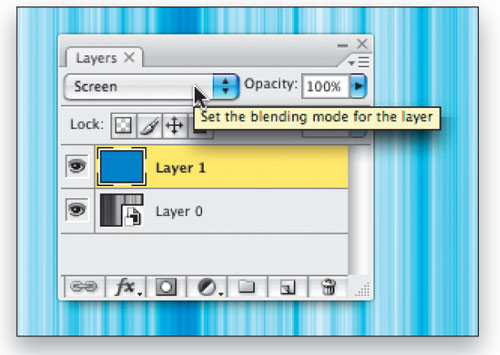
STEP NINE: To add a colorize layer, click on the Create a New Layer icon at the bottom of
the Layers panel. Click on your Foreground color to bring up the Color Picker, choose the color you want to fill your layer (we used R:10, G:140, B:210), and click OK. Press Option-Delete (PC: Alt-Backspace) to fill the layer with your new color. Change the blend mode of this new layer from Normal to Screen in the Layers panel.
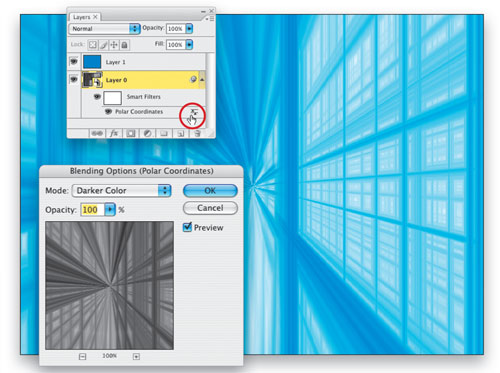
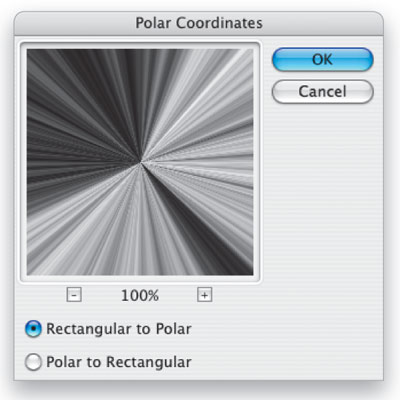
STEP TEN: Next, let’s apply the Polar Coordinates filter to the smart object layer. Click on that layer in the Layers panel to make it active, then go under the Filter menu and choose Distort>Polar Coordinates. In the dialog, click on the Rectangular to Polar radial button and click OK.
STEP ELEVEN: The trick to adding the cool vertical lines back into your animation is to edit the filter blending option for the Polar Coordinates control. To do this, double-click on the little “lines” icon to the right of the Polar Coordinates name in your Layers panel. Choose Darken or Darker Color for the Mode to get a similar effect to what’s shown here and click OK. As always, feel free to try the other blend modes for lots of different-looking results. Click the Play icon in the Animation panel to test your animation.