
Artistic Expressions: Seeing is Input
Part of being a digital artist and using Photoshop as an illustration tool is that you sometimes have to skew your perceptions a little—both in the real world and when you’re working inside Photoshop. We all live in the same reality, but we don’t always look at things the same way. As artists, we simply can’t take the world at face value. We need to constantly look and understand how we’re seeing things to better understand how to create them. We have to break things down into shapes, tones, colors, and textures. Then we must ask ourselves why these things look this way.
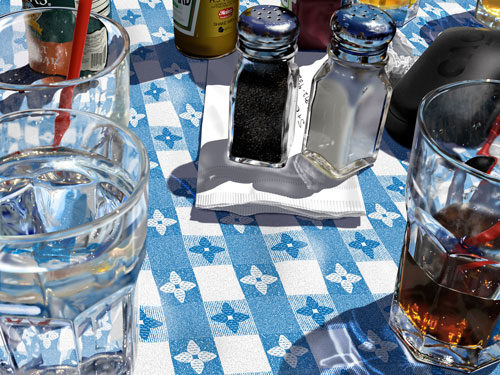
Try this next time you’re out somewhere, say lunch or dinner. Stop what you’re doing and just stare at your drink on the table. Look beyond the obvious notion that it’s a glass with liquid in it. Look at the way the light hits it. Look at how the ambient light colors the object. Look at the shape of the glass. Look at the negative space around the glass. Does the glass reflect in the tabletop? How does it reflect? Look at the condensation. Look at how the light is hitting the condensation. What about the temperature? Is there a mist because the room is warm? If there is a mist, what does it look like? How does it move? How is light refracting in the glass? How is it distorting the surface of the table when you look through it?
These are just a handful of questions to ask yourself. It’s just breaking down what you see into shapes, tones, and light. Try this whenever you see something that makes you curious. Stop and look closer. In this world, we’re so caught up in the day-to-day rush that we often forget how to see things.
The Reality of Photoshop
This open-minded way of seeing and thinking is crucial when you’re working in a program such as Photoshop. Despite the obvious advantages of illustrating in Photoshop, such as multiple undos and the fact that it’s a lot less messy than traditional methods, you’re in fact painting with light. Since the reality we look at is merely reflected light entering our eyes, it makes sense that we can come really close to mimicking reality on the computer.
Digital artists use Photoshop as their primary rendering tool for illustrations. However, like any other medium in the art realm, practice makes perfect. When painting or drawing, you fine-tune your craft with experimentation. Try different brushes and different drawing tools and over time you’ll find the right brush for the right effect. For instance, I used to utilize a toothbrush to achieve a really neat spattered look on my traditional paintings.

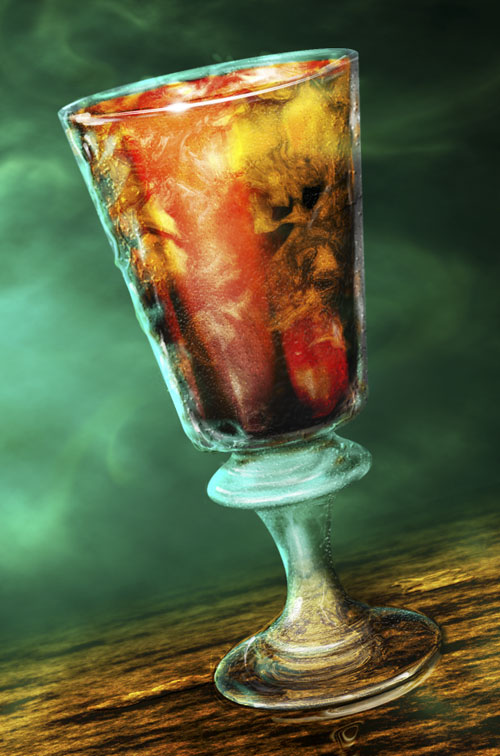
This is how Bert Monroy renders reality on his computer.
Working in Photoshop is a little different, however, largely due to the fact that the tools and filters available can be used in an infinite number of combinations to create really interesting effects, textures, lighting, etc. Sadly, there’s no single volume of instructions on how to achieve every effect or texture out there. We merely have the tools available to us. It’s up to us to find that magical combination. And that’s achieved through experimentation. Once you begin to familiarize yourself with what filters can do rather than just their names, you’ll look at them differently. This experimentation will expand the realm of what you can accomplish.
You may find that some combinations give results you never expected. For instance, would you believe that realistic water drops can be created with the Stained Glass filter and the Plaster filter? Because of the filter names, you may never have considered this, but it actually works.
Have you ever found yourself in pursuit of a particular effect and somewhere along the way, stumbled onto something that looked interesting but it wasn’t your original intention? This is where you should stop and examine what you’ve done. Why not save this version of the document under a different name, and then refer to it later and explore the new effect a little deeper?
The point is that you’re fueling your creative mind with the input necessary to solve any problem. Armed with that knowledge, you can look at something and know how to create it in Photoshop.
Painting reality
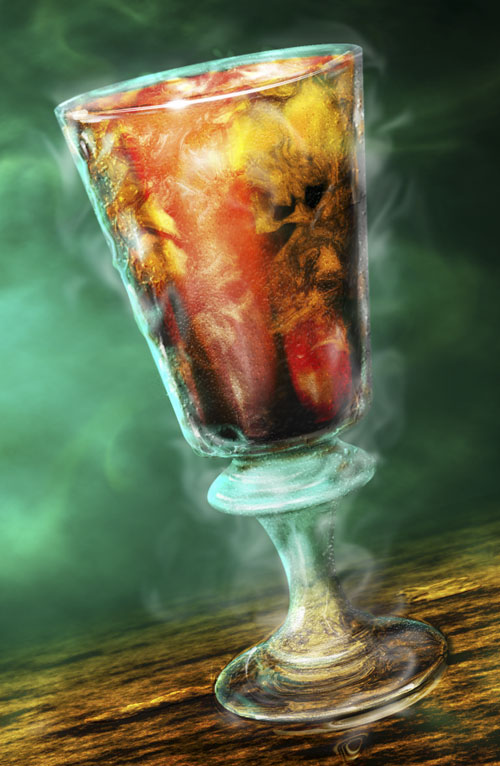
Let’s take this illustration as an example. It’s a piece that resulted from a recent lunch outing, where I found myself staring at my glass and studying its characteristics—the lighting, shape, patterns, color, contrast, and detail—and at the same time, considering how I could recreate these effects in Photoshop.
The crucial element here was lighting. Understanding how the light behaved around and through the object made it easier to illustrate; however, the one missing element was the smoky mist around the glass. I had a hard time coming up with a way to apply the mist realistically, but would you believe that I achieved a pretty good result using just the Smudge tool? Here’s how:
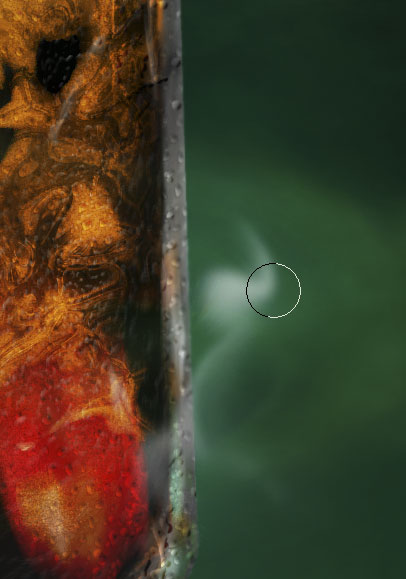
STEP 1: Start by choosing the Smudge tool in the Toolbox (you’ll find it nested under the Blur tool). Press the letter D then X to set your Foreground color to white.
STEP 2: In the Options Bar, change the brush to a small soft-edged brush (I used a 70-pt brush. Set the Strength to 60% for starters: the higher the number the more intense the smudging so staying in the 50–60% range will give the best results. (But remember to experiment.)

STEP 3: Now here’s the trick. In the Options Bar, you’ll notice a feature called Finger Painting. This is quite literally like squeezing paint on a canvas and smearing it with your finger—except you’re smearing pixels, not paint. Let’s click to turn that feature on.

In addition to handling the intensity of the smudging, the Strength setting now determines how many pixels of “paint” are laid down. With a higher number, more pixels are squeezed onto the canvas; with a lower number, fewer pixels are laid down and there’s more smudging of the background image.
STEP 4: At the bottom of the Layers panel, click on the Create a New Layer icon to create a new blank layer to paint on. Now just go into your canvas and click-and-drag to paint the white pixels. Don’t release the mouse—just move the cursor back over those white pixels to continue smearing them in a haphazard, swirly pattern. This will result is a smoky effect. Pretty cool, huh?
Experimentation is the key. Build on what we’ve done here and experiment with other brushes and other settings. Introduce layer styles to the layer you’re “finger-painting” on and see what you come up with. The more you know what Photoshop can do, the more you’ll be amazed at what you can do.
I leave you with this final thought. Even though this sample was something more realistic, the same “seeing” exercise can apply when you’re designing or illustrating in a less literal sense. Inspiration can be found in the strangest and most unusual places.

