
5 Tips for Adding Impact Using The Right Crop
In one of my very first critiques in a layout design class (way too many years ago), my instructor asked if I had cut the head off my subject in the layout on purpose or if the image came that way. I had chosen to crop it. I didn’t know why I had cropped it, other than the fact that it “felt right” and “looked better”. What I learned that day is that cropping an image a certain way can have an impact on how the viewer sees the image, perceives the message being communicated, and how it makes them feel.
During my years as a graphic designer and photographer, I’ve learned a few things about the power of the crop. I learned many of them at school but also through trial and error and my visual sixth sense. Below are some ideas to help you learn about the subtle but powerful difference a crop can make. Use these to determine what to look for when you’re evaluating your images for a layout or creating images from scratch. If you know the focus for your image ahead of time you can crop it in camera and save time later. From a designers standpoint, sometimes leaving more in the image is better so the designer can crop as needed. These cropping “rules” also apply to illustration and fine arts in addition to photography.
1. Crop to Tell a Story
When we survey a scene in really life, we generally notice details that help us piece together a story. What’s going on in this scene? Where am I? What am I expected to do or feel here? This is generally a subconscious act. We wouldn’t consciously walk into a cafe and think, “I see coffee cups, pastries, people talking at tables. I must be in a cafe!” But when viewing a single image or series of images, it’s helpful for us to have some details so we can flesh out the story in our minds.
One common technique used in films (you’ll notice next time to you watch a movie now) is to set the scene with a wide angle shot, zoom in a little on the characters or focal point of the scene, and then zoom in even closer on small details that help tell the story.


A close up of the hands of a craftsman working, details of items in a room, a really tight shot of a character’s face when they are exhibiting an emotion that is important to the story line. A tear trickling down a cheek, for example. Photographers who use this cinematic technique in their work are very good at telling stories. Try to keep those three crops in mind, wide, middle, tight, and you’ll have plenty of shots to tell the story in an interesting way.

2. Crop to Change or Emphasize a Focal Point
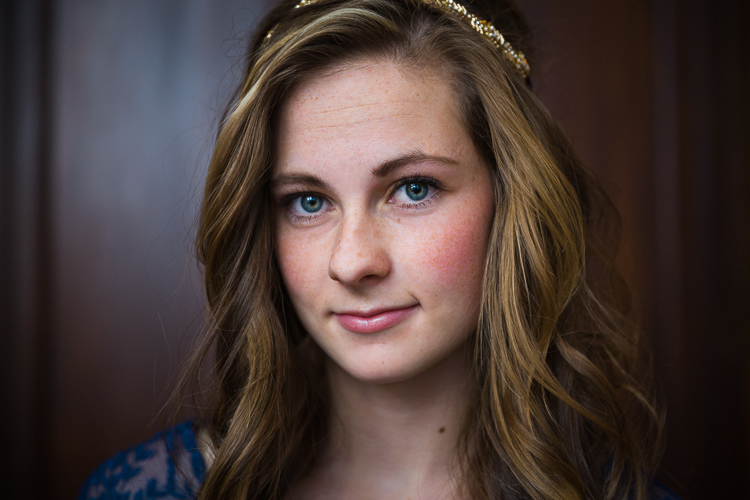
What I learned during that first critique way back in the day about why I subconsciously chose to crop the top of the head out of my image, is that I really wanted the focal point to be on the eyes of the woman, and by cropping it in tighter and placing her eyes strategically within the composition, the focal point became her eyes, not her entire face. Cropping can change the focal point of your image, or make it stronger.

Regarding the human face, we are naturally drawn to the eyes, so if you want your focal point to be the mouth or some other area of the face or body, sometimes it helps to crop the eyes out entirely. You’ll notice this in lipstick or nail polish ads in magazines. Cropping the head out entirely will bring focus to the clothing or accessory, a cropping technique commonly used in the fashion world.
For non face images, keeping the rule of thirds in mind when cropping your images can help emphasize a focal point. Sometimes I’ll not quite get it right in-camera, especially if I’m working quickly at a wedding or with small children, who don’t stand still or follow directions very well. Then I adjust the crop later in Lightroom or Photoshop. That slight adjustment can make all the difference.

3. Crop for Balance
I’m always looking for balance, in both design and photography. Balance (or lack thereof) can impact your image in a variety of ways. If you’re going for symmetry, cropping so the focal point is in the center or so there are elements on either side of a centered axis is the general rule.
For asymmetrical balance, you have a lot more options and it can sometimes be hard to determine whether or not the image truly is balanced. Pay close attention to how your crop affects the balance of your image. Cropping out too much on either side of your image can throw off the balance. This is one of those cases that I carefully observe how the crop makes me feel. Does it feel balanced?


4. Crop Out Distractions
Cropping out distracting elements is a quick easy way to improve your image. If it won’t negatively affect the composition to crop out part of the background, just crop it out! If you can’t crop it out, then you’ll have to either spend time cloning it out in Photoshop, find a different image, re-shoot or just leave the distracting elements in place. Removing those distractions can strengthen your imagery and your focal point.
5. Crop for Style & Feel
Did you know the crop can influence the overall style of your imagery? Savvy brands will include crop guidelines in their style guides for a consistent look and feel across their media platforms. The crop can make your image look contemporary, traditional or outdated.

The crop can also influence how a viewer literally feels when they look at your image. Want the viewer to feel tension? Include a lot of tangents (more on tangents below) and an unbalanced composition or tilting horizon lines and jagged angles. Want them to feel serene and at ease? Leave lots of white space around your focal point and make sure the horizon line or any other prominent lines in the composition are straightened.

6. Crops to Avoid Tangents
Tangents are areas within a composition or image where lines or objects touch but do not cross each other. In the art world, the term tangent is used to describe shapes that touch each other in any way that is visually disturbing. Check out Avoiding Tangents: 9 Visual Blunders Every Artist Should Watch Out For for more information on tangents. The basic idea is to avoid cropping your image so that any shapes fuse with the edge of your frame or are split exactly in the center on the side of the frame or close the corner of a frame. Tangents cause tension and are not visually pleasing.

7. Cropping Off Limbs
In the photography community, chopping off limbs (and heads, actually) in certain places is considered a no-no. You can get away with breaking this rule in specific cases, but as a general rule, you want to avoid cropping directly at a joint on the body. Cropping right in the middle of someone’s knees, for example, would feel really weird and make us uncomfortable. Try cropping mid thigh, mid waist (not at the hip), mid upper arm, etc. This rule is related to the tangent rule and also ties back to how we feel when we look at the image.


Conclusion
I generally play around with several different crops if an image just doesn’t “feel” right. In conclusion, here are a series of questions you can ask yourself to help you get to the right crop.
- What story does it help me tell?
- How does it change the focal point?
- How does it affect the balance?
- How does it affect the style of the image?
- How does it make me or others feel?
- Are there any distractions I can crop out?
Good luck and happy cropping. All photos by Tanya Goodall Smith.
