
Recent Viral Cellphone Image and How It Was Made
Last week, we saw this awesome reflection image by Michael Pistono go full-viral and make its way through the depths of the interwebs (starting from Reddit.com). Here is Michael’s write up about how he photoshopped it, originally posted on petapixel‘s site.
“My name is Michael Pistono, and I’m a 28-year-old photo enthusiast living in Honolulu, Hawaii. I was recently playing around with a reflection photo when I had the idea of creating another one out of a puddle — one that featured both tall buildings and an airplane.
The photo I ended up creating in Photoshop (shown above) went viral online. Here’s a look at how it was made.
I first used a picture of myself standing over a puddle as my base layer. I started off using my iPhone 5s and an app called ProCamera (which allows for much larger/high quality image files) to take this:
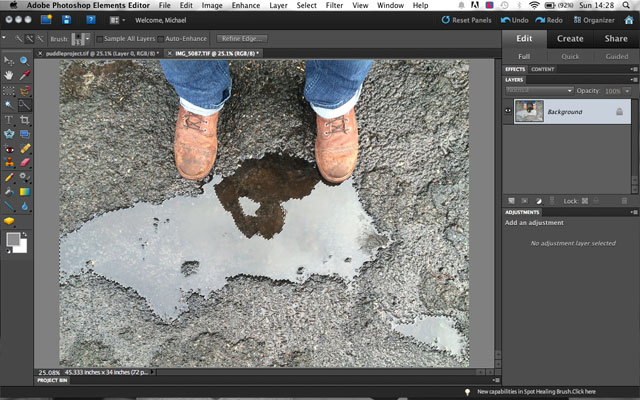
The first big step was to create a layer from the background image and cut away the empty space in the puddle that was going to be used for the “reflection.” I made a few smaller selections here and there to get the smaller rocks poking up through the surface to add back in later at this point too.
Next, I used another image that I took on Bishop St. in downtown Honolulu to fill in the cut out space in the asphalt layer.
I pasted it in, rotated and made sure that the buildings aligned with the vertical axis of the image, added some surface blur, and altered the highlights a bit before I sent it backward in the layer arrangment. I also had to drag the layer to ensure that the vanishing point in the buildings image was aligned perfectly with the lens in the reflection to get the “realism” I was going for.
Next, I wanted to darken the street level image to give the impression that the camera was metering for the sky in the reflection, so I brought up the ‘levels’ adjustments and fooled around until I was happy with what I saw.
I added a gradient map adjustment layer to give a blueish tint to the image. I set the opacity of the layer fairly low so that it didn’t overpower the image and messed with the color scheme until I saw the bluish tint that I wanted.
Lastly, I cropped the image into a square so that I could post it to Instagram and saved it as a JPG to share elsewhere.
My wife has since set up an Etsy shop in case anyone is interested in buying a print of this image.”
Check out petapixel for the full step-by-step construction of the image including screenshots. If you want to see more of Michael Pistono’s work (and his killer silhouettes), you can check out his instagram and tumblr accounts.
