Perhaps one of the most satisfying gratifications of designing with Photoshop is the ability to create the impossible—making unrealistic things look possible. Here we’ll combine dancers with splashes to create a unique “splash dance.”
1 [WHITE BACKGROUNDS WORK BEST]
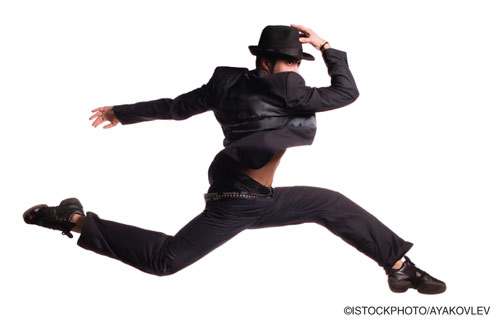
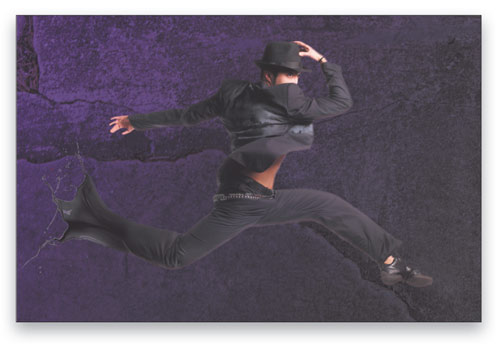
Like many techniques in Photoshop, this one will be easier if the photo you choose is on a white background. We’ve chosen this istockphoto.com image of a leaping dancer. (Toward the end of the tutorial we’ll look at what’s involved if the background isn’t white.)
2 [FIND SOME SPLASH PHOTOS]
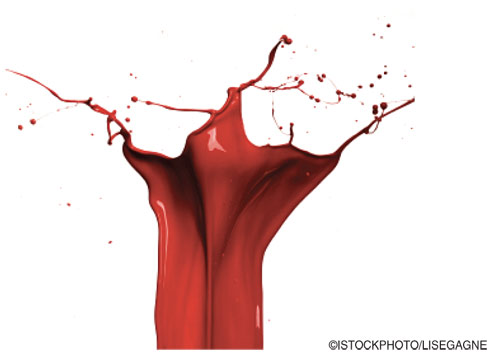
A quick search of “splashes” and “paint splashes” on istockphoto.com provides a bunch of nice splashes. We chose this one of red paint because it gave a good solid surface to work with, even though the color isn’t right. (See the variation at the end for working with water splashes.)
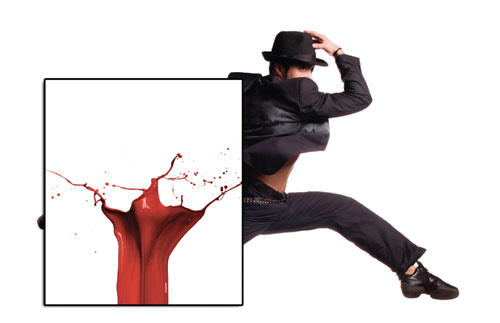
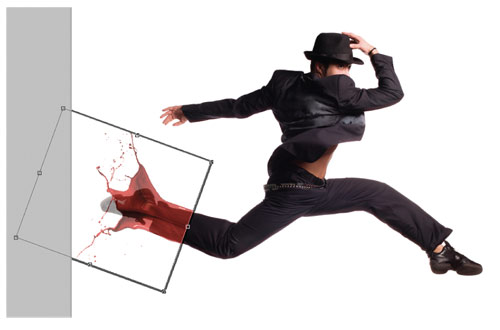
3 [DRAG-AND-DROP]
Drag-and-drop the splash photo onto the photo of the dancer. (For the purpose of illustration only, we added a stroke to the splash layer so it’s easy to see here; but the stroke’s not necessary).
4 [FREE TRANSFORM; LOWER THE OPACITY]
With the splash layer active, press Command-T (PC: Ctrl-T) for Free Transform. Rotate and scale the splash so it matches fairly closely with the dancer’s leg (as shown). Press Enter (PC: Return) when you’re satisfied.
Tip: Many times it’s easier if you temporarily lower the Opacity of the layer slightly in the Layers panel so you can see the leg underneath. After transforming, return the Opacity to 100%.
5 [ADD A LAYER MASK TO BLEND THE SPLASH]
With the splash layer still active, click on the Add Layer Mask icon (circle in a square) at the bottom of the Layers panel. Then, with the layer mask active, use a black, soft-edged Brush (B) to paint and blend the splash into the leg. Note: Depending on the angle of the foot, you may have to use the Clone Stamp tool (S) to clone out areas of the foot on the Background layer.
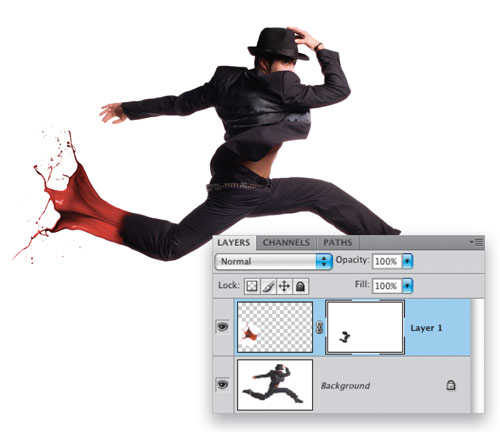
6 [ADD A LAYER WITH A COLORED SHAPE]
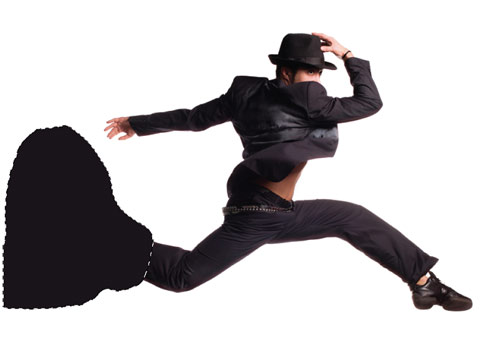
Click on the Create a New Layer icon at the bottom of the Layers panel to add a new layer above the splash layer. Now select the Lasso tool (L) and make a rough selection that’s larger than the splash. Use the Eyedropper tool (I) to sample the color from the dancer’s pant leg, and press Option-Delete (PC: Alt-Backspace) to fill the selection with that color. Then, press Command-D (PC: Ctrl-D) to deselect.
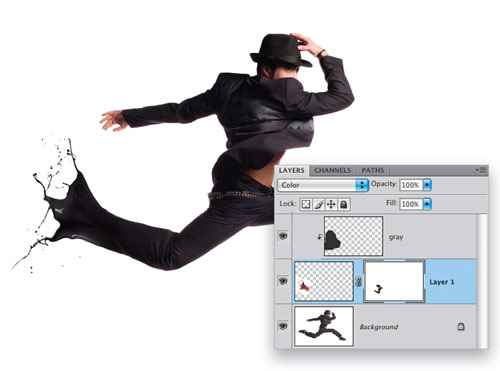
7 [CHANGE BLEND MODE; DODGE AND BURN]
Change the blend mode of this layer (Layer 2) from Normal to Color in the Layers panel, and the color of the splash should match up very nicely with the dancer’s pant leg. You may need to create a clipping mask to ensure that the color only affects the splash. To do this, hold down Option (PC: Alt) and click on the line between the splash layer and the color layer. Double-click on the layer’s name and rename it “gray.” To add to the realism, use the Burn tool to darken areas of the splash slightly and the Dodge tool to lighten areas so the colors match the pants better.
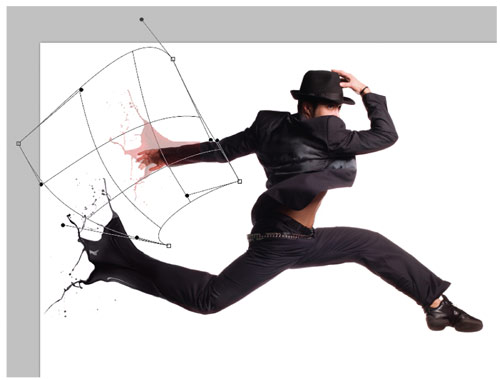
8 [REUSE THE SPLASH WITH WARP]
We’re going to reuse the same splash on the dancer’s hand, but we’ll make it look different. Drag the splash layer onto the Create New Layer icon and rename the original layer “foot” and the duplicate layer “arm.” With the arm layer active, use Free Transform to position, scale, and rotate it. With Free Transform still active, click on the Warp icon in the Options Bar. Use the Warp handles to make this splash fit his arm but look different from the original, then press Enter (PC: Return).
9 [CHANGE COLOR OF ARM SPLASH]
If you had the gray layer clipped, you’ll lose the clipping mask when you copy the splash layer. If you need the clipping mask, duplicate the gray layer, drag the copy above the foot splash layer, and clip it again. Next, make the top gray layer active, and Command-click (PC: Ctrl-click) its thumbnail to select it. While holding Option-Command (PC: Alt-Ctrl), click inside the selection and drag it over the arm splash. This duplicates the colored shape we created in Step 6, changing the color of the arm splash from red to black.
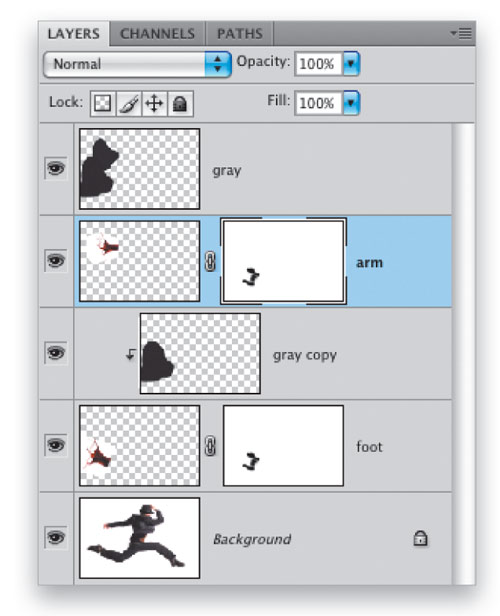
10 [CLONE AND MASK ARM SPLASH]
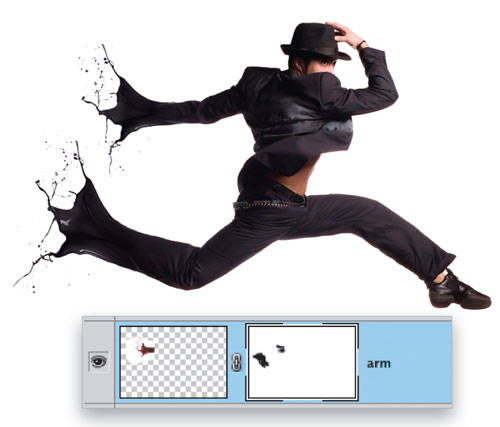
Finally, use the Clone Stamp tool to add some additional small splashes. Also note that the layer mask was duplicated as well when we made a copy of the foot splash in Step 8. Paint on the layer mask using black to hide areas of the splash and white to reveal areas.
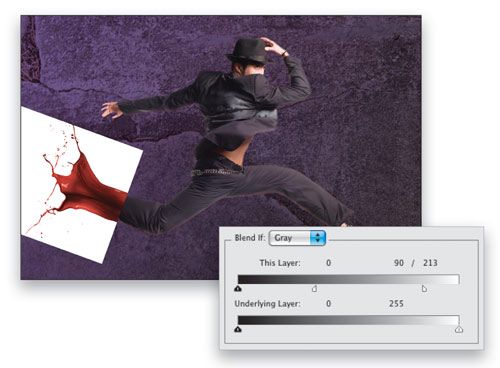
11 [IF YOUR BACKGROUND ISN’T WHITE]
If the background of your original photo isn’t white, the splash will have a very noticeable white box around it after you drag-and-drop it onto the dancer image. Double-click on the splash layer to the right of the layer name to open the Layer Style dialog in Blending Options. Click on the white triangle under the This Layer slider in the Blend If section and drag it to the left slightly (ours is 213) to remove the white. Hold down Option (PC: Alt) and click on the triangle to split it and drag the left side to the left (90 here) to make a cleaner transition. Click OK.
12 [ADD A LAYER BELOW AND MERGE DOWN]
To remove the white permanently, add a new layer below the splash layer, click on the splash layer, and press Command-E (PC: Ctrl-E) to Merge Down. Now the white box is gone (rather than hidden).
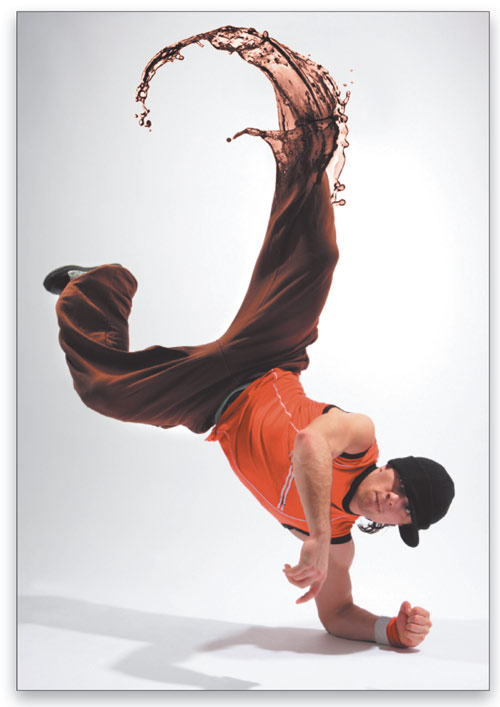
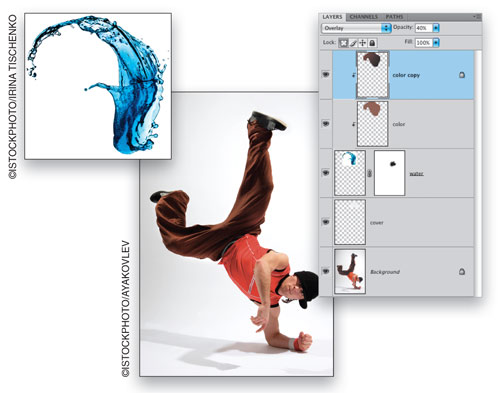
13 [VARIATION: WATER SPLASH]
You can use the same concept using translucent splashes such as this colored water. All the steps are the same: Drag-and-drop, Free Transform/Warp, and use a layer mask to blend in the splash. We also used the Blend If sliders to remove the white from the splash and added a layer to “cover up” part of the dancer’s foot. Since the colored water is semi-see-through, one clipped colored layer in Color mode wasn’t enough so we duplicated the colored layer, darkened some areas, and changed the blend mode to Overlay. To finish, we lowered the Opacity slightly as that created a better color match.
14