If you’re a digital layout artist, the time will come when you’ll have to work with text documents and spreadsheets. Although InDesign has great built-in tools for doing text entry and creating tables, there’s always someone who will attempt to do you a “favor” by sending you the text you need in Microsoft Word format. But never fear. We’ll show you how to quickly and easily import that text and how to control all of its formatting. While we’re at it, we’ll also take a look at how to handle the occasional Excel file. Do I dare mention PowerPoint? Okay, put those pitchforks and stakes down—we’re all friends here.
Importing Text
STEP 1 Change Type Preferences
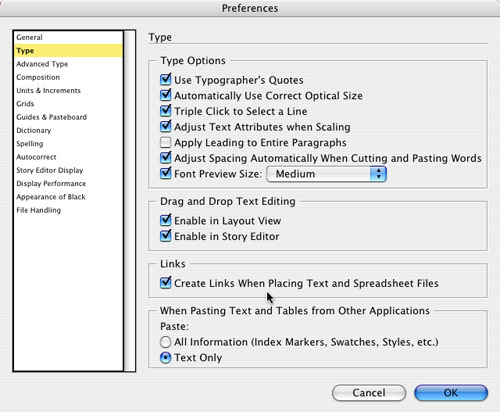
The first step is to change a preference in InDesign CS2 that determines how InDesign handles placed Word and Excel files. (The default setting for this preference changed in version CS2, so CS users should be okay.) Press Command-K (PC: Ctrl-K) to open Preferences, and click on the Type category on the left. Enable the option to Create Links When Placing Text and Spreadsheet Files. This will ensure that when a placed file is updated in Word or Excel, it will also update your InDesign document. There’s a caveat to that with Excel files, but we’ll discuss that later.
STEP 2 Create or Open a Document
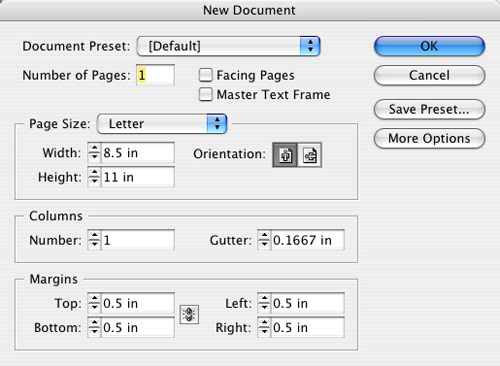
You’re going to need a Word file to follow along with in this part of the tutorial. The Word file we’re going to use as an example also uses style sheets in Word. This is not absolutely necessary, but if you set your Word users up with a template it will help you going forward. Go ahead and either create a new InDesign document (File>New>Document) or open an existing one.
STEP 3 Create Text Frame for Headline
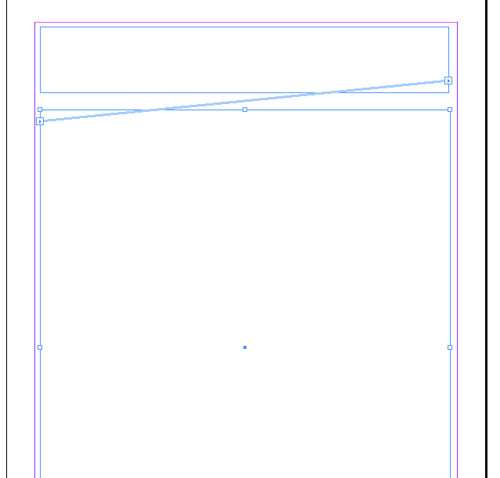
The next step will depend upon your layout needs—to frame or not to frame? InDesign allows you to create frames first or create them on the fly while placing your content. In this example, we want the article to go into a specific area of the page, so let’s create the frames first. Click with the Type tool (T) and drag out an area for your headline.
STEP 4 Create Linked Text Frame
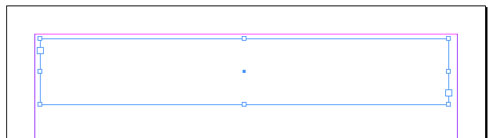
Now that we have our headline frame created, let’s create a linked three-column frame below it. Switch to your Selection tool and click on the out port near the bottom right of the frame you created. Your cursor will change into a placement icon and you can then drag out one large text frame below your headline frame. You can verify that the two frames are linked together by choosing Show Text Threads from the View menu.
STEP 5 Change Linked Frame to Three Columns
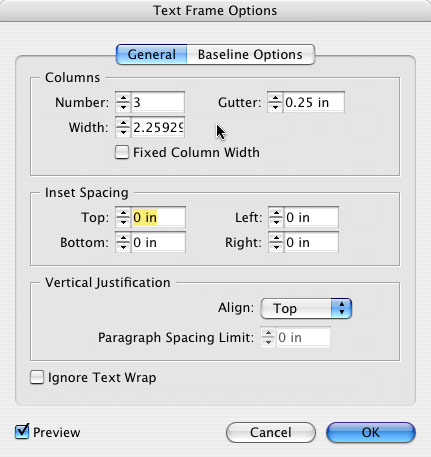
It’s time to divide the second frame into three columns. You can do this in one of two ways. There’s a “number of columns” box right on the Control palette that’s set to 1 by default. You can change that number to 3 and your frame will then have three columns. The other way that gives you more options is to choose Text Frame Options from the Object menu or press Command-B (PC: Ctrl-B) on your keyboard. Here choose three columns, set the Gutter to .25″, and click OK.
STEP 6 Place Text Cursor in First Frame
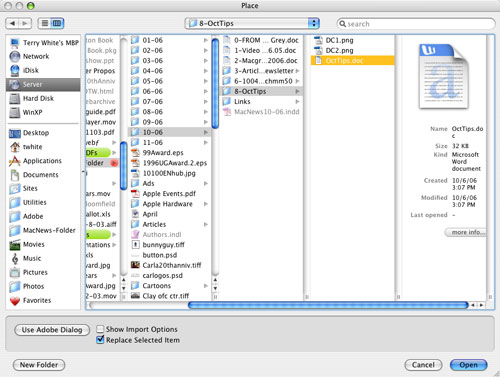
Now we’re ready to place our Word document. However, we want to direct the Word document to flow into the frames we just created. In order to do that, switch back to your Type tool and click inside the first frame that you set up for your headline. A faster way to do that would be to double-click inside the first frame with the Selection tool. This will automatically switch you to the Type tool and place your cursor in the frame. Choose Place from the File menu.
STEP 7 Activate Show Import Options
If you just choose your Word document in the Place dialog and click Open, the Word file will be placed, but you’ll miss out on all the magic. All of the controls for how that Word file will be placed are in the Show Import Options section of the Place dialog. Select your Word document in the Place dialog, enable the Show Import Options checkbox, and click Open.
STEP 8 Choose Either to Preserve or Map Style Sheets
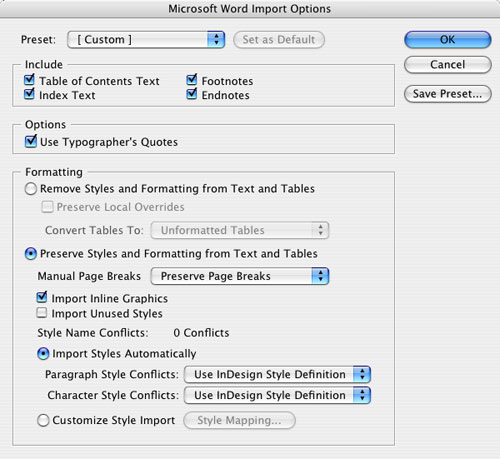
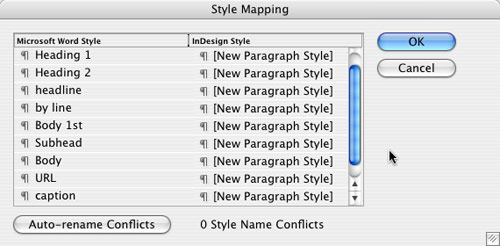
Most users will opt to Remove Styles and Formatting from Text and Tables. This means that the text will come in with a default font that you can style in InDesign. However, if the person used style sheets in Word and those style sheets match the same exact names as the ones in your InDesign document (yes, it’s case sensitive), then your document will come in beautifully formatted. So if that were the case, you would choose Preserve Styles and Formatting from Text and Tables. If you are unsure of the styles used, choose Customize Style Import, and click the Style Mapping button.
STEP 9 Map the Style Sheets
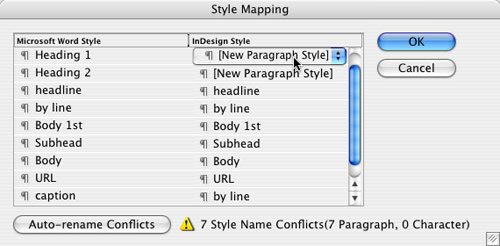
Since our new document didn’t contain any styles, we don’t have anything to match up to. Here’s an example of a dialog where InDesign style sheets have already been set up. Where the styles have the same exact name, we’re able to bring in those styles directly. Where the styles don’t match, we have the option of letting InDesign create a new style based on the incoming one or better yet, matching it to an existing style as we’ve done here by mapping “caption” to “by line” at the bottom. Click OK and then OK again to place your text.
STEP 10 Force Text to Second Frame
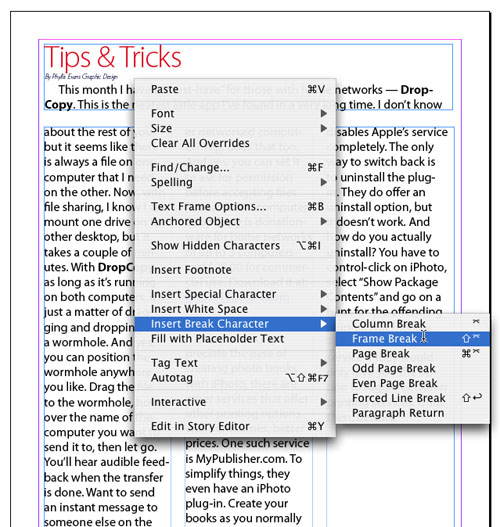
One side effect from placing this article is that the headline frame is too large. We could increase the size of the headline or decrease the size of the frame, but let’s say we want to keep everything the same size and just force any text below the byline down to the next frame. Don’t hit the Return (PC: Enter) key; there’s a better option. Place your cursor after the last word you want to be in the headline frame and choose Frame Break from the Type>Insert Break Character menu. This will force everything after the cursor to begin in the next frame.
Importing Tables
STEP 1 Place Excel Table in InDesign
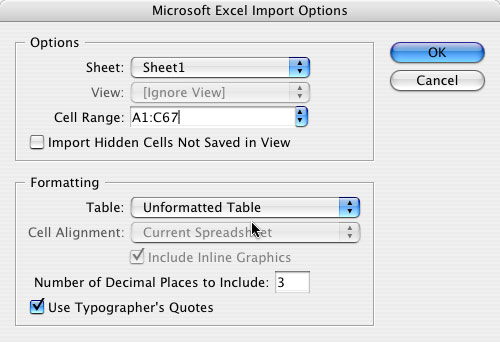
If your Word document contained a table, it would automatically be converted into an InDesign table and placed with the rest of the text. For tables generated in Excel, the process is pretty much the same: Place your Excel document with the Show Import Options box checked in the Place dialog. Then, choose Unformatted Table from the Table pop-up menu in the Formatting section and click OK. Because we didn’t create a frame first, the table will be placed at the current cursor location, or you’ll get the placement icon so that you can place the frame on the fly.
STEP 2 Select the Entire Table
The table that you placed will be pretty plain. You can, of course, go through and change the fonts and even use your style sheets for consistent formatting. However, remember the caveat we mentioned in Step 1? If you have a linked spreadsheet and someone makes changes to it in Excel, your InDesign table will update, but you’ll lose all custom formatting done in InDesign. To format all the text at once, switch to the Type tool and position it in the upper-left corner of the table until the icon changes to a diagonal arrow. Click to select the entire table.
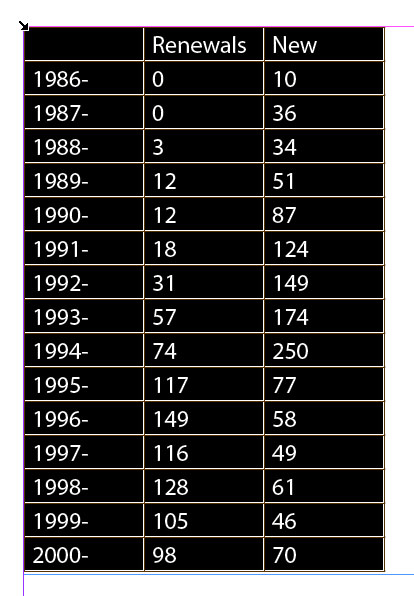
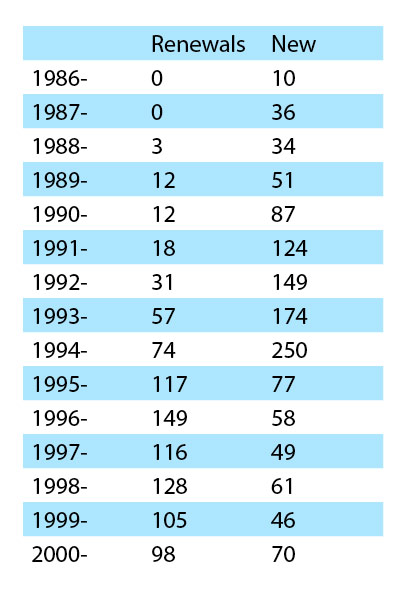
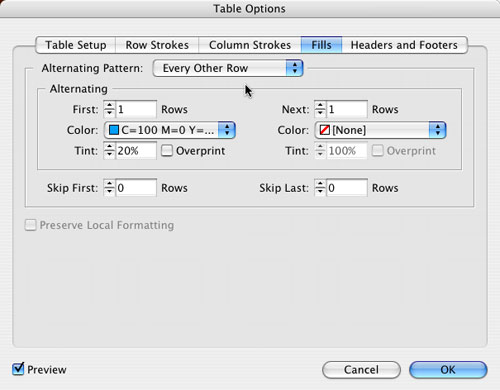
STEP 3 Color Your Rows and Columns
Beyond simple text formatting you can also change the fill color of the cells. My favorite method of doing this is to choose Alternating Fills from the Table>Table Options menu. The resulting Table Options dialog allows you to choose a pattern for which rows or columns that you want to fill. After selecting a pattern, choose your colors and click OK.
STEP 4 Remove the Strokes
Users often ask if you have to keep the visible lines/strokes separating the cells? The answer is no. With the entire table selected as we did in Step 2, you can choose 0 points for the stroke value in the Control palette.