Design with Flair from Start to Finish in Illustrator CS4

We’ve all seen some tutorials with outrageous designs where it shows you just how to do a small part of the technique. In this article, we’ll start from scratch with a basic photo and create a fully realized design—in no time at all.

1 START WITH A PHOTO
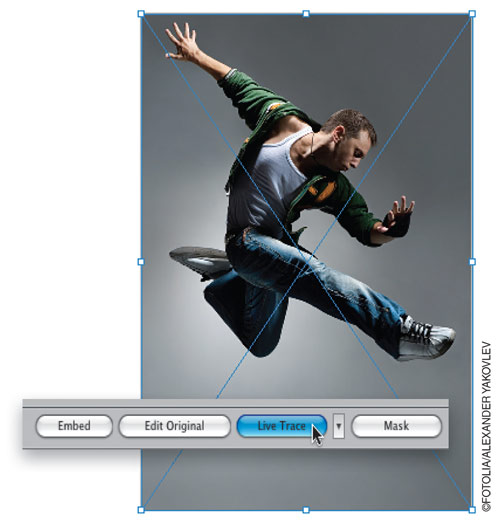
As mentioned above, it all starts with a photo. We’ve placed (File>Place) our photo of a dancer into a new Illustrator document. We just want to make this a simple black-and-white graphic, so with the photo selected, click the Live Trace button in the Control panel to invoke the default settings.

Illustrator Tutorial

2 TWEAK THE THRESHOLD
Depending on your photo, the graphic may need some tweaking. In the Control panel, locate the Threshold field, click the arrow to its right, and adjust the slider to increase or decrease the setting. You’ll see the graphic change as you do this. Find the setting that makes the graphic the most appealing. For our image, we used a setting of 83.

Illustrator Tutorial

3 EXPAND THE SHAPE TO A STANDARD OBJECT
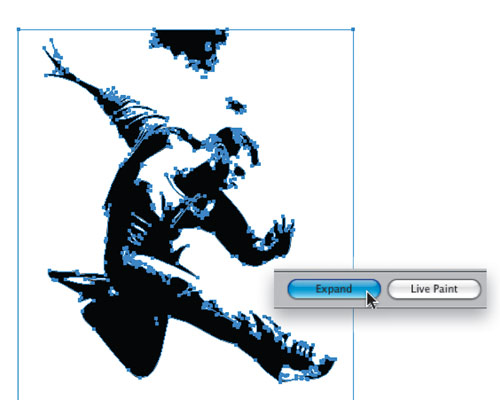
We want to edit the vector object itself but, because the graphic has been traced, we’ll have to expand the shape from a Live Trace Object to a standard object, so click the Expand button in the Control panel. Sometimes the graphic will be grouped by default: Simply go under the Object menu and choose Ungroup.

Illustrator Tutorial

4 DELETE ANY STRAY WHITE SHAPES
Now, there may be some stray white shapes that you can’t see. Just click inside any white areas and if one is selected, go under the Select menu and choose Same>Fill Color. This will select all the other white-filled shapes. Then just press Delete (PC: Backspace). All you should have left are the black shapes (as shown here). (Note: If you have any stray black areas outside your object that you don’t want as part of your design, delete those as well.)

Illustrator Tutorial

5 CHOOSE DOT PATTERN VECTOR PACK
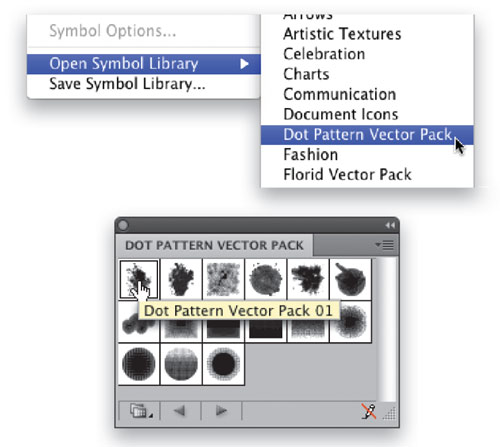
Now we’re done with our main graphic, so let’s add some elements to jazz it up. Open the Symbols panel (Window>Symbols), click on the flyout menu (top right), and choose Open Symbol Library>Dot Pattern Vector Pack. Select the first Dot Pattern named Dot Pattern Vector Pack 01 and drag it into the artboard.

(Note: If you don’t have Illustrator CS4, click here.)

Illustrator Tutorial

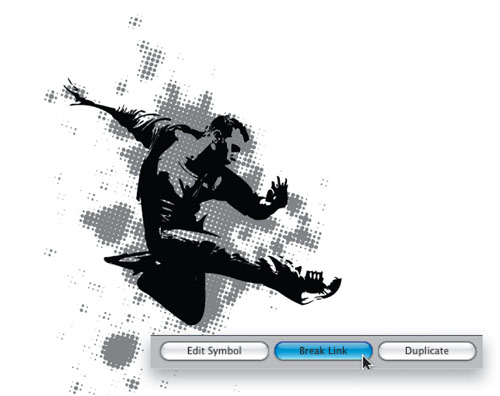
6 BREAK LINK, COLOR, AND SEND TO BACK
Because this is a symbol instance, we need to break the link to the master symbol so we can edit the graphic. Do this by clicking the Break Link button in the Control panel. Now, open the Swatches panel (Window>Swatches) and click on a light-gray box to apply that color to the graphic. Using the Selection tool (V), place this graphic over the traced graphic and scale it as needed. Then go under the Object menu and choose Arrange>Send to Back. (Note: If you can’t see the dots behind your object frame, make sure your Fill is set to None in the Control panel.)

Illustrator Tutorial

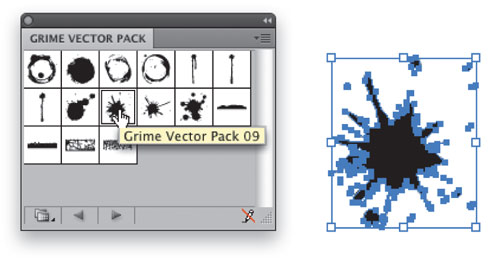
7 APPLY A GRIME VECTOR PACK
Go into the Symbols panel flyout menu again and this time, choose Open Symbol Library>Grime Vector Pack. In this panel, click on the Grime Vector Pack 09 symbol and drag it to the artboard. As we did in Step 6, click the Break Link button to make this an editable vector shape.

Illustrator Tutorial

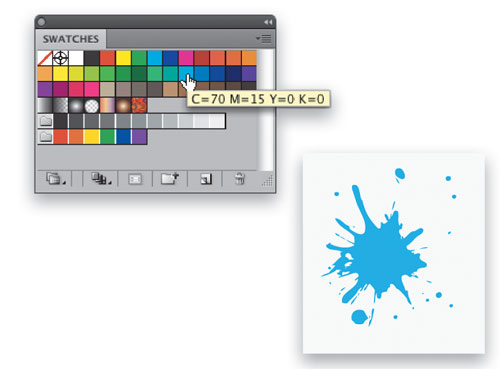
8 FILL THE GRIME SHAPE
In the Swatches panel, we chose the blue swatch (C:70, M:15, Y:0, K:0) to fill the grime shape and add to the “edginess” of the design. Of course, you should try playing with other colors to change up the feel of your graphic.

Illustrator Tutorial

9 PLACE, DUPLICATE, ROTATE, AND SCALE SHAPES
Place this shape over the working design. Then, while holding down the Option (PC: Alt) key, click-and-drag the shape to create duplicates, and position these duplicate shapes so that they somewhat cover the traced figure. Vary these shapes by rotating and scaling them so the overall shape is more appealing (as shown).

Illustrator Tutorial

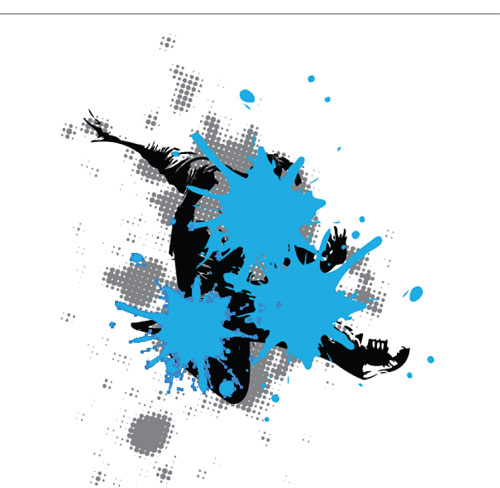
10 BRING TRACED SHAPE TO FRONT
These grime shapes need to be behind the traced shape but in front of the dot graphic. Select the traced shape, go under the Object menu, and choose Arrange>Bring to Front. If needed, reposition the blue shapes to reveal certain parts of the figure.

Illustrator Tutorial

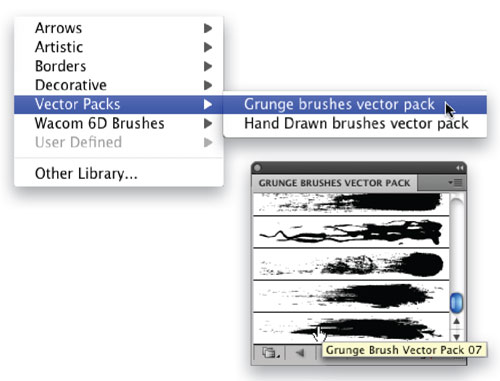
11 SELECT GRUNGE BRUSH VECTOR PACK
Now open the Brushes panel (Window>Brushes). In the Brushes panel’s flyout menu, go to Open Brush Library, then Vector Packs, and select Grunge Brushes Vector Pack. Click on the Grunge Brush Vector Pack 07, then choose the Paintbrush tool (B) from the Toolbox.

Illustrator Tutorial

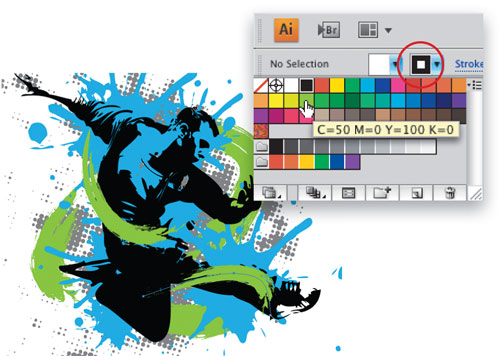
12 ADD SOME GREEN STROKES
In the Control panel, click on the Stroke icon (second from left), then click on the green swatch (C:50, M:0, Y:100, K:0) to set your stroke to that color. Now, using the brush we selected in Step 11, paint random strokes around the subject, as you see here. If the stroke seems too small, just double-click the brush in the Brushes panel to open the Art Brush Options dialog, and enter a new percentage for Width. Vary the illusion of depth by sending some of the strokes behind the other shapes.

Illustrator Tutorial

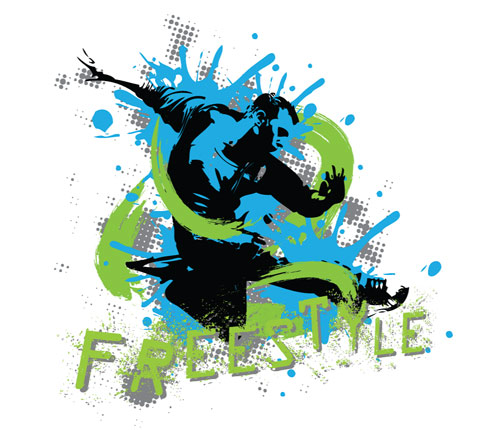
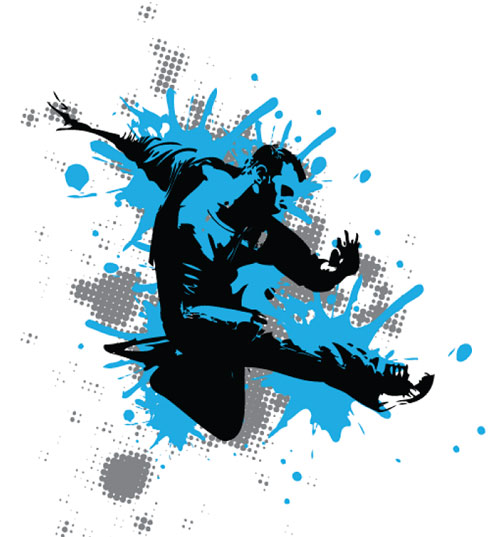
13 ADD SOME TEXT AND YOU’RE DONE
That pretty much does it. All that’s left is to add some text (we found a cool grunge font over at www.daFont.com) in a color from the overall design, and there you have it.

Illustrator Tutorial


Share & Enjoy

Pages: 1 2


Similar Articles


  1. G Snyder (Reply) on Thursday June 4, 2009

    I think you might mean “flair” here…

  2. Chris Main (Reply) on Thursday June 4, 2009

    Hi G,

    You’re right, we did mean “flair.” We’ve already made the change.

    Thanks!
    Chris Main
    Managing Editor
    Layers Magazine

  3. bebopdesigner (Reply) on Thursday June 4, 2009

    Nicely done. Thanks for posting!

  4. Mazerolle (Reply) on Thursday June 4, 2009

    I was not able to locate the same photo at Fotolia; I took another one but the result is not convincing. The same apply for many tutotials.

  5. [...] Click here to see the rest of the tutorial [...]

  6. Gary (Reply) on Thursday June 4, 2009

    Very very good.

  7. matt (Reply) on Thursday June 4, 2009

    Nice work, thanks a lot :)

  8. Josh (Reply) on Thursday June 4, 2009

    great tutorial. thanks, this helped me tap into the abstract side of illustrator!

  9. susan (Reply) on Thursday June 4, 2009

    thanks for sharing!

  10. jean (Reply) on Thursday June 4, 2009

    very simple and nice!! Thanks

  11. Chavar (Reply) on Thursday June 4, 2009

    That was really great, although my brother and i were both looking at it, and he is not so into the excessive grunge look.

  12. [...] Corey Barker shows how to get some slick results using Illustrator’s Live Trace, symbols, and brushes. [...]

  13. [...] to get a jump on this should check this out (via John Nack who also point to a few other links the Illustrator crowd might [...]

  14. Faisal (Reply) on Thursday June 4, 2009

    How can i get these vector packs?

  15. Munaf Patel (Reply) on Thursday June 4, 2009

    Thx Cool work! it will work for me as well!

  16. Rachel (Reply) on Thursday June 4, 2009

    Awesome tutorial! I am using CS3, and the vector packs are not available in my symbol library – where can I find something similar?

  17. macs55 (Reply) on Thursday June 4, 2009

    The tutorial is verry good (read awesome [for those sho couldn't get it, sorry but you need to be creative and play with different numbers, don't get stick by the book]).

    Dear Layers Magazine (all of you the good guys), thanks for all your effort, and good work.

  18. designer uae (Reply) on Thursday June 4, 2009

    Nice work

  19. Jennifer Chang (Reply) on Thursday June 4, 2009

    it’s very clear and step by step details, that what i need. thanks and wish having more illustrator demos more often.

  20. dansoadesigns (Reply) on Thursday June 4, 2009

    cool

  21. JustJenna (Reply) on Thursday June 4, 2009

    I’m kind of with the folks who can’t access the vector packs; if you’re going to demonstrate something that only works in a particular version of the software (i.e. CS4), you should say so up front. Other than that, I was WAY cool with it.

  22. [...] Design with Flair from Start to Finish in Illustrator CS4 – by Corey Barker of Layers [...]

  23. Raven Sloe (Reply) on Thursday June 4, 2009

    So thats how you do it.

  24. Chris Main (Reply) on Thursday June 4, 2009

    Hey Everyone,

    We’ve added a mini-tutorial showing how to fake the Dot Pattern Vector Pack 01 symbol if you don’t have Illustrator CS4.

    http://www.layersmagazine.com/design-with-flare-from-start-to-finish-in-illustrator-cs4.html/2

    Thanks,
    Chris Main
    Managing Editor
    Layers Magazine

  25. Chrishonda (Reply) on Thursday June 4, 2009

    Thanks, this really helped. I don’t know how to save my vector so I can upload it to Myspace though.

  26. [...] Design with Flair from Start to Finish in Illustrator CS4 [...]

  27. [...] Design with Flair from Start to Finish in Illustrator CS4 Creating a Cut-out style Illustration from a Photo Template Draw a Balloon in Illustrator Tutorial Drawing Birds in Illustrator Tutorial Vector Build Methods 1 Drawing a character’s face in Illustrator Flash Game Illustration Illustrator Vector Line Art of Cruise Ship Gears and Splined Shafts in Adobe Illustrator Image Inlay Text Illustrator Tutorial Stylized Portrait Illustration Create A Vector Art Twitter Bird Character Icon In Adobe Illustrator Drawing a Vase in Illustrator Tutorial Comic Book Style Graphic Design Creating a crazy cool logo   [...]

  28. Benn (Reply) on Thursday June 4, 2009

    Thank you, that was very helpful. Not only a great tutorial from a learning the basics point of view, but actually a pretty sweet effect too.

  29. Jason G (Reply) on Thursday June 4, 2009

    This is a great tutorial to take anyone from elementary illustrator work, to intermediate. Very easy to do and very helpful. Thank You!!!

  30. john (Reply) on Thursday June 4, 2009

    Thanks a lot for the tutorial
    lean a lot from this

    cheers

  31. [...] (Note: If you don’t have Illustrator CS4, click here.) [...]


Planet Photoshop Photoshop World Kelby Training Lightroom Killer Tips NAPP Scott Kelby