You can use PDF documents as small, flexible, Internet-safe files for managing documents in a collaborative project that requires input from several people. The commenting, response, and sharing features in Adobe Acrobat 9 Professional provide great flexibility and ease of use. And with PDF, you can view and comment on the exact layout, which isn’t possible in text-based applications.
1 CREATE A SMALL PDF DOCUMENT
Your first two tasks are: To create a small-size, Web-friendly PDF version of your document for review—typically, images with a resolution of 72-ppi with moderate compression will provide image quality good enough for review. (For more on repurposing PDFs, see “Optimizing PDFs,” Layers, Sept/Oct 2008, p. 72.) Then, establish a naming scheme for your PDF document versions, making sure everyone in your group is aware of it. For this example, we’ll use a simple, sequential, numeric naming system that adds “_#” at the end of each successive version—Gallery Promo_1, for example.
2 CHOOSE REVIEW/DISTRIBUTION OPTION
Acrobat offers two kinds of managed reviews: Server-based shared and email-based reviews. Shared reviews (used here) are the most flexible, as reviewers can interactively view and respond to each other’s comments, track comments, and even participate in live interactive review sessions. Acrobat 9 is required to initiate a shared review and Commenting tools can be used in either review method. Acrobat 6 or later and Reader 7 or later are required for an email-based review. In a shared review, you can use either the Acrobat.com free server (used here) or your own server for document distribution.
3 ENABLE COMMENTING FOR READER USERS
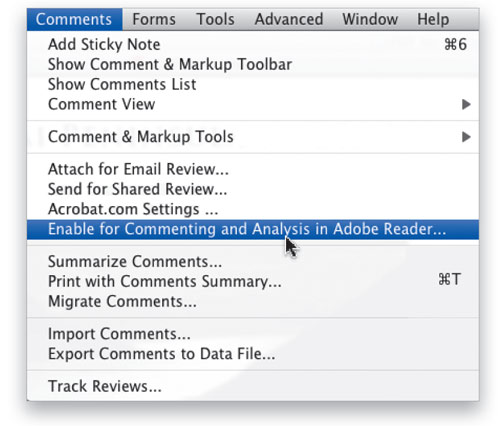
If reviewers have only Acrobat Reader, they can view and add their own comments. But Commenting (and its automatically available tools) must first be activated for these Reader users from Acrobat Pro or Pro Extended. Setting up a shared review automatically activates Commenting for Reader 9 users; however, Acrobat 9 is required to participate in shared reviews via Acrobat.com. For email-based reviews, you can activate Reader Commenting by choosing Comments>Enable for Commenting and Analysis in Adobe Reader. Acrobat 8 (or higher) is required for sharing comments via email-based review.
4 INITIATE SHARED REVIEW
First make sure you’re connected to the Internet, preferably with a broadband connection. To initiate a shared review, open the PDF you want to share and choose Comments>Send for Shared Review. The drop-down menu at the top of the dialog should be set to Automatically Download & Track Comments with Acrobat.com. Click Next and you’ll be prompted to provide your Adobe ID (usually an email address) and password. If you don’t have an Adobe ID and password, you can create one here: Just click on the Create Adobe ID link. Be patient, the linking process can take a few minutes…go grab a cup of coffee or run a few sprints.

5 SET UP YOUR SHARED DOCUMENT
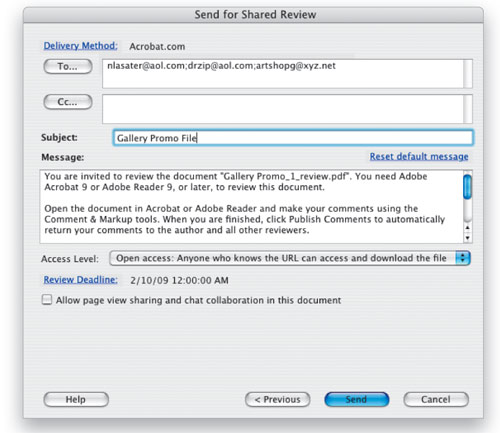
When the Send for Shared Review dialog appears, in the To or CC fields, list the email addresses of everyone you want to participate in this collaboration, separating each email address with a semicolon (;). (Note: Click on the To or CC buttons to access your email list in your default email application.) Type in a Subject (ours is Gallery Promo File). If you want to change the Review Deadline, click on the link and select either a new date or No Deadline. Don’t click Send yet….
6 SET ACCESS LEVEL
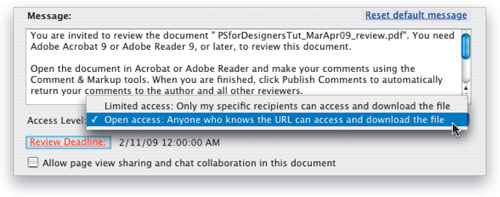
There are two choices of Access Level: Open Access and Limited Access. Open Access allows access to anyone who knows the URL for the shared file. Limited Access is restricted to those listed in your share list and they’ll have to create a free Acrobat.com account to access the shared document. Open Access is a bit easier for your recipient to use and is the access we’ll choose here. Note: If the document on which you’re collaborating is sensitive, such as a financial report or product release, you may want to use the Limited access. Now, click the Send button.
7 DOWNLOAD, VIEW, AND COMMENT
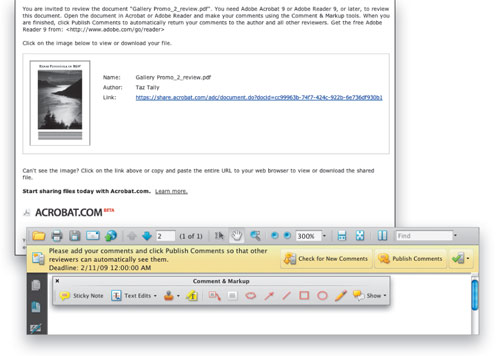
Each person you include will receive an email invitation (with a link to the document) to join the document review. They can copy-and-paste the link into their Web browser (preferred) or they can activate the link through the email. Each reviewer will be taken to Acrobat.com where they’ll be asked if they’sd like to download the document to access additional features in Acrobat or Reader. After clicking Download, they can review and comment on the shared PDF and then publish their comments in Acrobat or Reader. A Task Bar appears at the top of the shared document, allowing reviewers to Check for New Comments or Publish Comments.
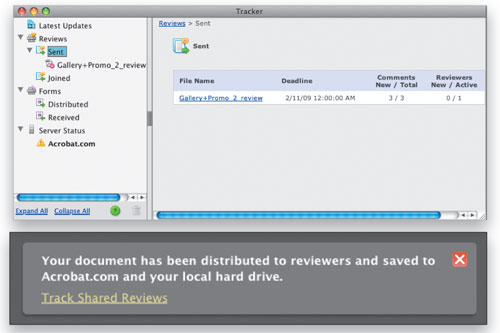
8 TRACK COMMENTS
To help manage your shared documents, activate the Track Reviews function in Acrobat or Reader. This tracking allows you to monitor all shared documents and shared comments created in Acrobat or Reader. Once you click the Send button in Step 6, Acrobat informs you that that your document has been distributed and provides a link for opening the Tracker. You can also choose Comments>Track Reviews (Reader: View>Tracker). In the Tracker window you can view all of your shared documents and track comments and reviewers. The Tracker will also inform you about any new comments, the status of the file, and when the review is set to expire.
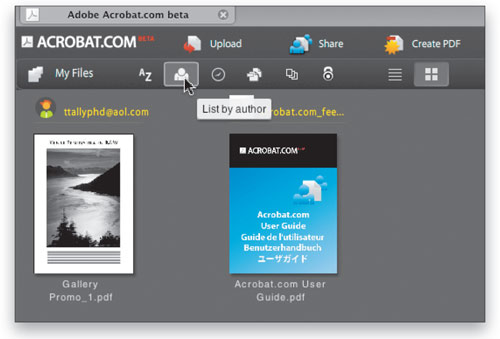
9 VIEW YOUR SHARED DOCUMENT ONLINE
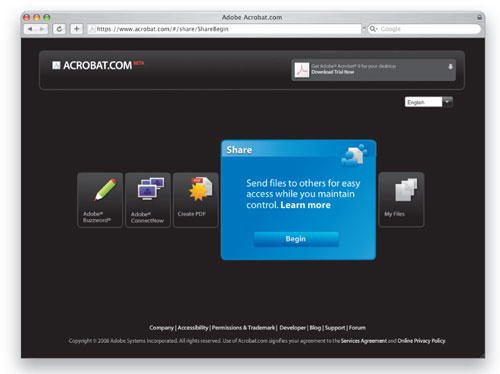
To view your documents online, visit Acrobat.com and log in with your Adobe ID. Your document(s) are listed under My Files. To the right of the My Files icon, there are a variety of document-management tools, including several document-view controls. Click on the List by Author (head-and-shoulder) icon to show the author and the View As Thumbnails (four squares) to view thumbnails of the document(s).
10 VIEW AND MANAGE REVIEWERS
To view and manage the reviewers for a particular shared document, simply click on the document’s thumbnail and a list of all the reviewers to whom you sent invitations appears at the bottom of the share.acrobat.com window. Move your cursor over a reviewer’s name to view their access status. In our example, you’ll see that the Artshop reviewer can view and download this file. Also note that Reader Commenting has been activated automatically. To remove a reviewer, hover your cursor over the reviewer’s name, then click on the down-facing arrow at right and click Remove.

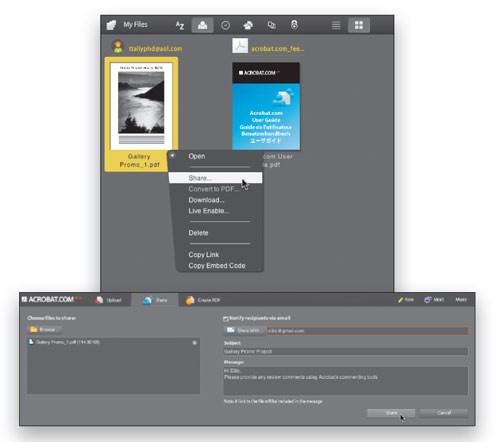
11 MANAGE YOUR SHARED DOCUMENT
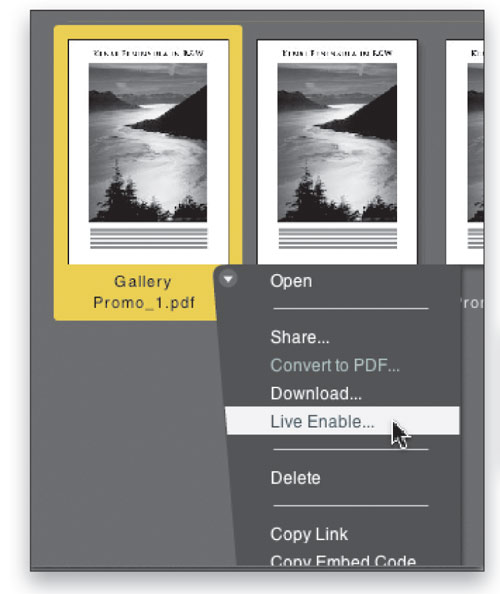
If you click on the down-facing arrow at the lower-right corner of your shared document’s thumbnail, a pop-up menu opens, allowing you to Open, Share, Convert to PDF (if it’s not a PDF), Download, Live Enable, Delete, Copy Link (for placing a link to this document in an email) and Copy Embed Code (for placing a link on a website). If you click Share, a dialog appears above the file thumbnails with the selected shared file listed under Choose Files to Share. To add another reviewer, complete the right side of the window and then click Share.
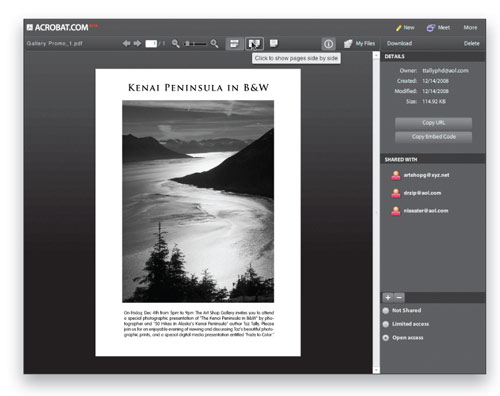
12 VIEW AND ACCESS FILE INFO
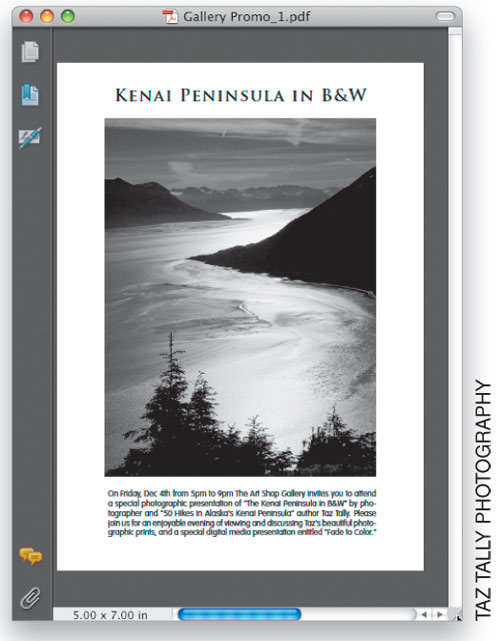
To view a complete compilation of information about your document and its contents, click on the hyperlinked name below its thumbnail (or choose Open from the menu accessed in the last step). The file appears in the Preview area. At the top of this window, you can change magnification, scroll through the document, and control the page display. On the right are listed document statistics and reviewers. Double-click on any reviewer name to manage that reviewer. In the upper-right corner, click on the My Files icon to return to the previous file icon preview.
13 WORK LIVE
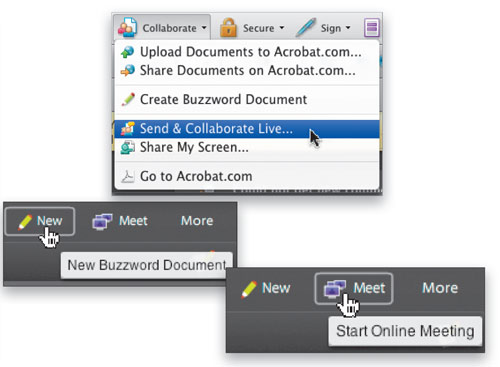
In addition to the asynchronous review process detailed above, you can also work “live” on documents with your reviewers through Acrobat.com. There are several avenues for working live: You can choose Live Enable from your shared document pop-up menu to create a live version of your shared document; you can also participate in online meetings and live text document editing (Buzzword documents) by clicking on their respective icons located in the upper-right corner of the shared.acrobat.com window; or you can initiate a live review from within Acrobat by choosing File>Collaborate>Send & Collaborate Live.