Using Adobe GoLive CS2 to Create Inline Frames
In relation to a webpage, a frame is a division of the browser window, which allows the Web browser to load separate webpages into the same overall Web browser window. A later iteration of the frame concept evolved where instead of dividing the entire window, you could cut a “hole” in your webpage and load another HTML file into that hole, essentially embedding one HTML file into another. This hole is an inline frame. Once defined, you can load another webpage into this area.
STEP 1 Open the Site
Let’s start with a three column CSS-based layout, so after downloading the practice files, open the site file Inline Frames.site, and then double-click on the advanced_css_objects.html file in the Site window to open it.
STEP 2 Adjust the CSS-Based Layout
Using the Object Selection tool, click on the outermost DIV to select it, and then bring up the Inspector palette (Window>Inspector). Set the Right Column Width to 250 pixels. You’ll notice the center area automatically shrinks to accommodate the new size (thanks, GoLive, for doing the math and CSS adjustments for us!).

STEP 3 Set the Default Text for Inline Frame
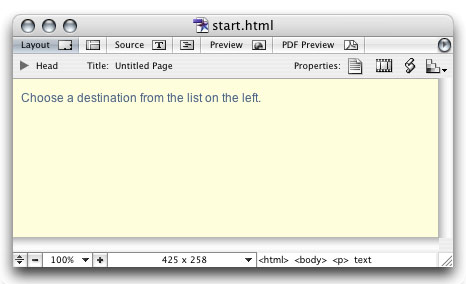
Double-click on the file called start.html in the Site window to open it. Type in “Choose a destination from the list on the left.” This will act as the default view inside the inline frame when a visitor first opens this page.
Note: You may choose the first destination page (Destination #1) to be the default instead of an instruction page.
STEP 4 Drag Out the Inline Frame Object
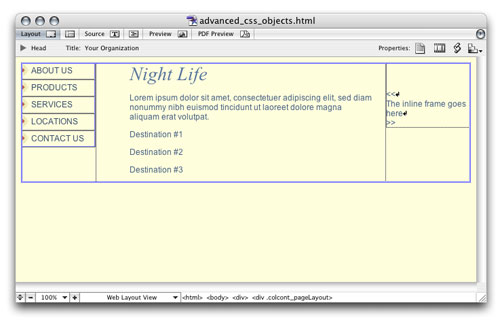
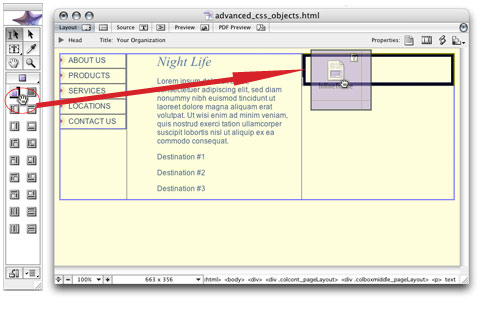
Back in the advanced_css_objects.html file, click inside the right DIV with the Standard Editing tool and select all of the contents (Edit>Select All). Press Delete (PC: Backspace) to remove all the contents. Next, click on the flyout menu at the top of the Objects Toolbar and choose Frame. Select the Inline Frame object (top-left icon) from the set of Frame objects and drag it into the rightmost DIV.
STEP 5 Set the Properties for Inline Frame
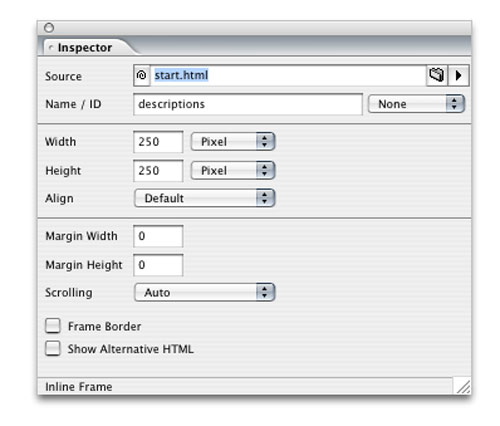
Select the Inline Frame object that you just inserted and bring up the Inspector palette. Enter (or point-and-shoot to) the start.html file in the Source field, set the Name/ID field to “descriptions,” set the Width and Height to 250 pixels, and uncheck (if checked) the Frame Border setting. Another important option is to leave the Scrolling set to Auto. This will allow the inline frame to attach a scroll bar if the content of the webpage is longer than the inline frame’s height.
STEP 6 Make Your Border with CSS
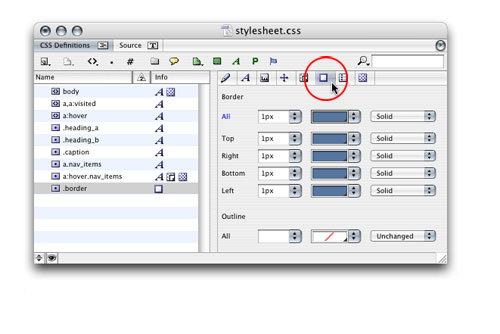
Let’s make a custom border based on a CSS definition to ensure graphic consistency. Double-click the stylesheet.css file in the css folder in the Site window to open it. Click the Create a New Class Style icon, and use “.border” as the name. Then, select the Border and Outline Properties tab and enter 1 pixel in the All field. Select Blue from the pull-down menu next to the color chip, and select Solid from the last pull-down menu. Close and Save the file.
STEP 7 Apply the CSS Border
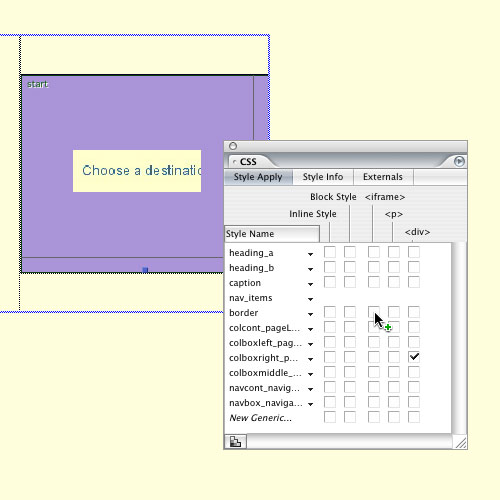
Select the inline frame in the advanced_css_objects.html and open the CSS palette from the Window menu. With the inline frame selected, there’s an option to apply CSS definitions to the iframe; let’s apply the border definition we just created to the iframe.
STEP 8 Make Content Pages
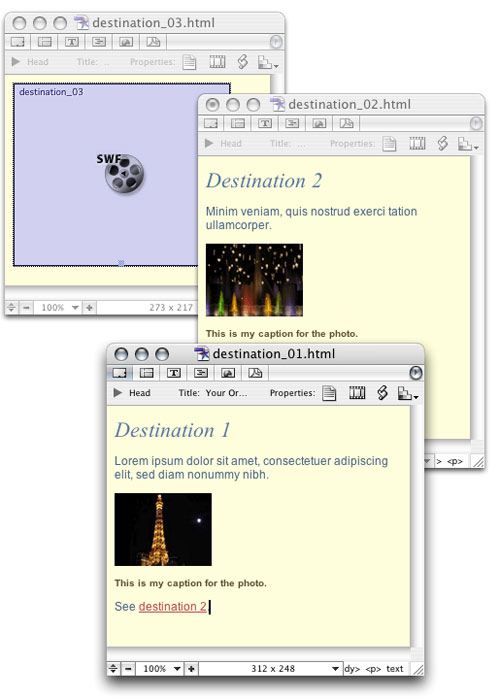
Next, we need to make the pages that we’re going to load into the inline frame. Since we’re loading HTML pages, we can create our pages with any technologies a webpage can have, such as text, database results, audio, images, video, and even Flash animations (as I have embedded in the destination_03.html file that you’ll use in the next step).
[For more on using different types of media files in GoLive, see www.layersmagazine.com/category/tutorials/golive.]
STEP 9 Make Links to Content Pages
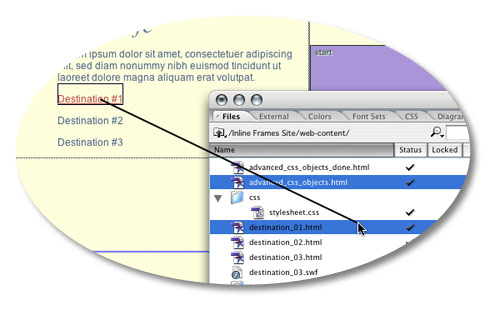
Select the text “Destination #1” with the Standard Editing tool, hold the Command key (PC: Control key), and point-and-shoot to the file named destination_01.html in the Site window. Repeat this for “Destination #2” and “Destination #3.”
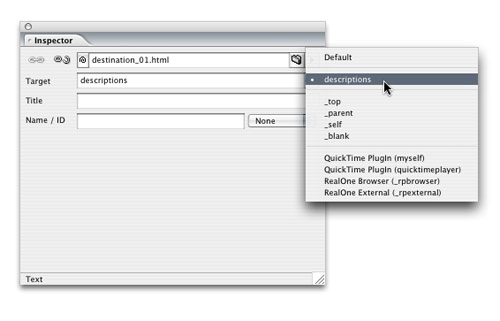
STEP 10 Target the Links
Now we need to target the links so that the pages will load into the inline frame. Select some of the linked text in the Destination #1 link (you don’t have to select all of the linked letters). In the Inspector palette, choose “descriptions” from the Target pull-down menu. Repeat for Destination #2 and #3.
STEP 11 Cross-Link the Content Pages
Double-click the destination_01.html file in the Site window to open it, select the “destination 2” text at the bottom, and link it to destination_02.html in the Inspector palette. Do not set the Target; this will make the link default to the same window the file is in (which is the inline frame). Close and Save the file.

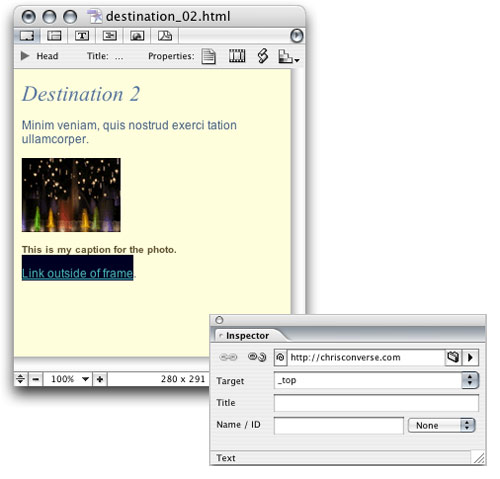
STEP 12 Link Outside of the Inline Frame
Open the destination_02.html file, select the “Link outside of frame” text at the bottom, and make a link to a website in the Inspector palette. For this link, choose “_top” in the Target pull-down menu. This link setting will make sure the link breaks out of the inline frame and takes over the topmost window of the browser.
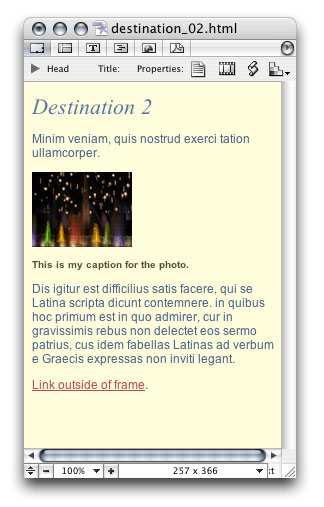
STEP 13 Add Extra Content to See Scrolling
Before closing destination_02.html, let’s add some extra content to the page. This will ensure overflow in the inline frame so we can see our automatic scroll bar kick into action when we preview the file. Close and save the file.
STEP 14 Preview the Experience
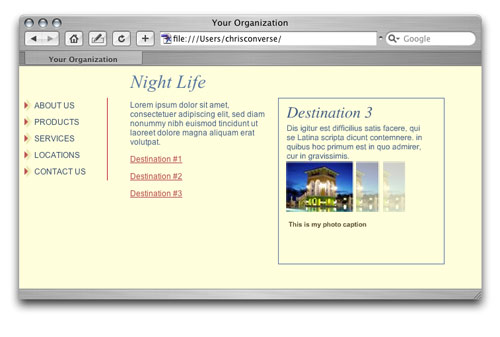
Preview your pages in a Web browser. Notice the border on the inline frame, and how the links target the page into the inline frame area. View the content for Destination 1 and notice how it links to Destination 2 inside of the inline frame. And finally, take a look at the scroll bar on Destination link #2, test the link to the outside page, and then come back and view the Flash animation in Destination 3.