
Simple and Colorful Portrait Lighting

Today we are going to do a simple two-light shoot, which is really a one-light shoot (as far as our subject goes) because the second light is only used to light the background.
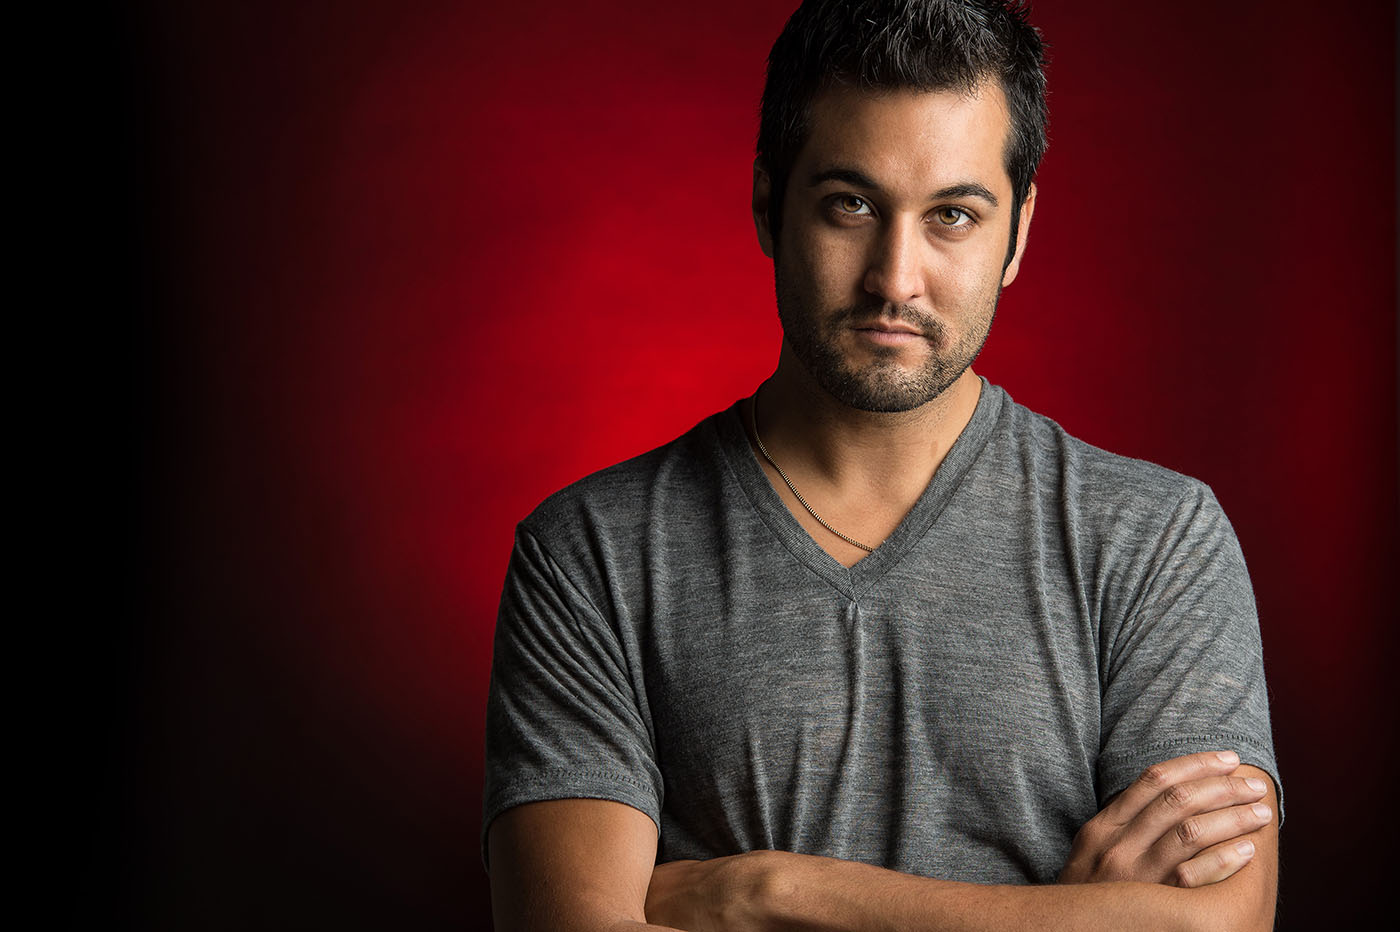
Figure One
Here’s the final image. This is a simple, classic look and it’s really easy to pull off. Plus, it works great for either men or women, and because we’re adding color to our background using a gel, we can make the background color match our subject’s outfit. In this case, our subject wore a gray shirt, so we could have chosen just about any color; but red is an ideal color to go with gray, so this was an easy choice.
Scott Kelby
Figure Two
For the single light on the background, I’m using one of the same studio strobes I pretty much always use: an Elinchrom BXRi 500. Their latest version is just the BRX, which is similar to the BXRi, except this newer version works with Elinchrom’s EL-Skyport 3.0 Software and their EL-Skyport App for iOS using their optional Wi-Fi module.
When we’re using one of these strobes to light a background like this (where I actually want to see a pool of light), I use a bare-bulb strobe with a standard reflector like you see in the image below. If I want the pool of light tighter and more concentrated, I just move the light closer to the background. If I want it to cover more of that black background, I can move the light farther from the background. However, if you’re not using a black background and you want to light the entire background with just one light, then try using a wide-angle reflector on your strobe instead. We use the Elinchrom 9 1/2″ 135° Wide-Angle Reflector, which sells for around $35 at B&H. That alone will usually do the trick.
We’re shooting on a roll of black seamless paper, and when we’re shooting on black like this, we can use a flash or studio strobe to add a splash of color to this background by adding a gel over the light. In this case, we used gaffer’s tape to put a square piece of red gel over the entire reflector. You can get a 20×24″ sheet of red Rosco brand gel from B&H for around $6.50, then you just cut it into squares that will fully cover the reflector. These gels are made to withstand the heat from a modeling lamp and a flash. They call them “heat stable,” which is a fancy way of saying, “These shouldn’t burst into flames.”
In the behind-the-scenes shot below, you can see that the subject’s body is hiding the light, which is placed directly behind him. We originally had the light on a much lower light stand, but we couldn’t get the pool of light to land behind his shoulder, so we had to use a taller stand.
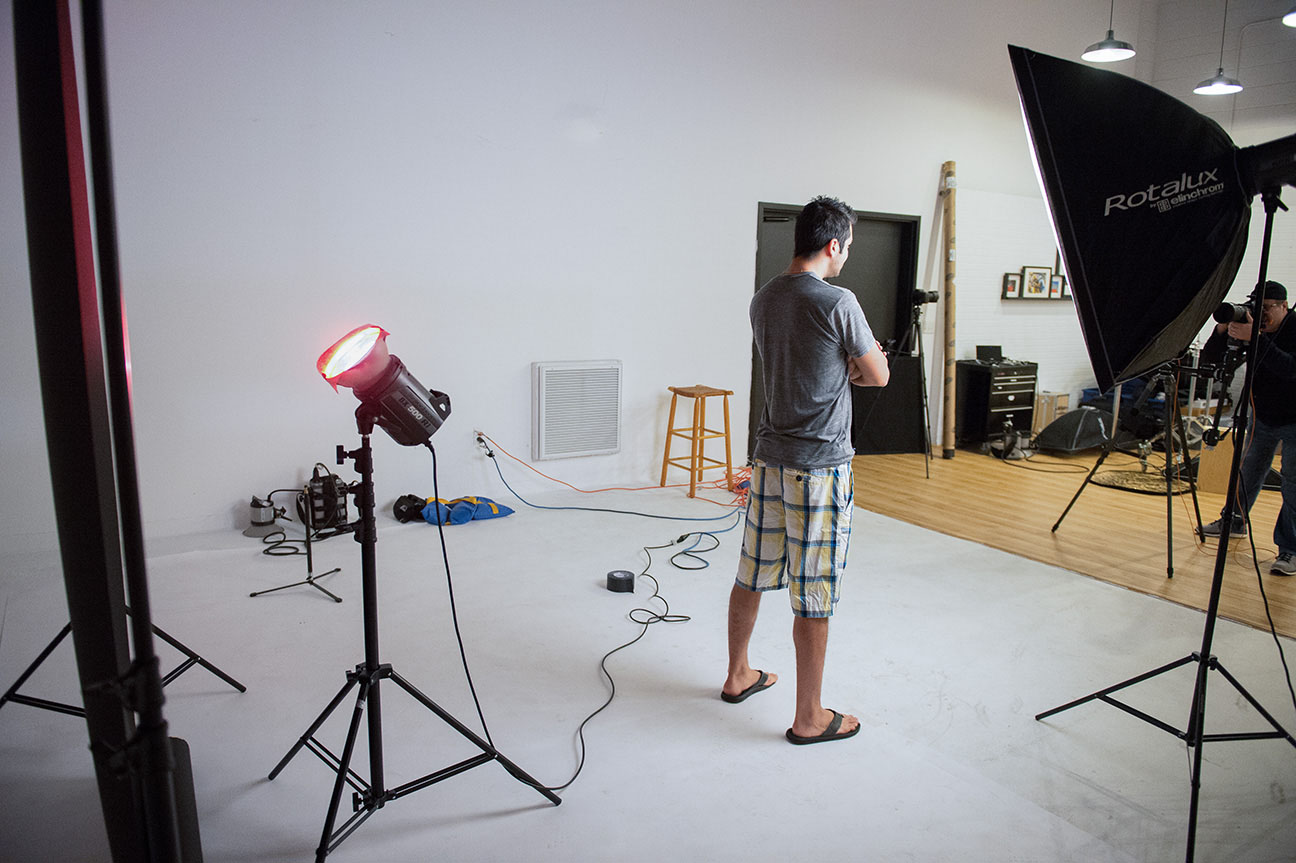
Figure Three
Here you can see how his body hides the light, which is key to this particular look, as well as how the light is affecting that black background. You can also see the placement of the main light off to the side and just a little in front of the subject. The main is another BXRi 500 with a 39×39″ square softbox, which is a size I really like for head-and-shoulders type shots like this.
I’m triggering both lights using an EL-Skyport Transmitter, a wireless unit made to work with Elinchrom lights, and it fits right on your camera’s hot-shoe mount. You can control the power of each individual light from right there, rather than having to go to the back of the lights themselves.
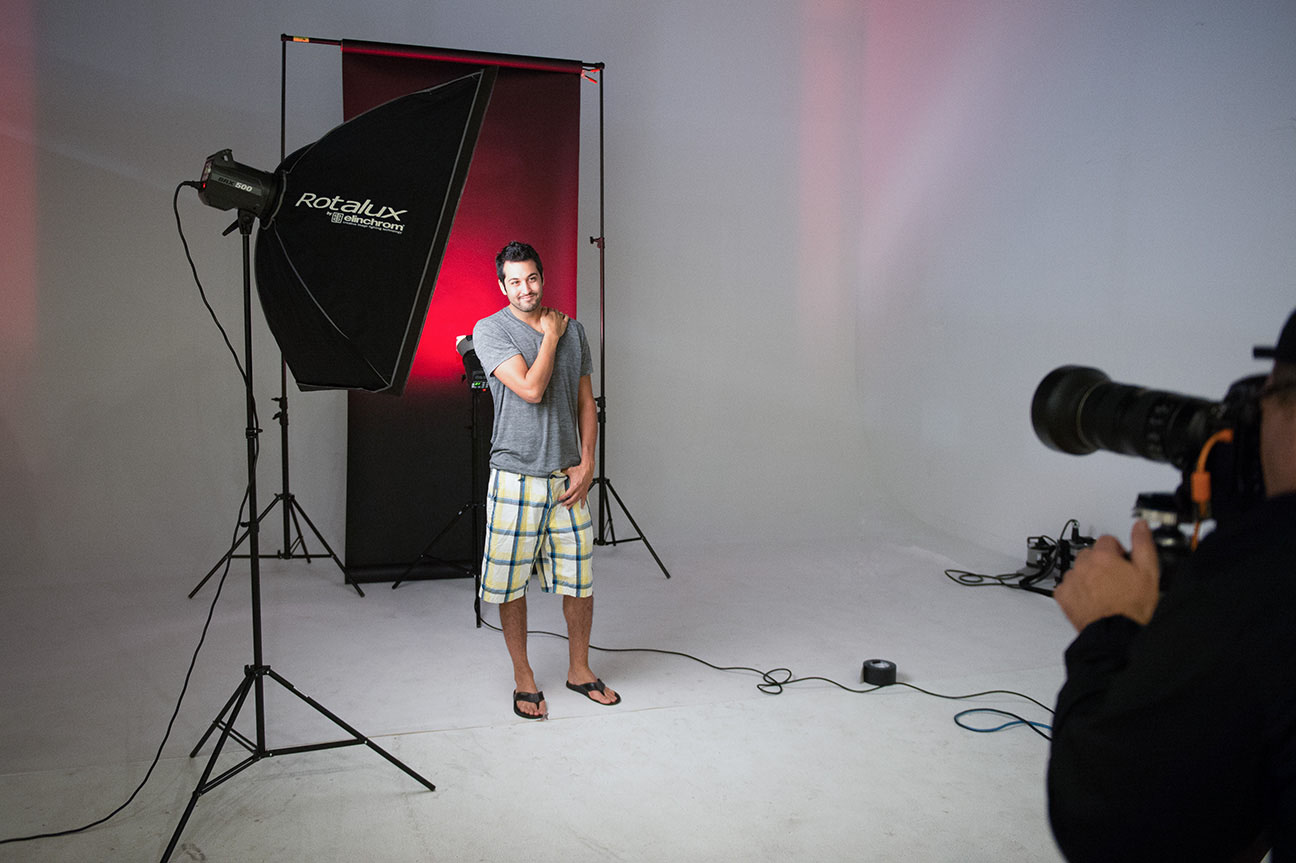
Figure Four
Here’s a view from the other side. You can really see the placement of both the main light and the red-gelled background light, and what an easy setup this is. Earlier, I mentioned that the main light was a little bit in front of him. I did that to make the light on him really soft. By only lighting him with the back edge of the softbox, rather than the middle where the softbox is its brightest and harshest, it makes the light really nice and soft. With guys, I usually go for an edgier look with harder light, but in this case after I took a few tests shots, I decided to go with something softer because I thought it suited his look and personality. He was a great subject all the way from Australia. He had a wonderful accent and was very warm and friendly, and I think that translated into the type of lighting I wound up using on him.
In case you’re wondering, “Why is there a roll of white seamless behind the main light running right through the set?” it’s because we’re trying to hide the tire tracks from a motorcycle shoot I did a few days earlier. We thought it would be easier to cover it up rather than repaint it in a hurry. It’s not elegant, but it works.
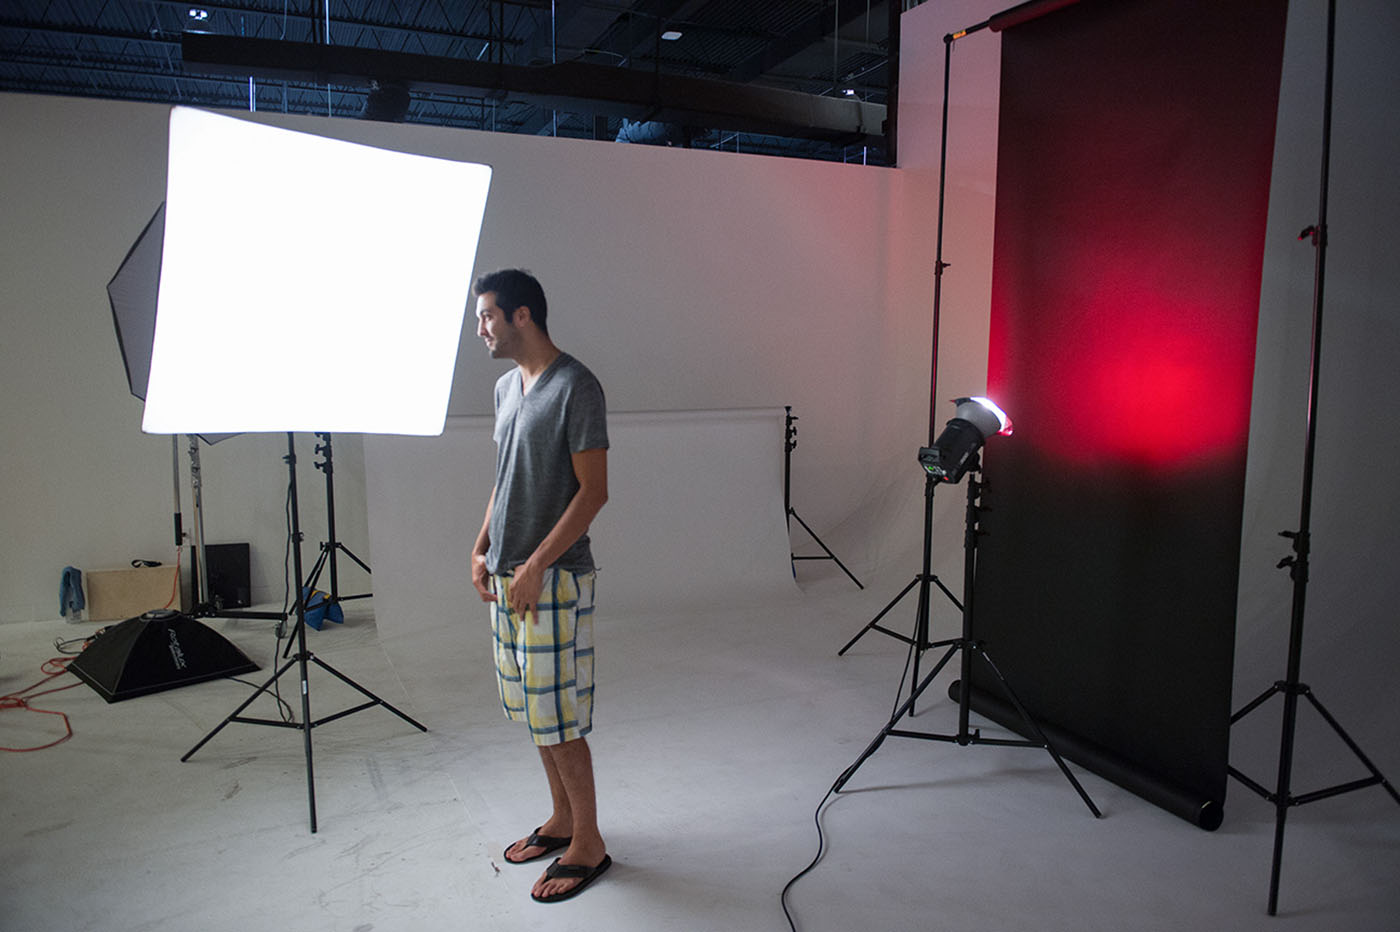
Figure Five
This over-my-shoulder view lets you see the whole shoot come together, and pretty much what the final shot is going to look like. Any time I’m in the studio (and any time I can on location), I try to shoot tethered directly into Lightroom on my laptop so
I can see the image much larger. The tiny screen on the back of my camera is actually much smaller than even the screen on my cell phone. It’s hard to make intelligent decisions about lighting, shadows, and sharpness on a tiny screen, so by tethering I can see every image appear onscreen at around 8×10″ or larger, so it’s really helpful. Lightroom has this tethering capability built right in, and it usually works really well. Usually. Every once in a while it gets finicky, but for the most part, it works well, and it’s really fast.
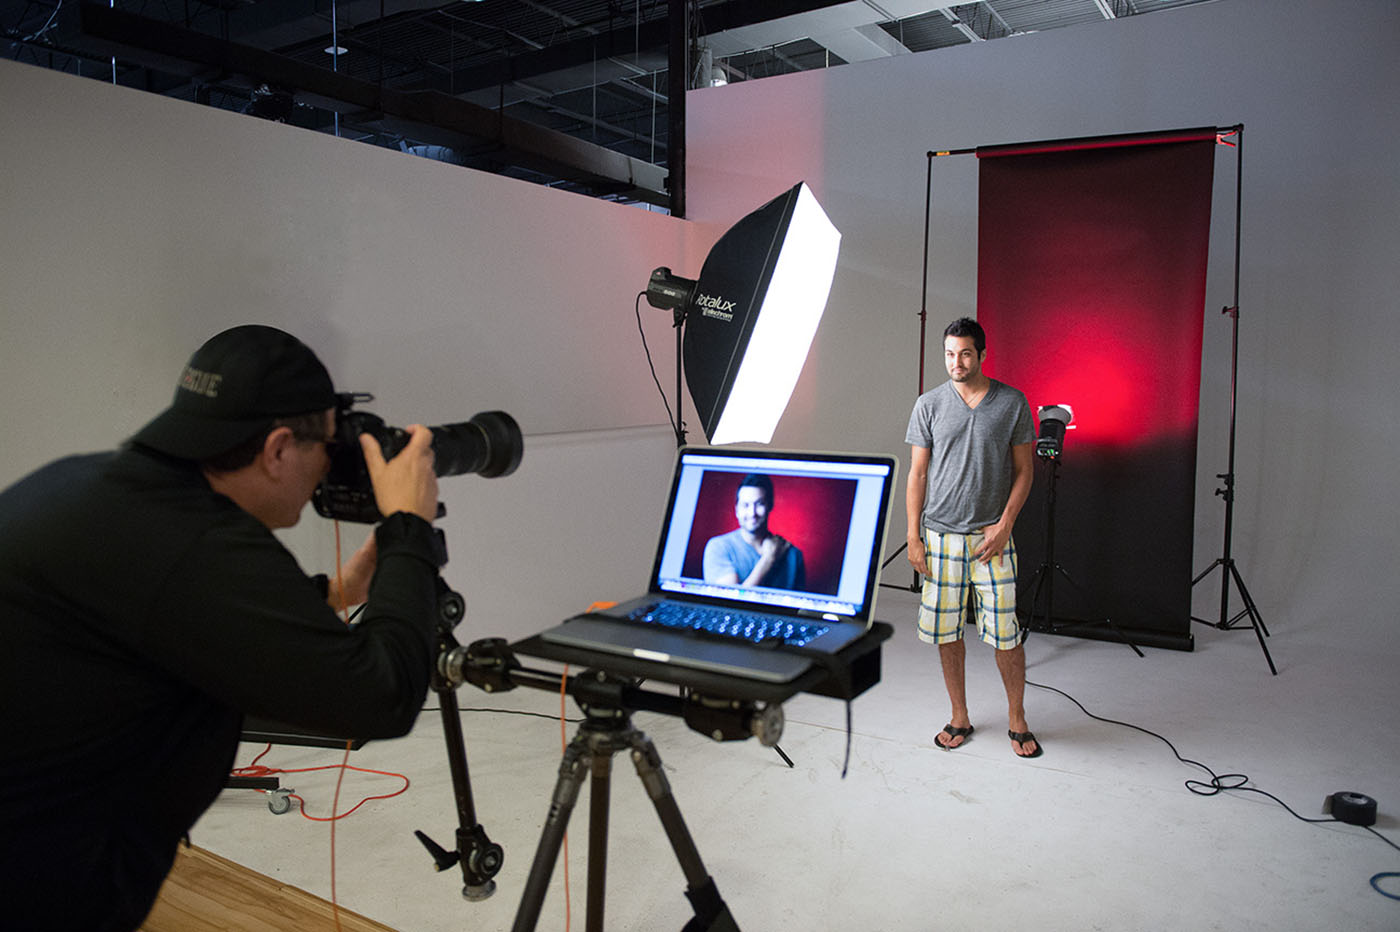
The table my laptop is sitting on is from Tethertools.com, a company that makes accessories for tethering (they even make that long, orange USB tethering cable that you see me using in this shot). The reason it’s orange is so you can easily see it in a dark studio environment so you don’t trip over it. We also use another Tether Tools accessory called a JerkStopper, which helps keep you from ripping the USB cable out of your camera if you actually do step on the cable. It protects the cable and your camera.
Lastly, I’m shooting a Nikon D4 with a 70–200mm f/2.8 lens (my go-to lens for portraits). This was shot at f/10 at ISO 200 with a shutter speed of 1/125 (my standard shutter speed for shooting in a studio).
Well, there ya go. A simple two-light shoot, and the only thing we really did differently was to add some depth and dimension by adding an inexpensive red gel over the front of the reflector on our background light. Give this one a try, and share your results!
Want more color related tips? Here is a post from Pete Collins sharing a Lightroom tutorial.
