Photoshop is full of long-time habits—and sometimes those habits keep us from noticing when a newer tool can make life a lot easier. In this excerpt from Kirk Nelson’s Photoshop World session, “Photoshop Has Changed, So Should You!”, Kirk walks through the new Adjust Colors feature and shows how combining it with Photoshop’s smarter selections can dramatically speed up the color-change workflow. It’s a quick, practical update that fits right into the way photographers already work.
A Faster Way to Change Colors
Color adjustments have always been a big part of working in Photoshop—but Adobe has finally given us a way to handle them that doesn’t involve a dozen steps and a lot of cleanup.
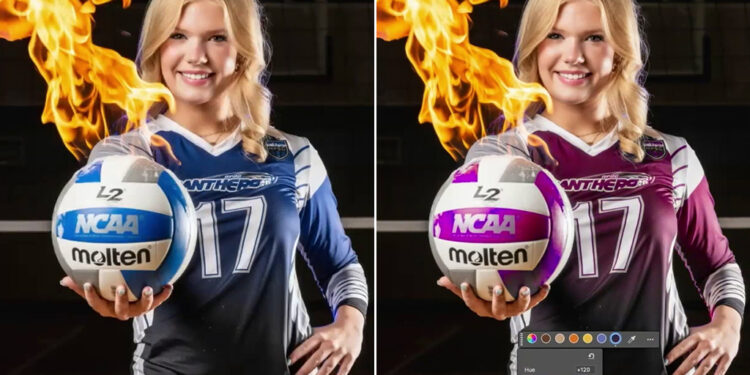
This example starts with a shot I took while working with one of the teams. Let’s say we want to change the color of her jersey.
Now, there are a lot of ways to do this in Photoshop. Too many, honestly. And if you’ve taken my classes before, you know I’ve always gravitated toward Hue/Saturation. From the Contextual Task Bar, that’s accessed by the… what are they calling it now, the New York cookie? Black-and-white cookie? It’s the Create New Adjustment Layer icon.

All this does is click us over to the Adjustments panel. We were on Properties so we were over there anyway. In this instance the Contextual Task Bar doesn’t save us any time, really.
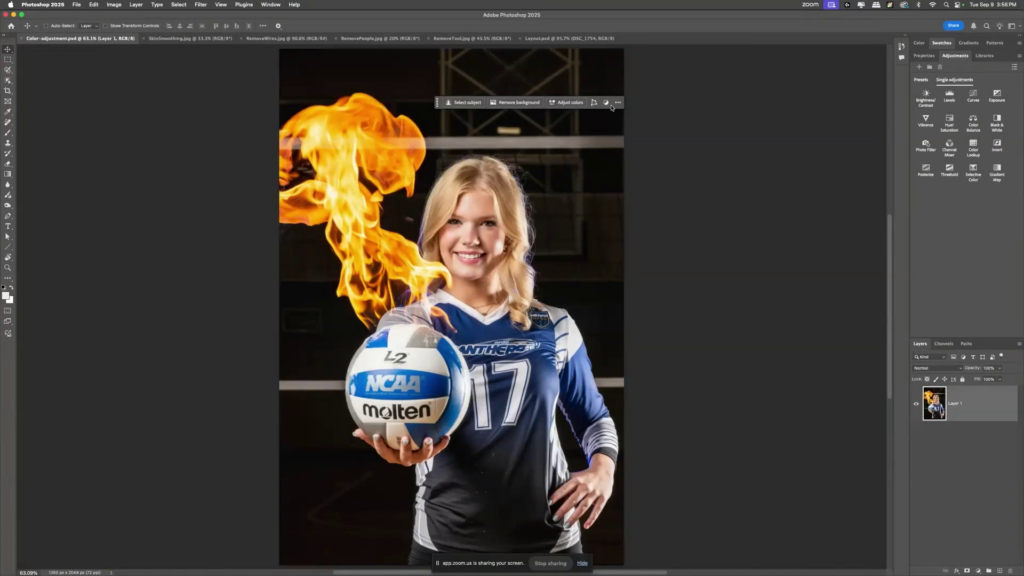
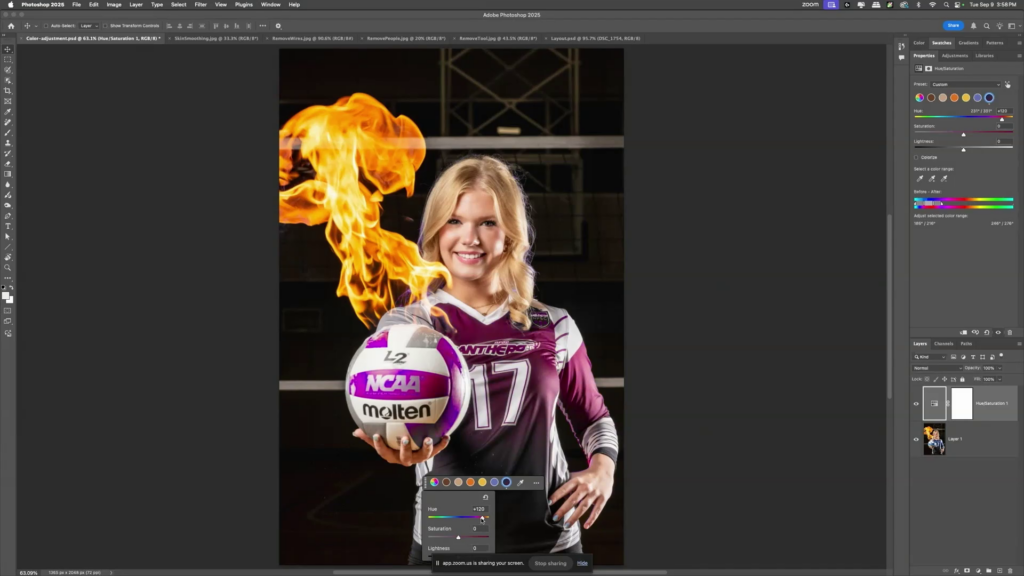
Hue/Sat absolutely works, but it takes a lot of fussing. As soon as you start dragging that hue slider or the Targeted Adjustment Tool (which I used), you’re not just shifting the jersey—you’re also adjusting the ball and anything else Photoshop thinks is in that color family. Then you’re messing with those little color-range brackets, trying to widen or narrow them. Before you know it, you’re cleaning up masks and doing way more work than you meant to.
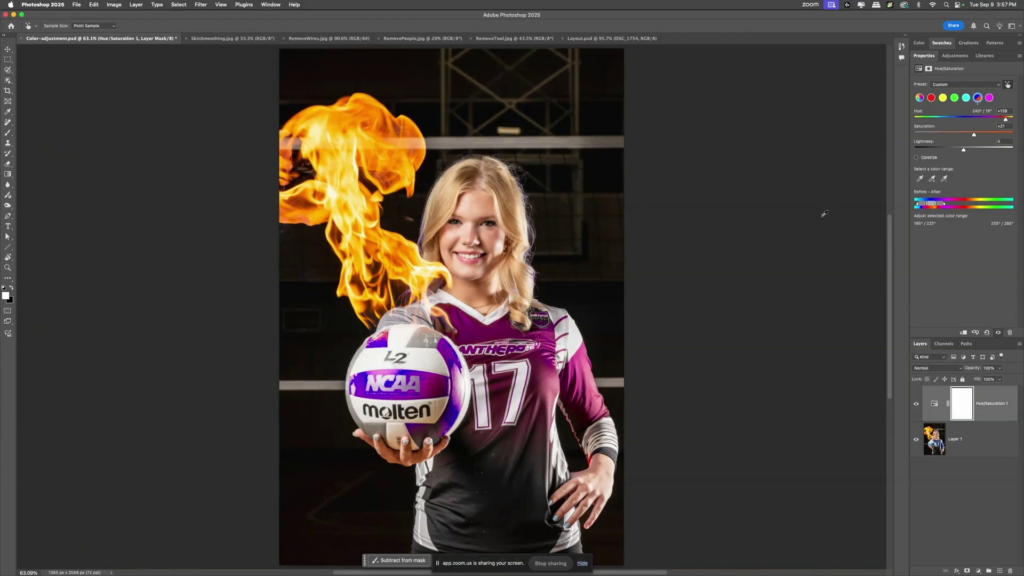
Let’s delete all that and create our Hue/Saturation adjustment the new way.
Meet the Adjust Colors Tool
With the new Adjust Colors option in the Contextual Task Bar, Photoshop identifies the prominent colors in the image. Click the blue swatch and it targets the blues instantly.

At first, it still changes everything blue—you start moving sliders around, trying to pull the hue one way or the other, and Photoshop just grabs every blue pixel it can find. And I know what you’re thinking. You’re like, “Ha! Ha! That’s the same issue you had doing it the old way.” As my kids would say… “don’t @ me.“ I get it. But this is where the combination of new tools really clicks.
Use Object Selection to Get Specific
Instead of relying only on color, let Photoshop help. Grab the Object Selection Tool. Let it think for a moment. Then go to Select > Select People—Photoshop recognizes her right away. From there, choose Upper Clothes.
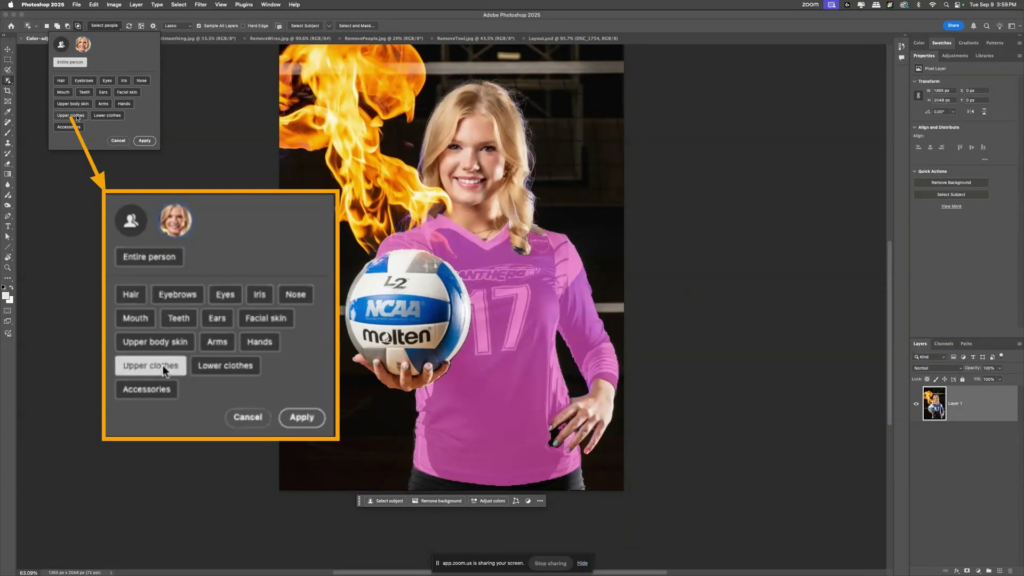
With a few clicks, Photoshop isolates just the jersey.
Could we have done that before? Not in the three clicks that that just took, that’s for sure. So now, the issue would be, now we don’t have that little adjust color thing over here. Where did that go? Why don’t we have that? Where is it? Honestly guys, I expect that in future generations of the program, we’re going to be able to put custom features in that Contextual Task Bar. It’s not there yet.
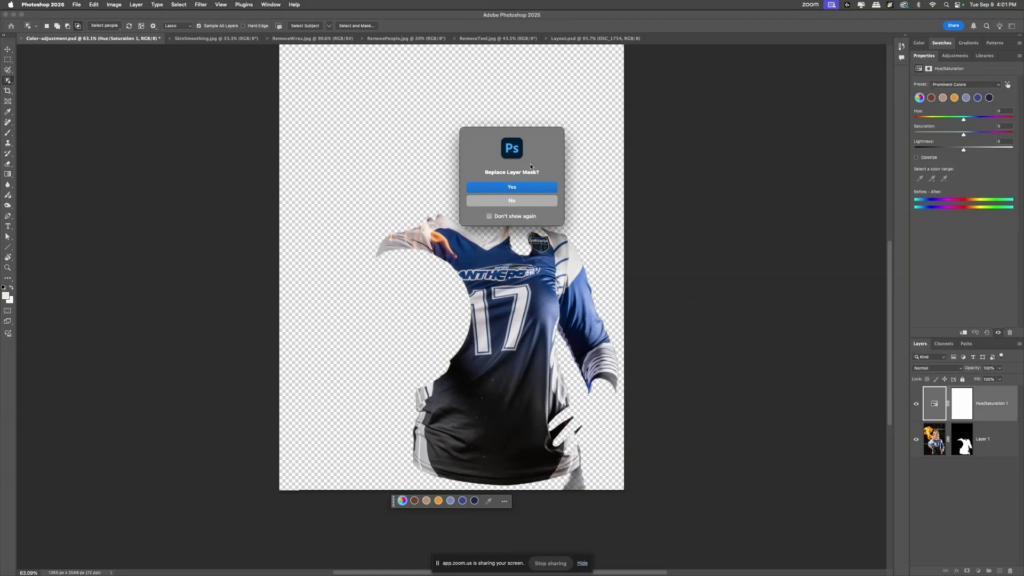
Here’s a little hack for what I’m going to do here. We’ve already got this selection. I’m going to go ahead and make that a mask. So it’s just there. Okay. Click back on the image. Now look, my Adjust Colors button is back. And when I click it, it just gives me the colors in the area that’s been masked out. So it’s just in this. Now, it’s still going to be applied to the entire image, but we just made a mask telling it where we want it to be, but the mask is just on the wrong layer. It’s on our base layer and not on the adjustment. Simply drag that mask up onto the adjustment layer. Yes, Photoshop warns you it’s replacing the mask. Yes, that’s what we want. Photoshop… relax.
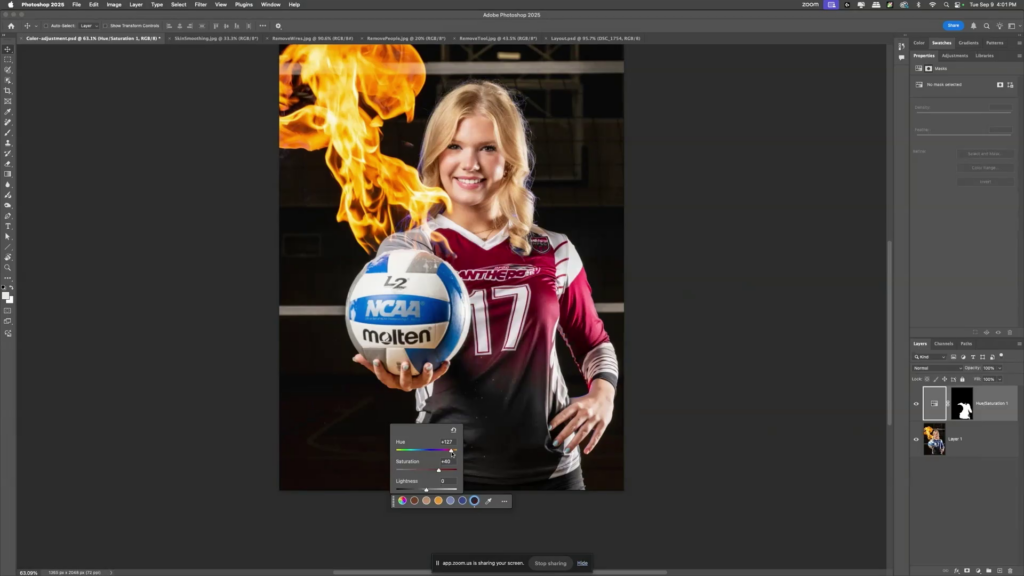
Pick the blue again, shift the hue, and now only the jersey changes. No more collateral damage.
Why This Workflow Works So Well
When you combine Object Selection with Adjust Colors, this becomes one of the fastest ways to target and shift a color in an image. The prominent colors update, the mask keeps things contained, and the whole process feels natural and intuitive.
You can refresh the colors, switch to presets, or even adjust everything at once with the Master option. When I had to mock up different jersey colors for a coach, this literally saved me hours. No more old-school fiddling with hue brackets or cleaning up messy masks. It’s just… easy.
Adobe has changed Photoshop a lot in the last few years, and this is one tool that really shows how those changes can work in your favor.
Unlock the Best of KelbyOne Live 2025
Not a member yet? Join KelbyOne and, along with full membership benefits, you’ll unlock immediate access to The Best of KelbyOne Live 2025. This curated assortment of conference sessions from top photographers and educators is packed with Lightroom, Photoshop, iPhone, and creative workflow tips—everything you need to expand your skills and create your best images in 2026.

