
Photography Secrets: Better Backgrounds
Editor note: This article is from the July/August issue of PSU, pages 68–72
What comes to mind when we think about portrait photography? The face, the light, the expression? Yes, yes, and yes! What’s often overlooked is the background, lurking and sometimes overpowering our subjects and all the care we put into photographing them. A background can make or break an image, and for that reason we’re going to discuss what makes a great background and how to control this canvas for the best portraits possible. Then we’ll begin to work with composition, compression, depth of field, and exposure to craft better backgrounds no matter what the environment.
So what makes a great background? The answer depends on the story that you’re trying to tell. In the studio, your subject’s face is the primary focus. By keeping the background simple, it doesn’t distract from your subject. The addition of colored backgrounds can then be used to subtly complement your subject’s skin tone, eyes, or clothing, too.
When you’re creating an environmental portrait, you want to include some of the location to help build a backstory for the subject. Showing the location is key, as long as you’re careful that the location doesn’t clutter up the image, leaving too much for the viewer to take in and taking the focus away from the subject. Whether in studio or on location, simplicity is the key to creating a better background.
Headspace
How can you simplify your backgrounds in a photo? Before we get too technical worrying about specific lenses or studio lighting, let’s focus on the always applicable: headspace. Keeping a clear head to ensure that your subject’s head is in the clear is key to better portraiture. Chances are the person you’re photographing spent some time making sure her hair looked just right for the photo shoot. The last thing you want to do is mess this up by growing a large tree branch or telephone pole out of the top of her head.
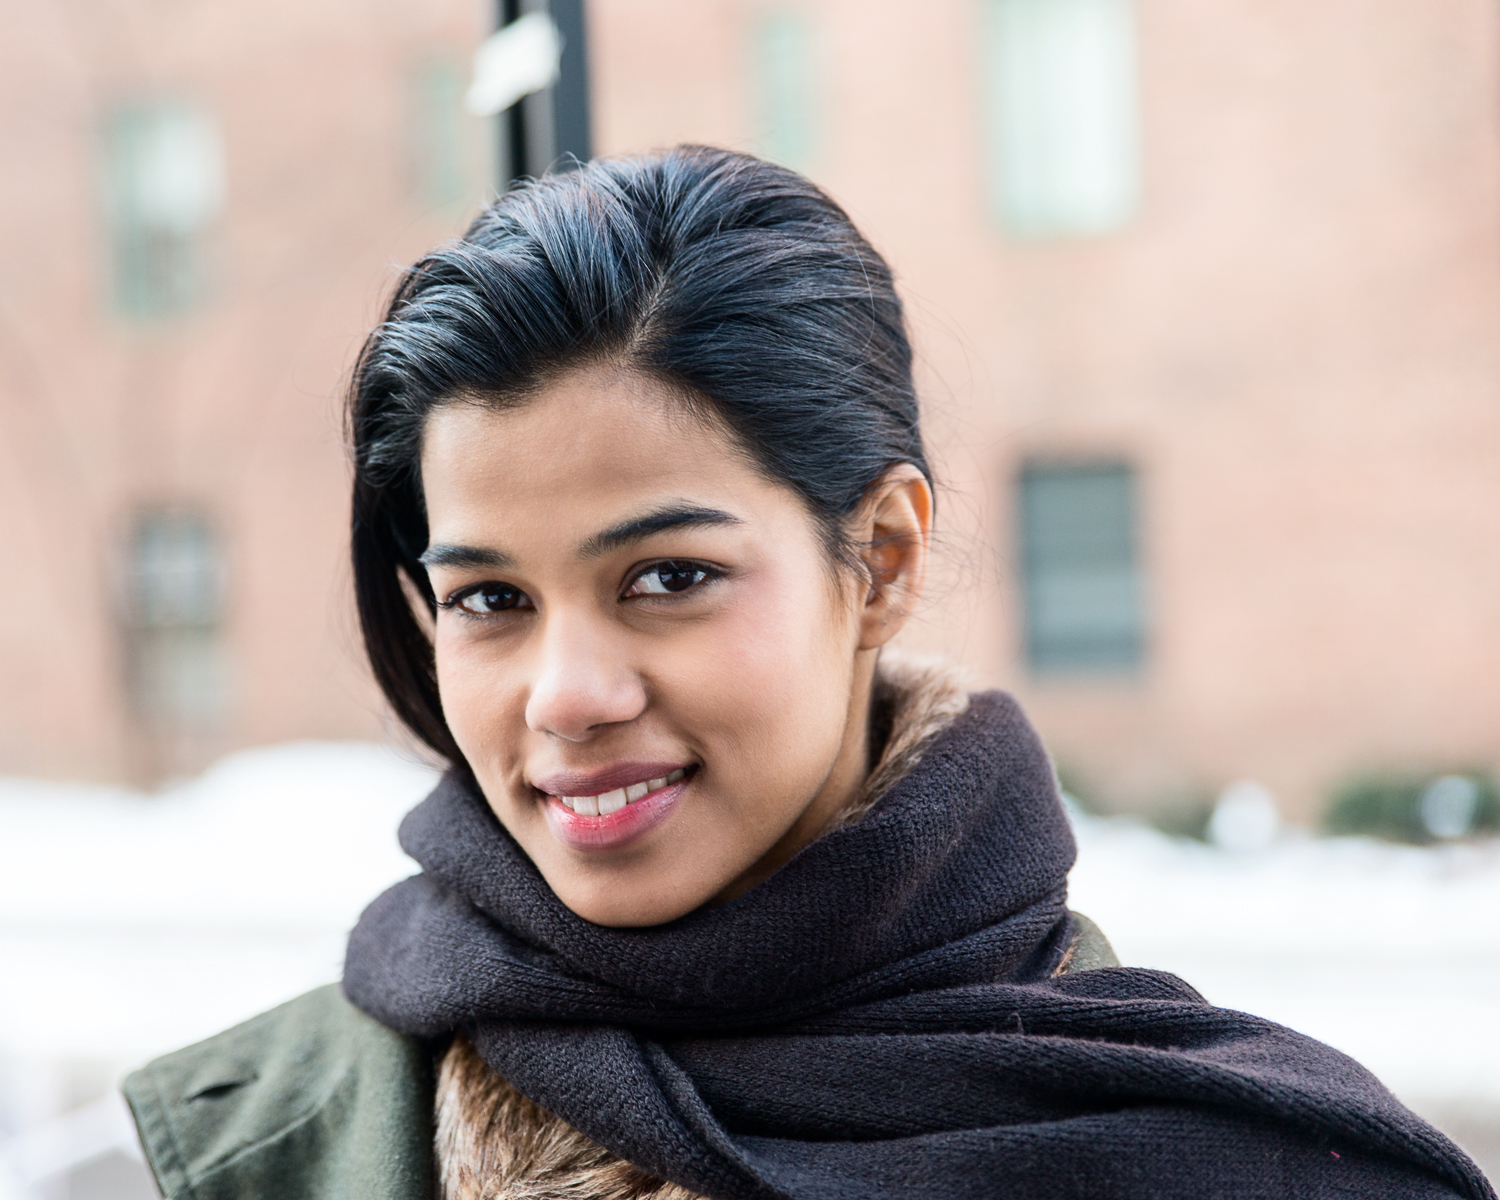
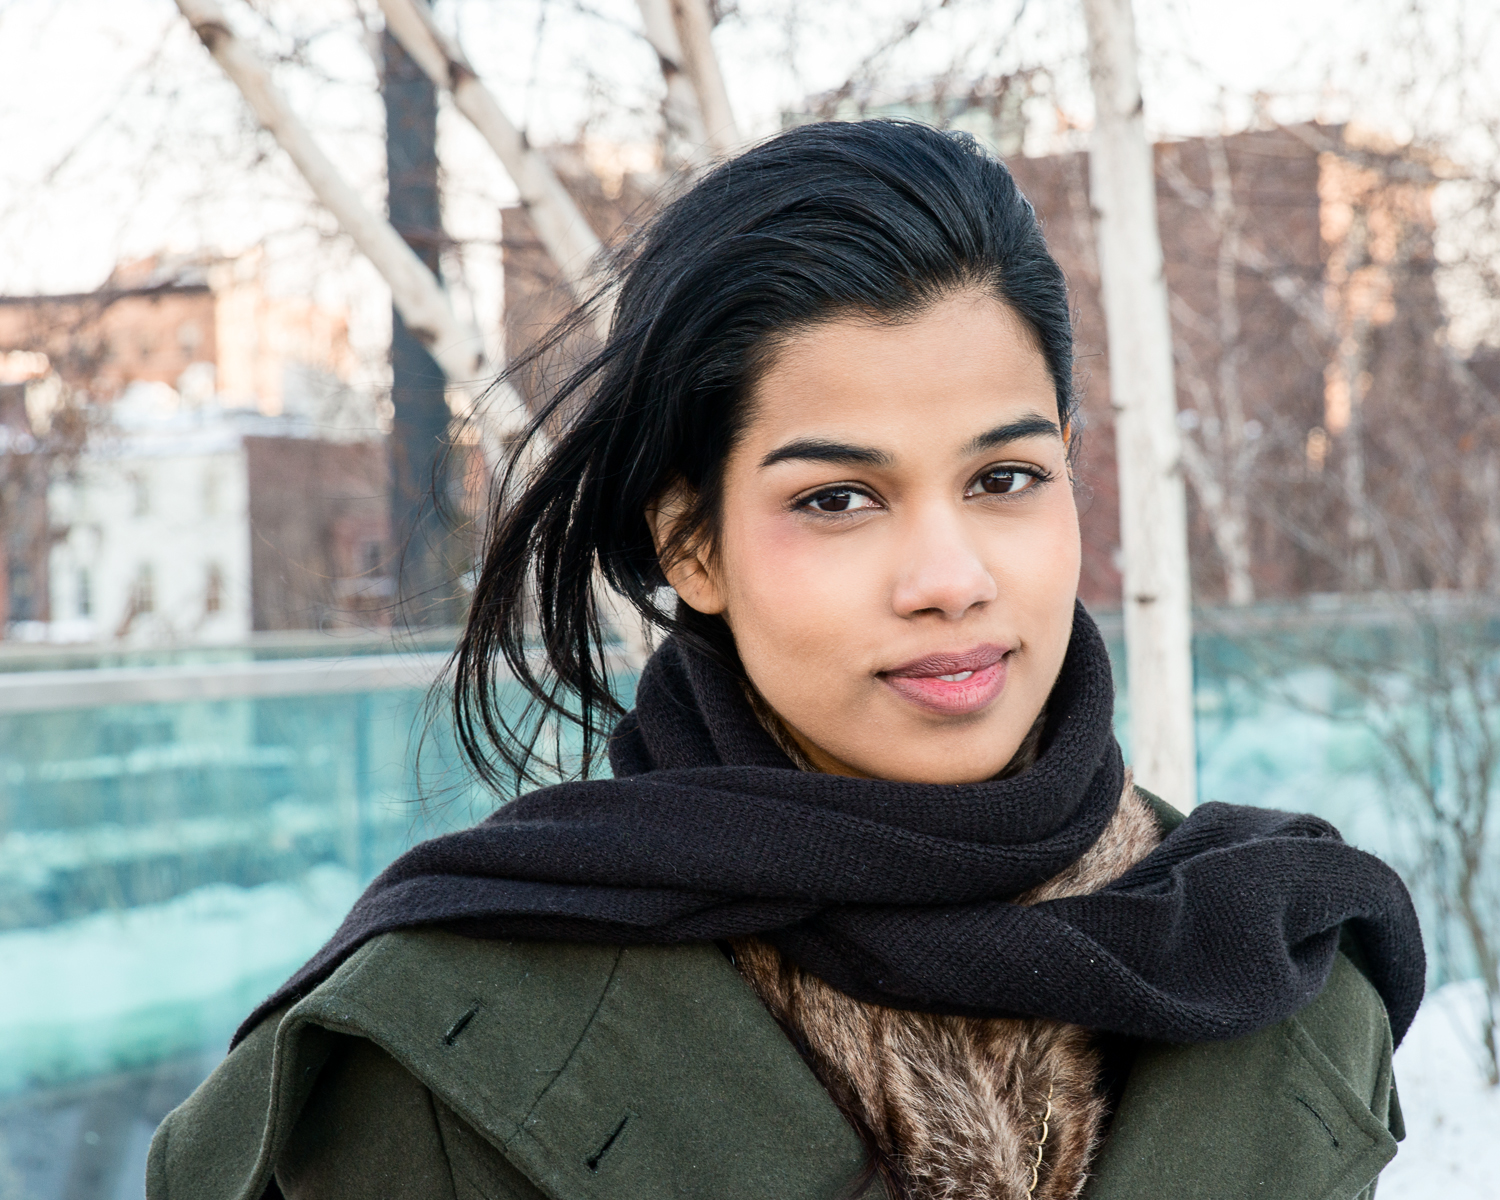
When you’re looking through that lens, focus on the face, but make sure to adjust your angle so that the area around the head is clear of any intersecting lines.
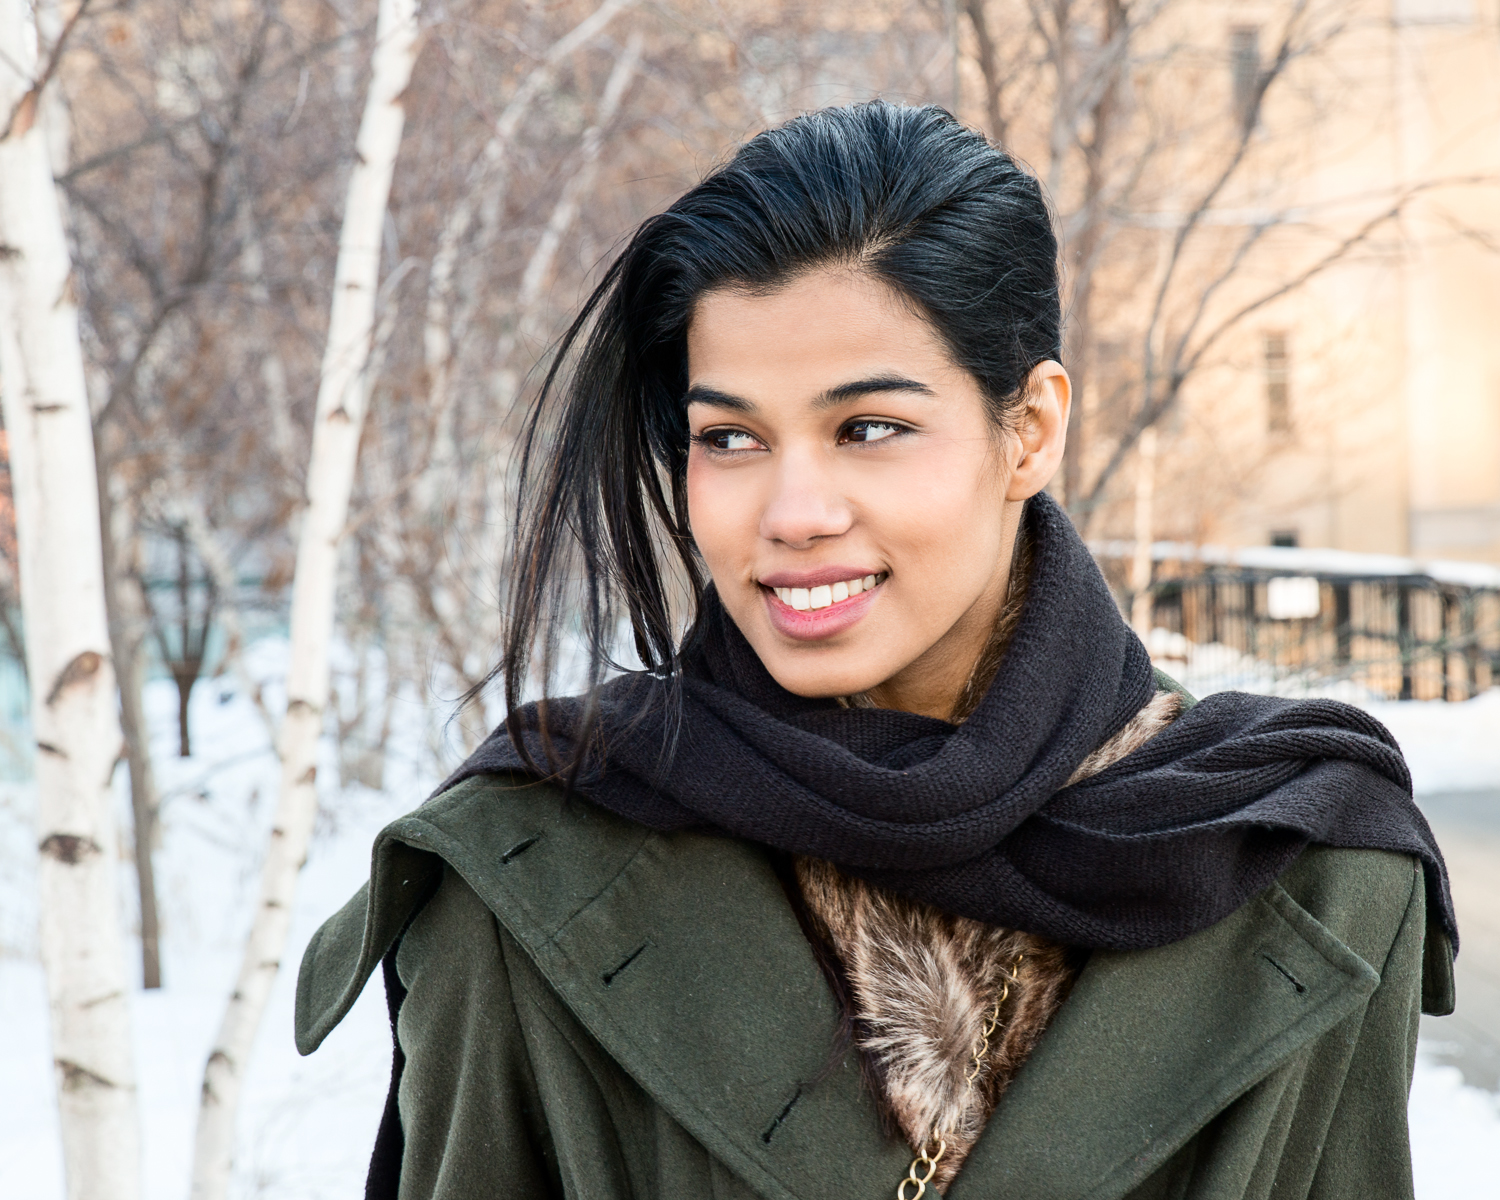
In this next example, a pier is running right through the girl’s head. By simply crouching down a little, I was able to place her head in the blue open sky for a much better photo. Careful composition ensures that even busy backgrounds don’t totally skewer your portrait.

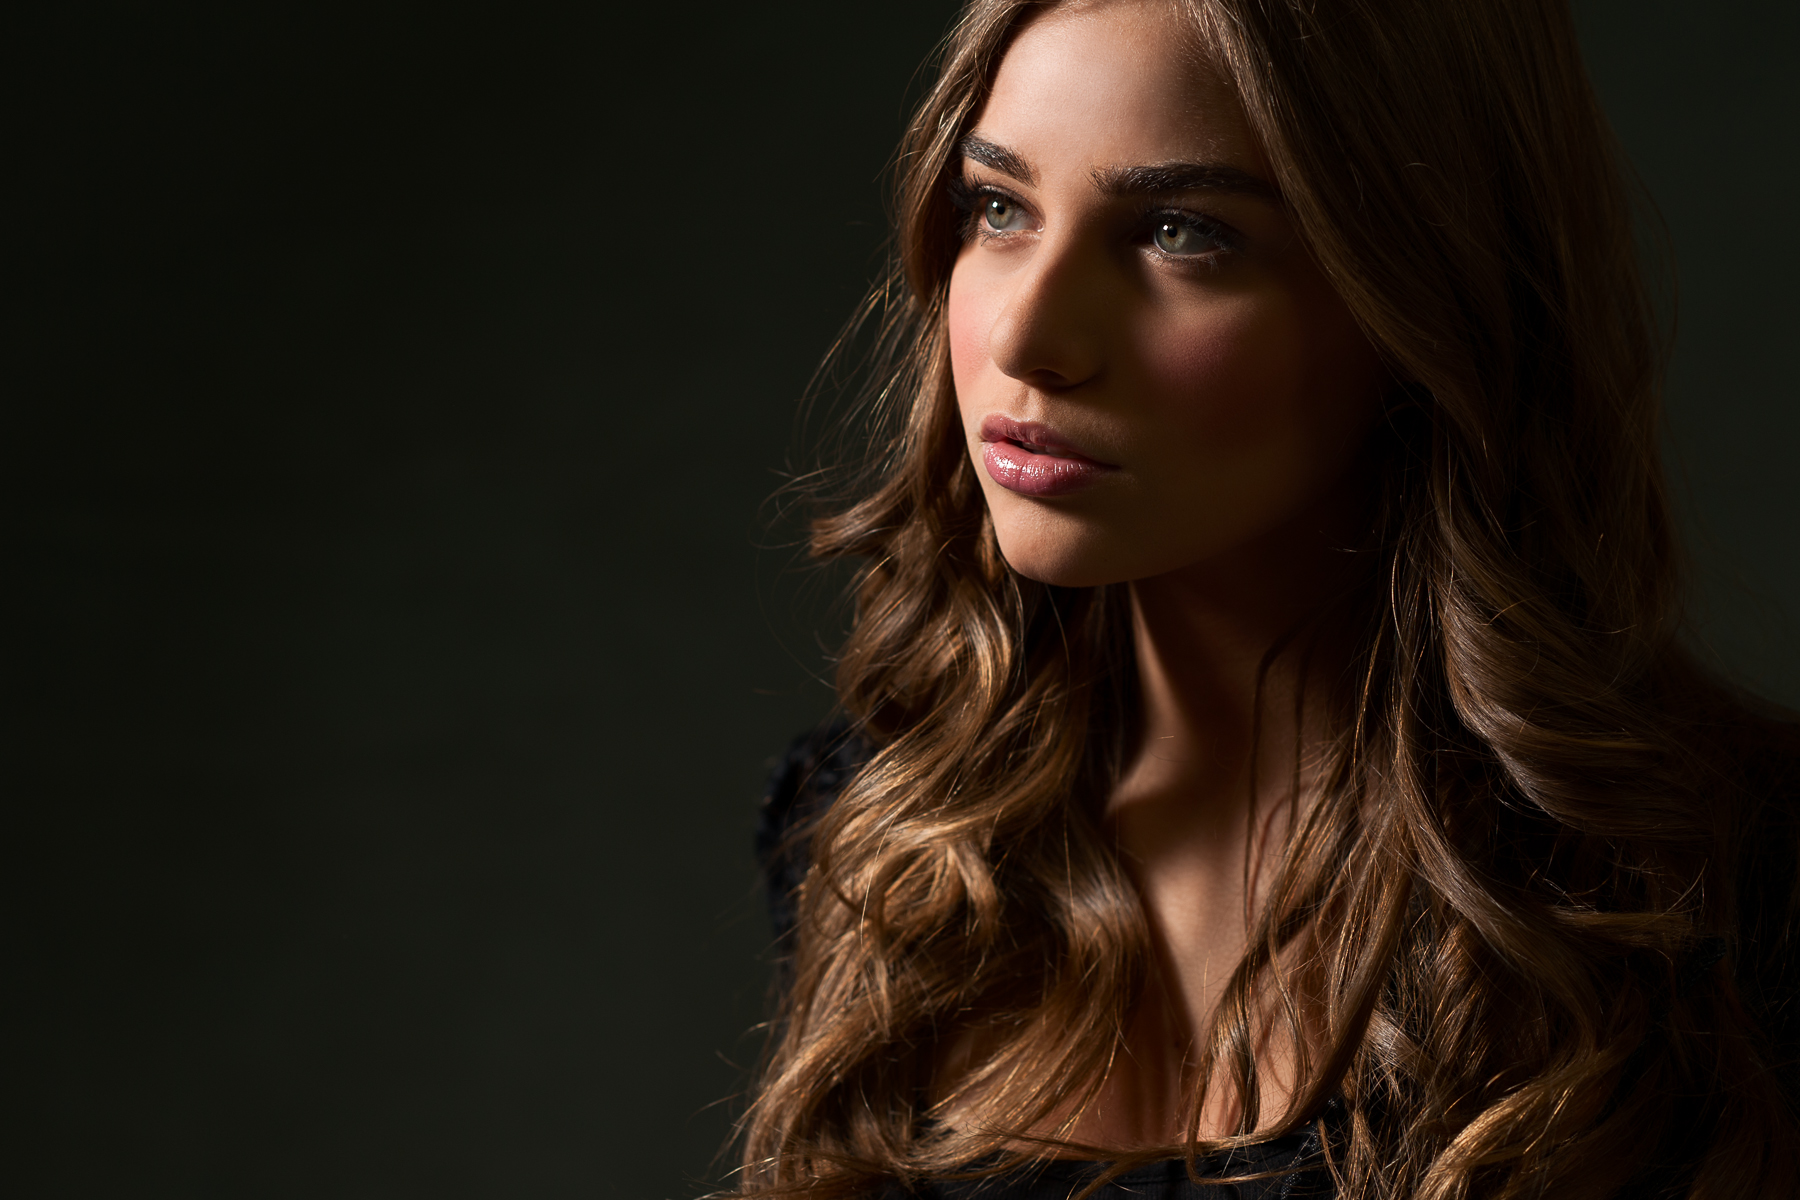
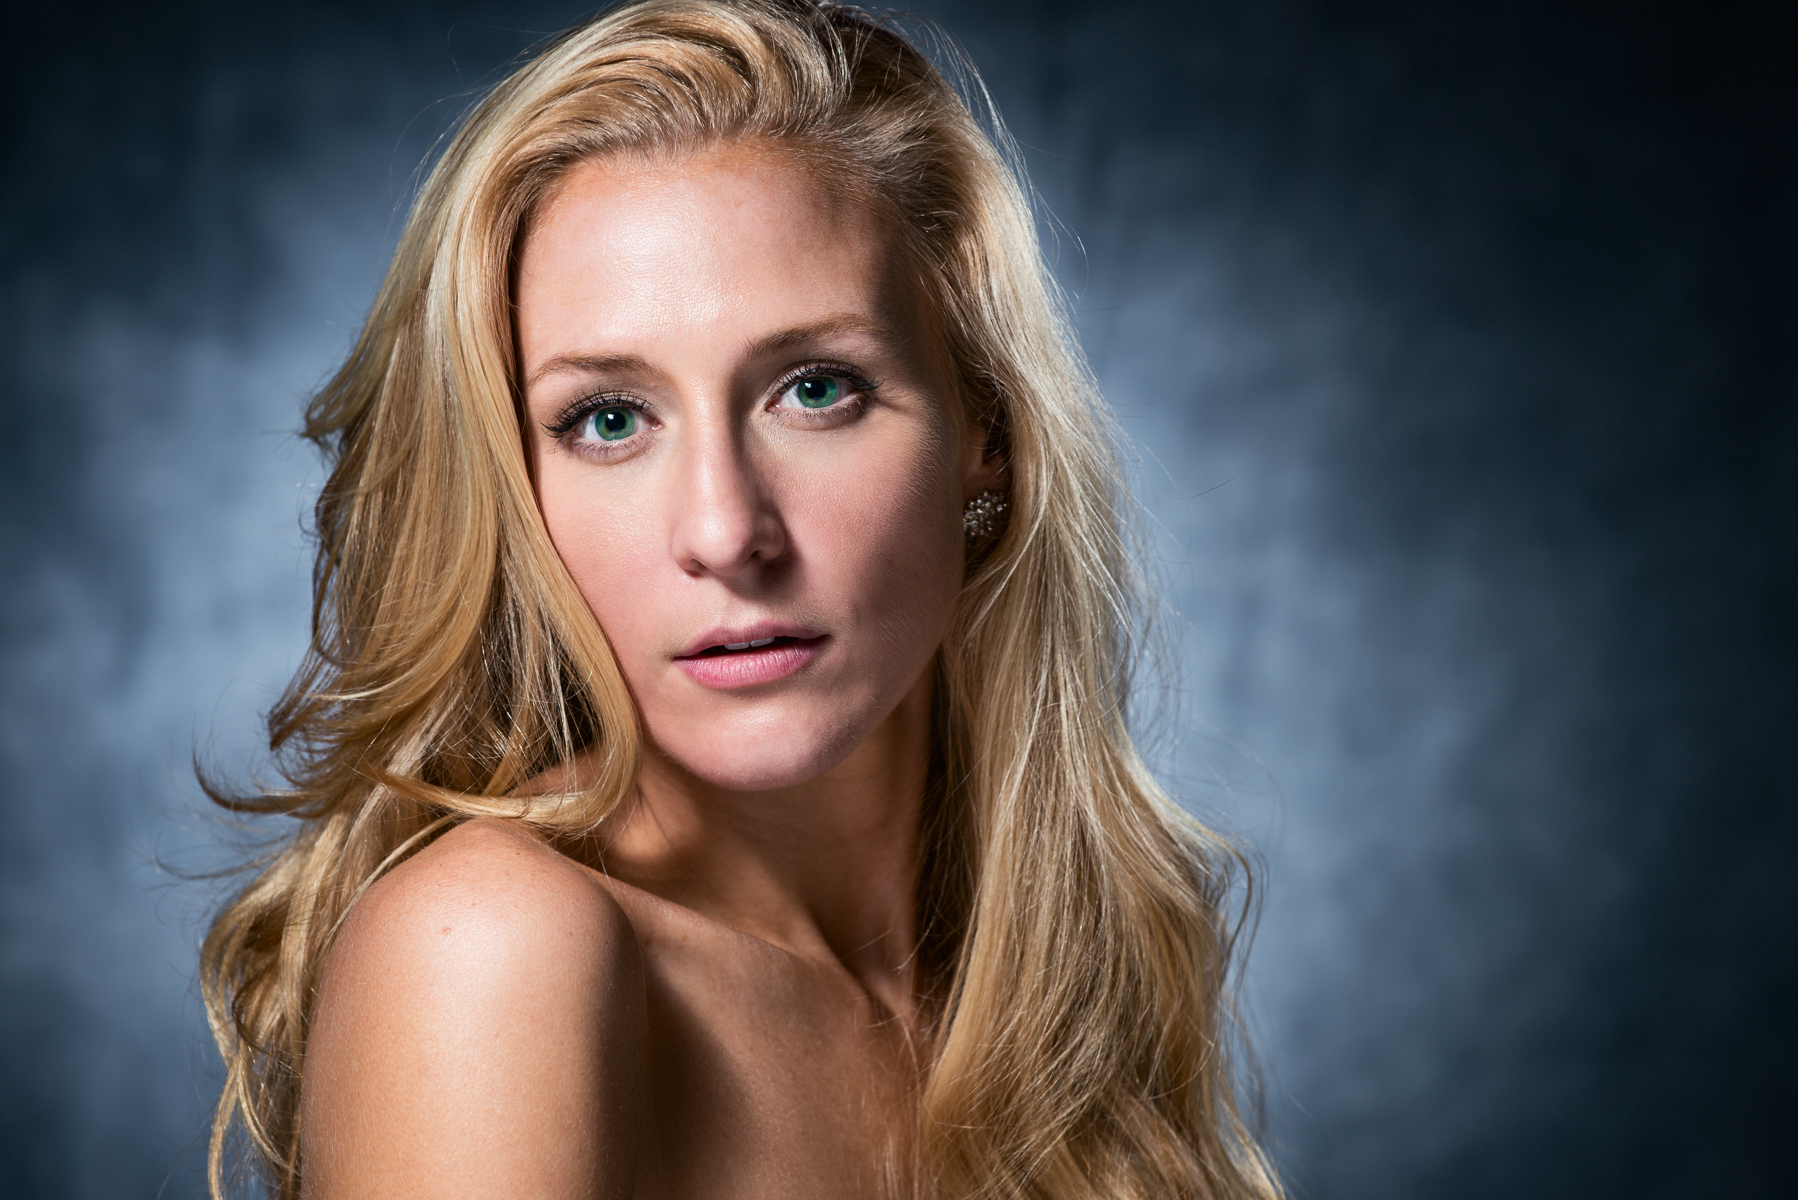
Another strong compositional tool is the use of negative space, which is open space around your subject, or even empty space, that serves to balance the frame with your subject’s face. By off-centering the model here, I left room around her so that she really stood out from the black background, and left that blank area for viewers to fill with their imagination. “What might she be thinking?”
The Lens Effect
Next, let’s look at how different camera lenses can affect the background in our photographs, more specifically the compression of different lenses. Here’s how these lenses work in relation to the background and foreground of your photographs.
Wide-angle lenses expand the scene, pushing the foreground and background away from the subject.
Telephoto lenses compress the scene, bringing the foreground and background together, sandwiching the subject.
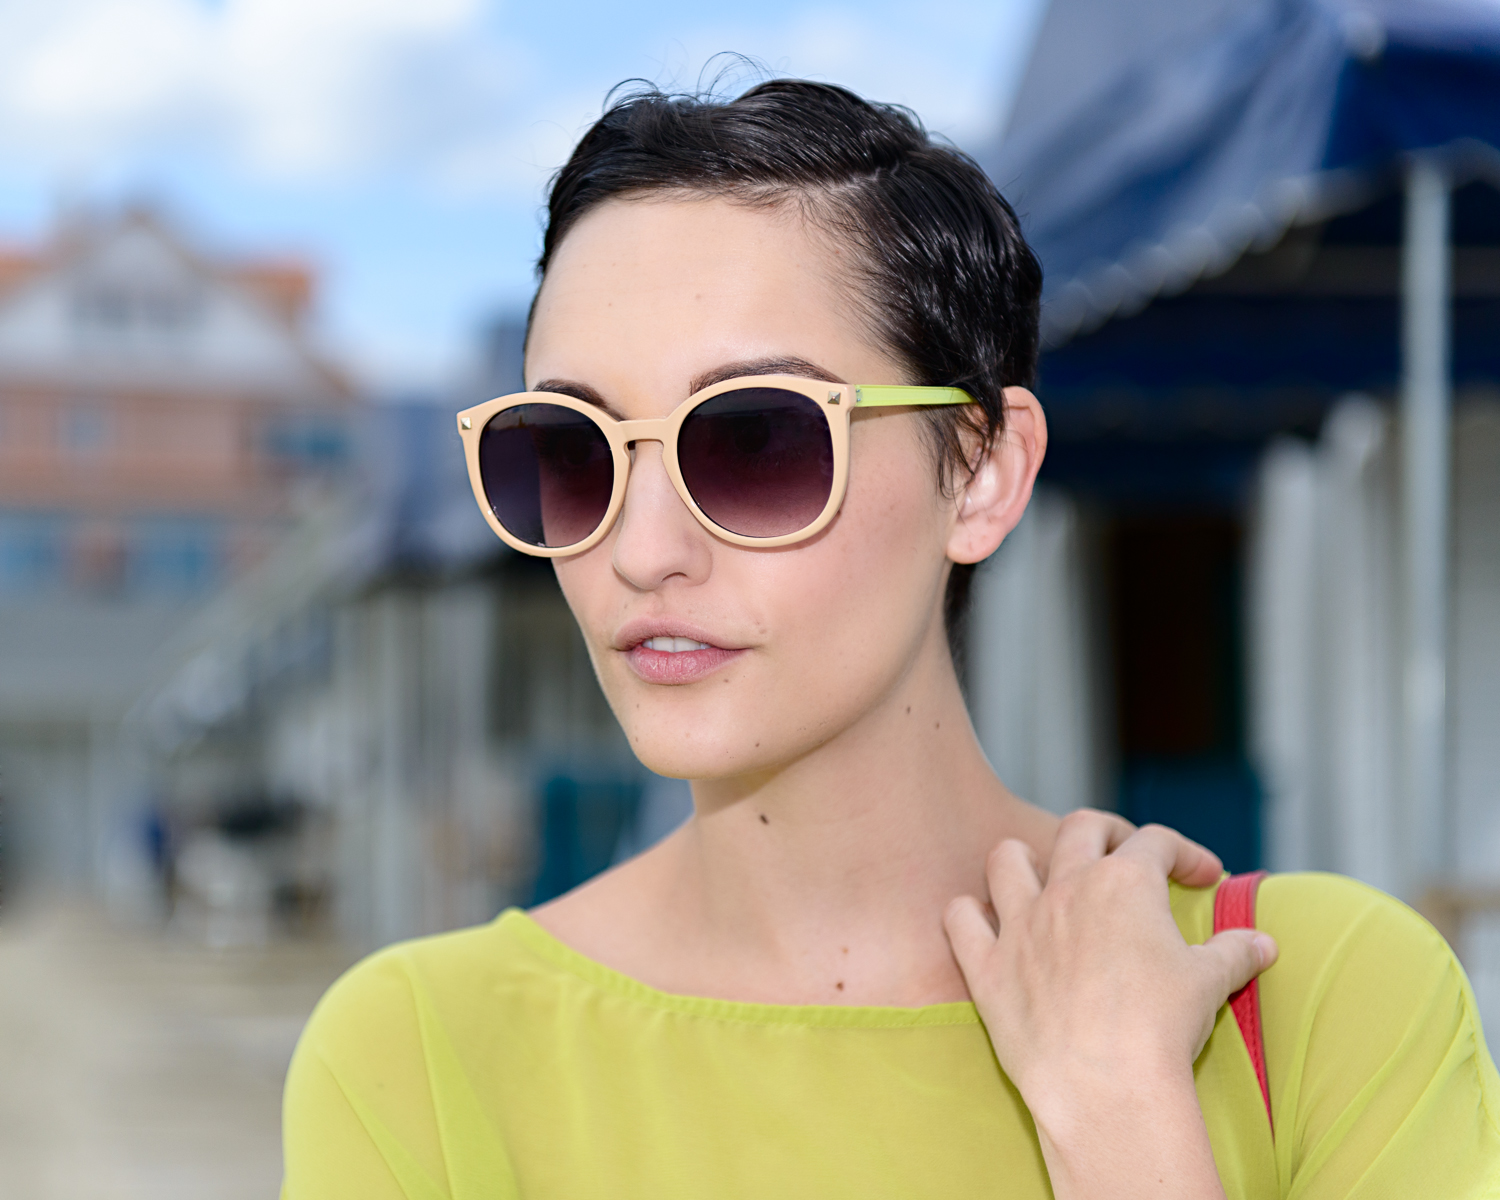
You’ve probably heard that a telephoto lens is the best route to take for portraits, and this is because it compresses or tightens the facial features, making people appear thinner. It’s also a good way to take an environment and bring it in close around the subject. Zooming in with a long telephoto lens, such as a 70–200mm used for this photo, makes it easier to pin your subject onto a specific part of the background and to incorporate things into the foreground, as well.

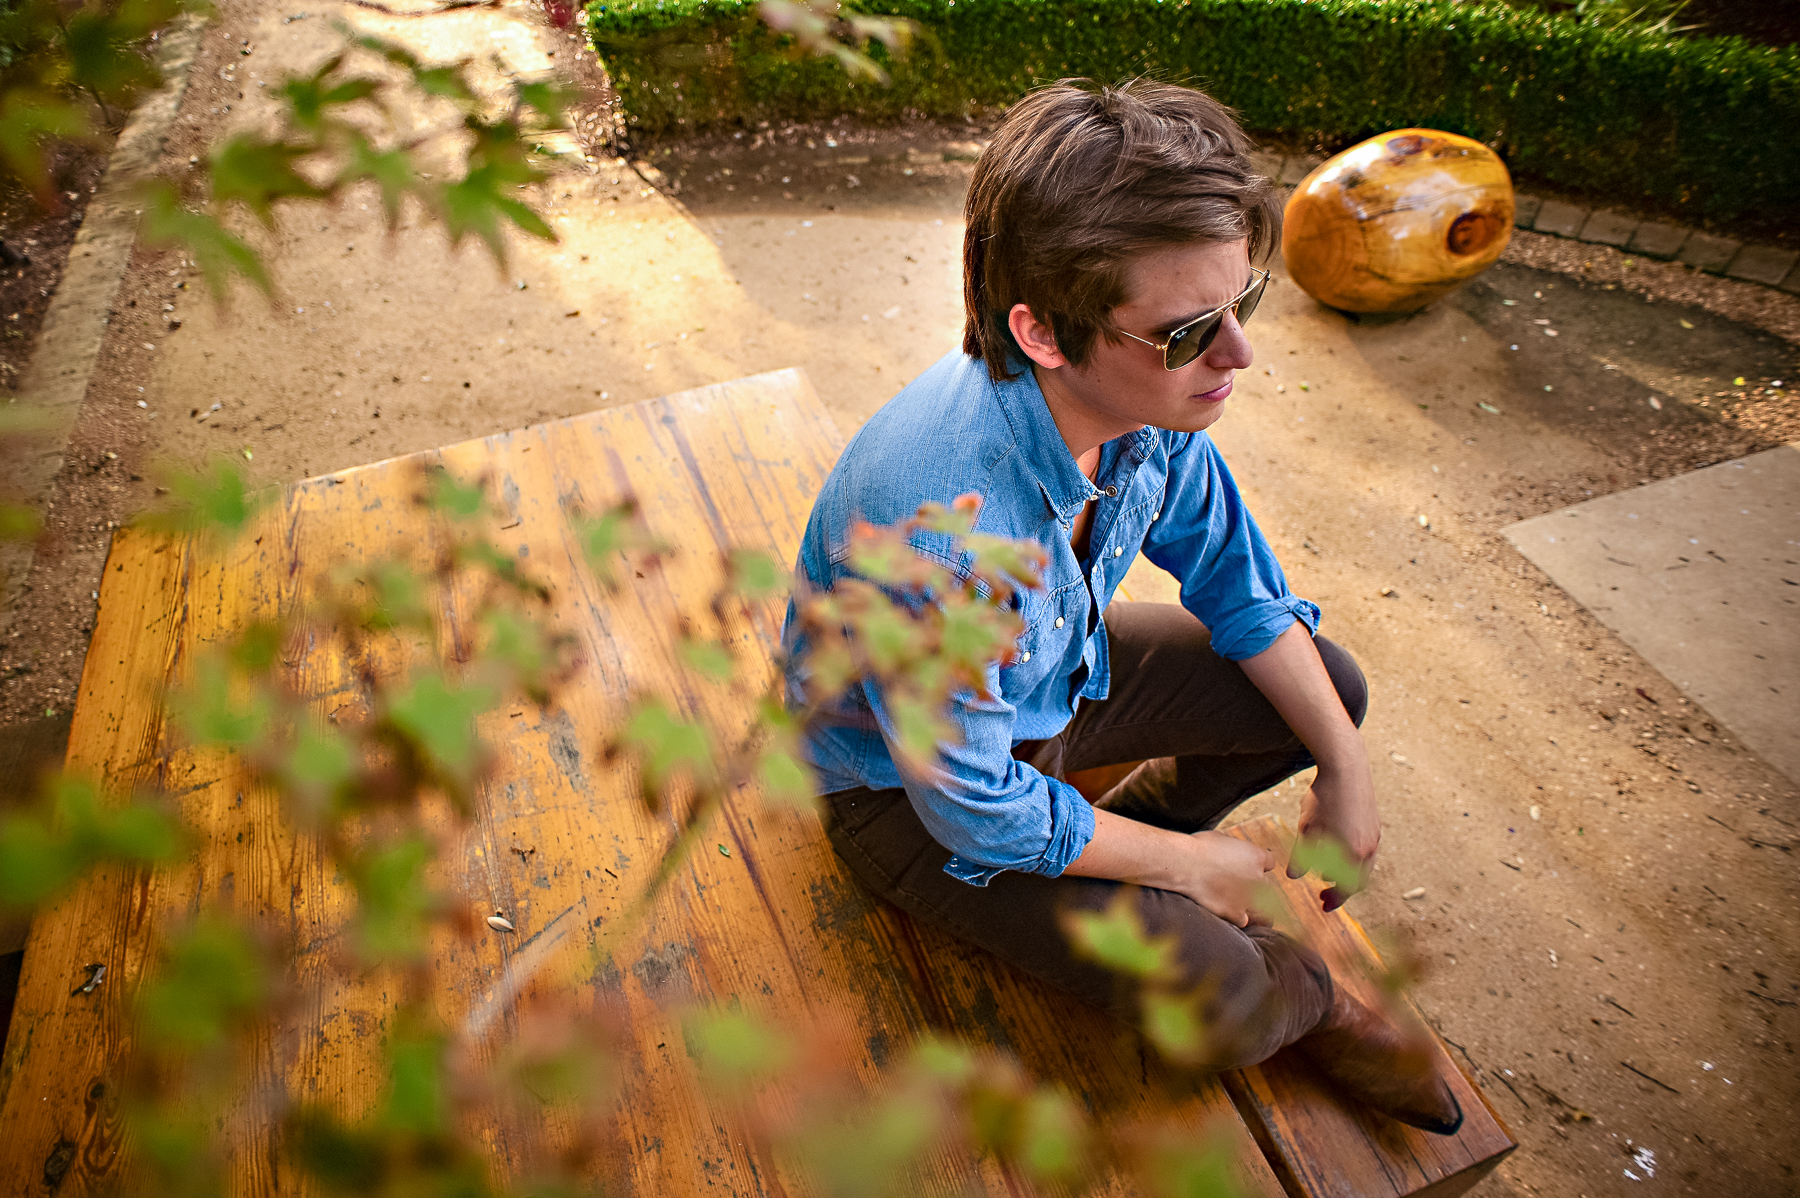
Wide-angle lenses are equally powerful story-telling tools when dealing with a portrait outdoors. Rather than squishing everything in the photograph, a wide-angle lens does a great job of separating things. By putting your subject in the center of the frame, a wide-angle lens will minimize your background by giving it the appearance of shrinking away. It will also pull back the foreground to reveal more of your subject. In this particular portrait, a wide 20mm lens was used to create this effect.
Depth of Field
Now that we’ve talked about one characteristic of your camera lenses, let’s discuss the other aspect of control that these tools offer us, which is the depth of field (DOF). Depth of field is the amount or depth of the photograph that will be in focus. This can easily vary from many feet to as little as a millimeter of the picture being in focus. We can control this by using the aperture on the lens.
Large aperture=Small f-stop=Shallow depth of field
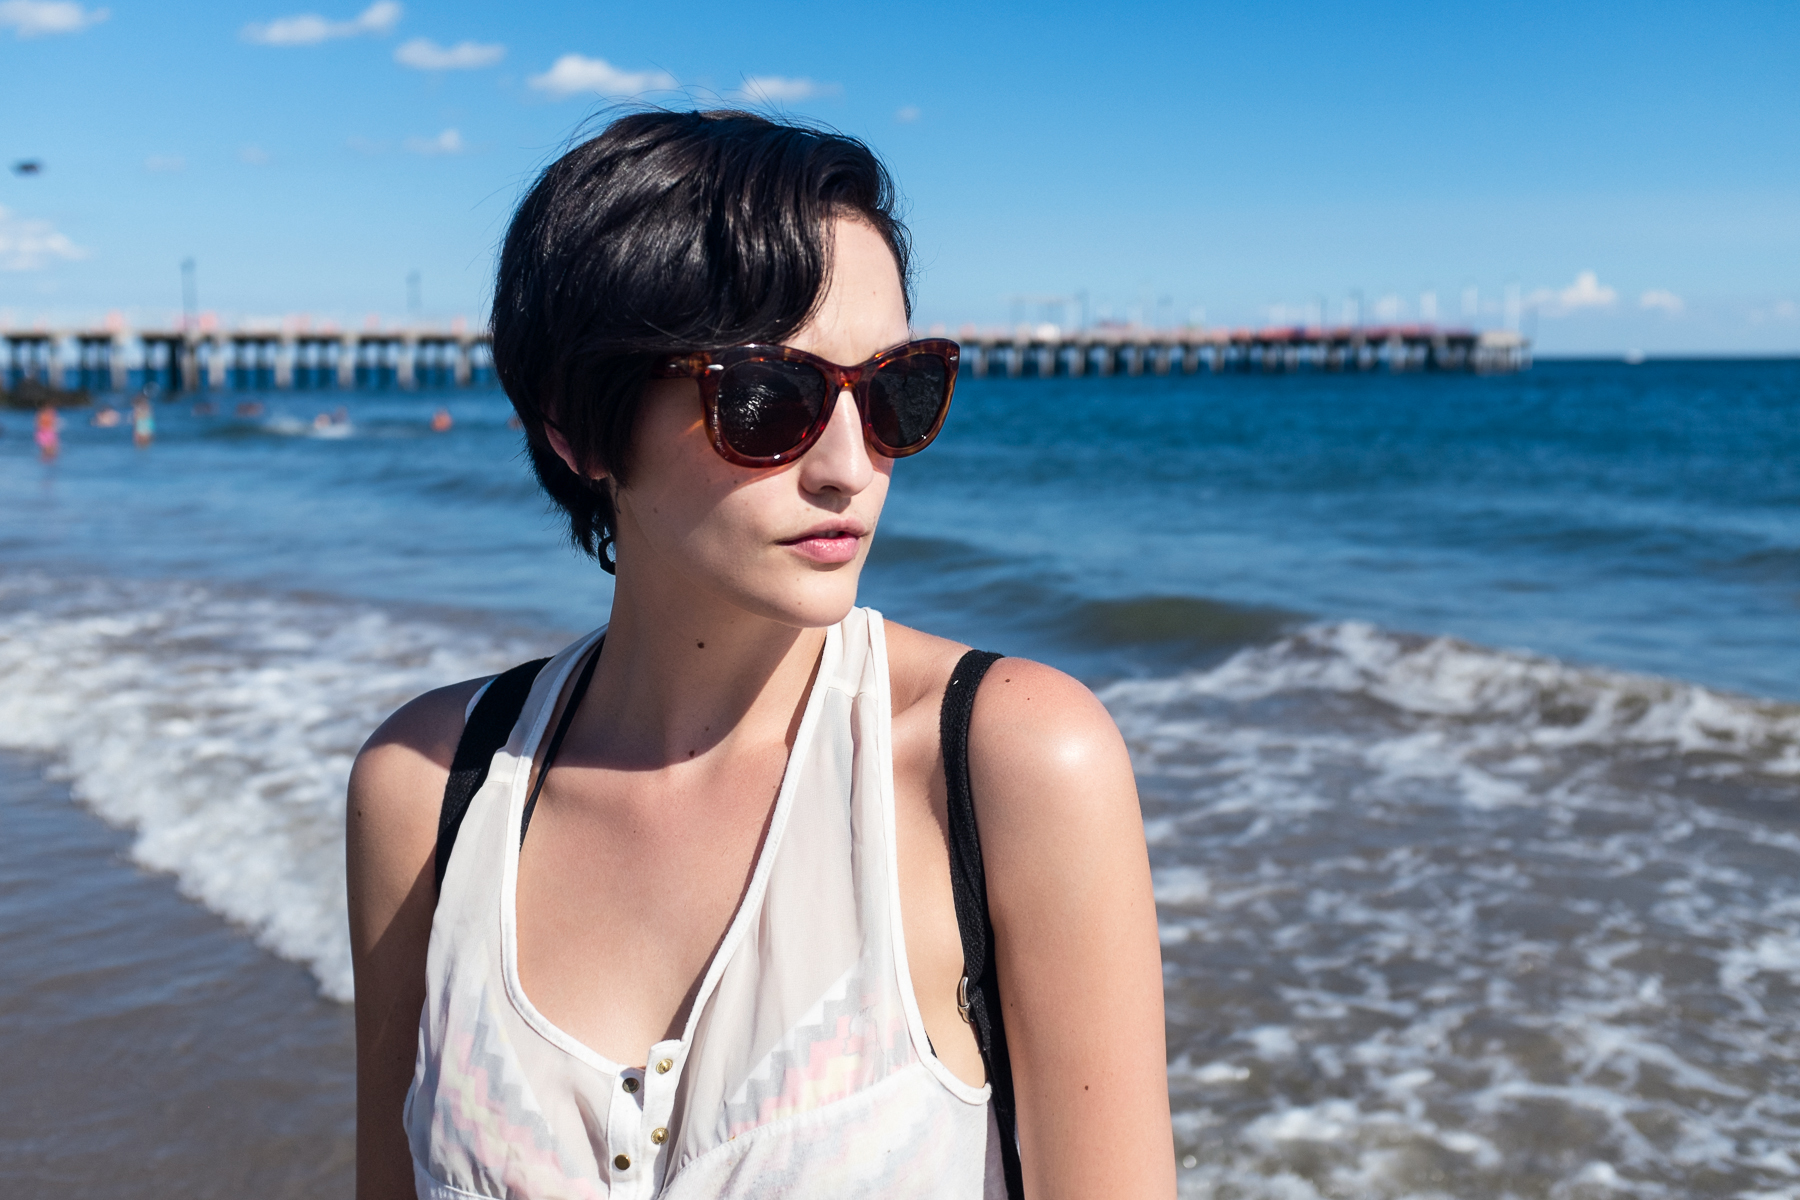
There’s a reason inexpensive lenses only open up to f/5.6, while the really pricey prime lenses open up to f/1.2. You’re paying for that large aperture, and along with it the ability to gather light quickly and to create a tiny depth of field. So what’s the big deal? Why does the DOF matter so much? The background, that’s why. Here’s an example of a portrait taken on a sunny summer day on the Jersey Shore. Because it was so bright outside, my camera automatically chose a small aperture of f/16 to make the proper exposure (anyone remember the “Sunny 16” rule?). This rendered the model sharp but also left everything in the background sharp, which is very distracting.

I then switched the camera to Av mode (aperture priority) and told my camera to try again, only this time while using a large aperture of f/2.8. The resulting image kept the subject in focus and blurred all the people and buildings behind her. Now that’s a much less distracting background!
In a Flash
Now that we know what to look for in a good background, and how to achieve it through selective use of composition, compression, and depth of field, let’s take it a step further. By adding external flashes to the equation we add another dimension of control to our photography and a couple of unique ways to render a pleasing background.
Earlier in this article, there was a photo using a lot of negative space. That image of the girl on a black background was also a perfect example of low-key lighting. Low-key lighting uses a big contrast ratio to set your subject apart from the background. When using only natural light, it can be difficult to make the background go dark while still keeping enough light to illuminate the subject’s face. This is because the existing light in the room is responsible for both. When we shine a strobe at our subjects, we can turn the power up high enough to light them, and only them. Then, using a faster shutter speed you essentially turn down the brightness of the background, all the way to pitch black if you like. A solid-black background equals no distractions, and the contrast lends a certain moodiness to the image.
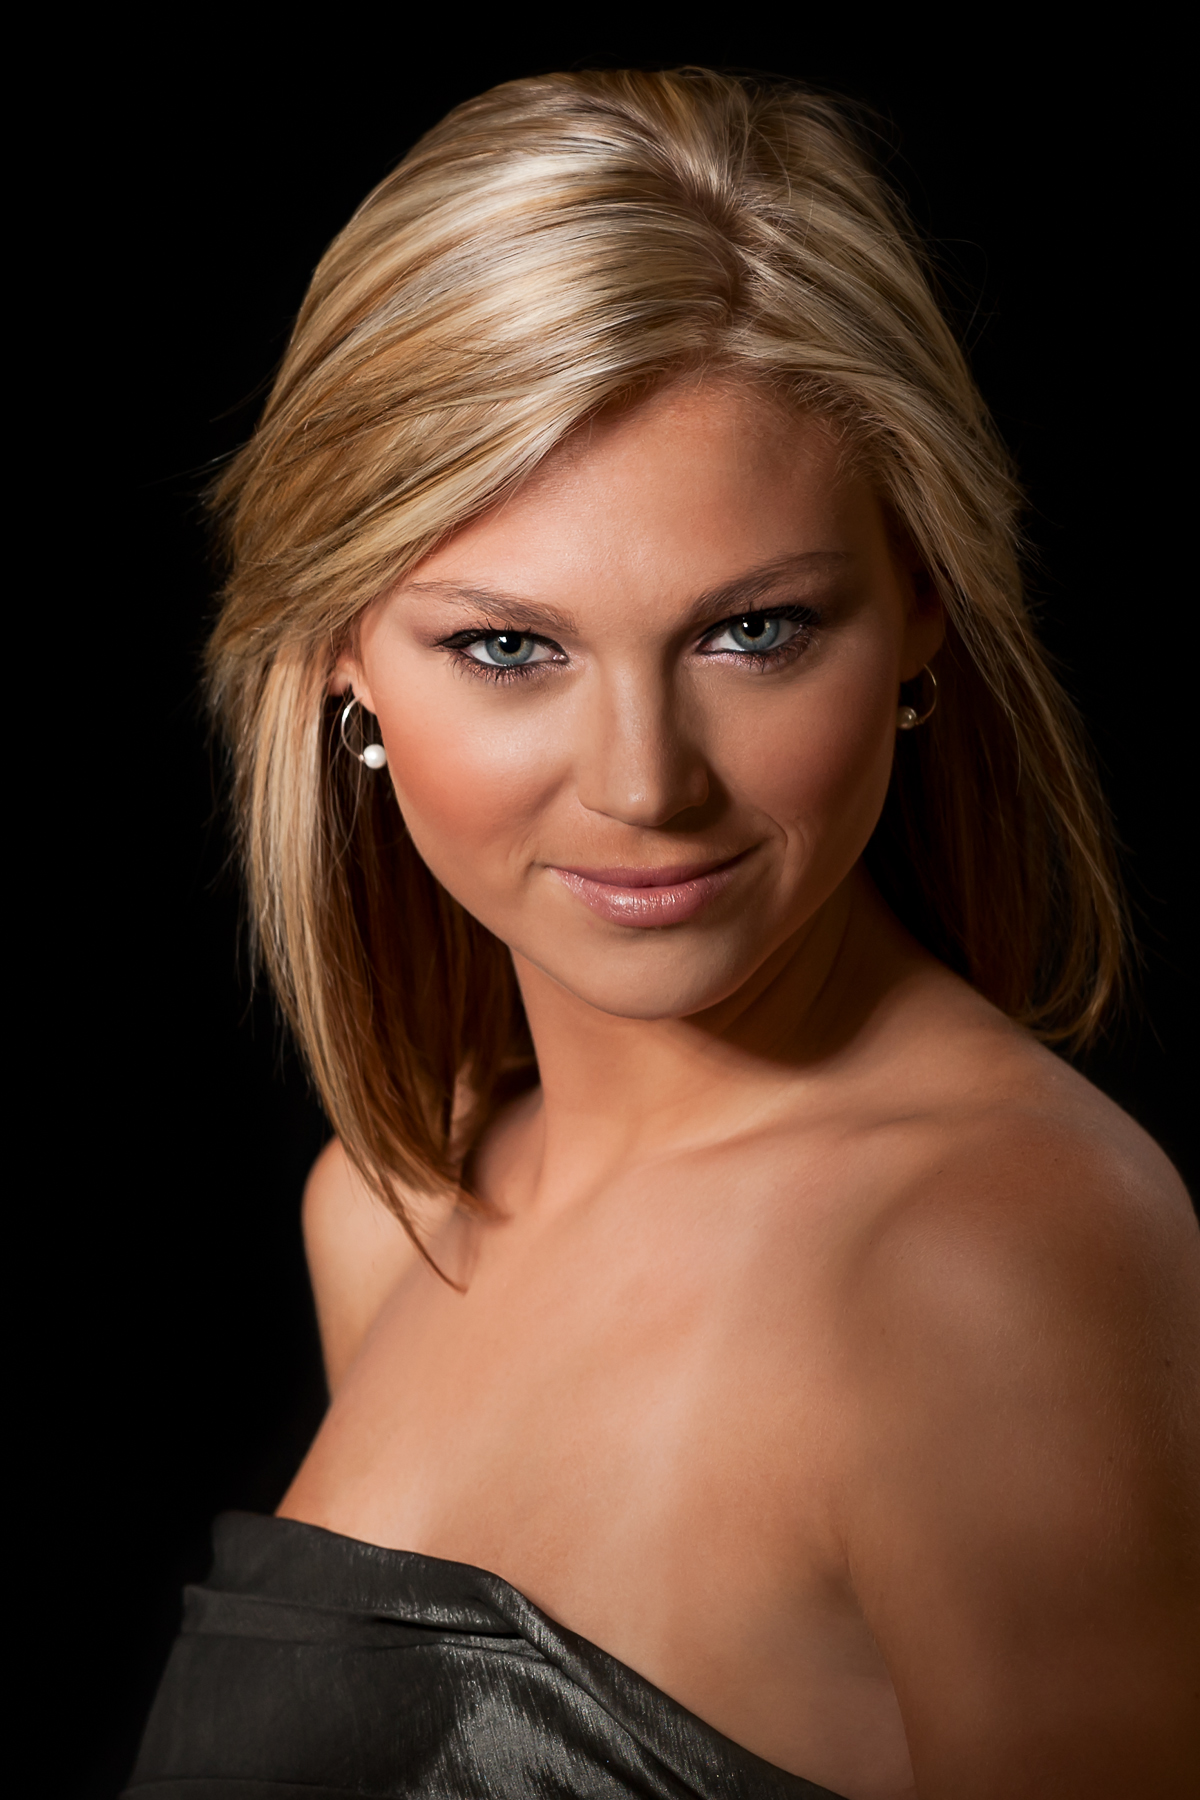
On the flipside, you can also use strobe lights to create a high-key background. This image where the background is pure white is an example of high-key lighting. With the light skin of the subject and the blown-out background, you get an image with low contrast, no distractions, and a very clean aesthetic. This is a popular look for headshots and e-commerce photographs, where the main focus is the face or clothes of the person and there can be no distracting from that.

Finally, you can meet somewhere in the middle for a great background, too. Starting with a dark room again, you can set up a second strobe light with a unique modifier called a grid spot, which focuses the beam of light so you can create a halo effect behind your subject’s head. Then, when you turn on the front light that’s only aimed at the subject’s face, you get a beautiful portrait, complete with a background that really guides the viewer’s eye to the face.

No matter where you are, simply minding your composition while using the lenses and light to your advantage will have you creating better backgrounds in no time.
ALL IMAGES BY ERIK VALIND
This article is courtesy of Photoshop User magazine, the official publication of KelbyOne, which provides quality online education for creative people. For more information, visit KelbyOne.com
