
Lighting Residential Exteriors: A Three-Story Home
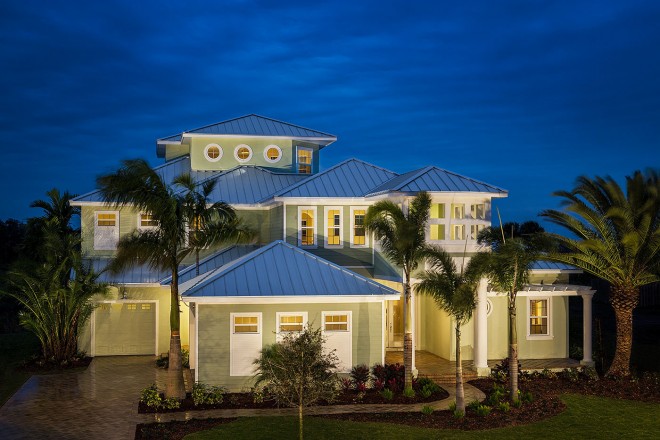
Recently, I received an assignment to photograph a new model home in Florida. This particular three-story home was a challenge to light and photograph because of the height and design; the top of the house was set back from the front. Another challenge was the weather, as we were expecting a storm to arrive around the time we were going to photograph, and thick clouds were starting to block the sunset. Here’s how we approached these challenges to lighting residential exteriors of this scale.
Typically, when photographing a residential house, I try to stay away from shooting directly into garage doors. If possible, the preferred position is on the opposite side of the house to deemphasize them.
When lighting architecture for twilight photographs, I like to use tungsten lighting, as it allows for precise control of light placement and gives the building a pleasing, warm tone. The only problem with using tungsten lighting is that there’s only about 20 minutes where the daylight color temperature will match the tungsten temperature. We started setting up the shot three hours before sunset because the house was very large and we needed to have all our lights in place before the sun began to set.
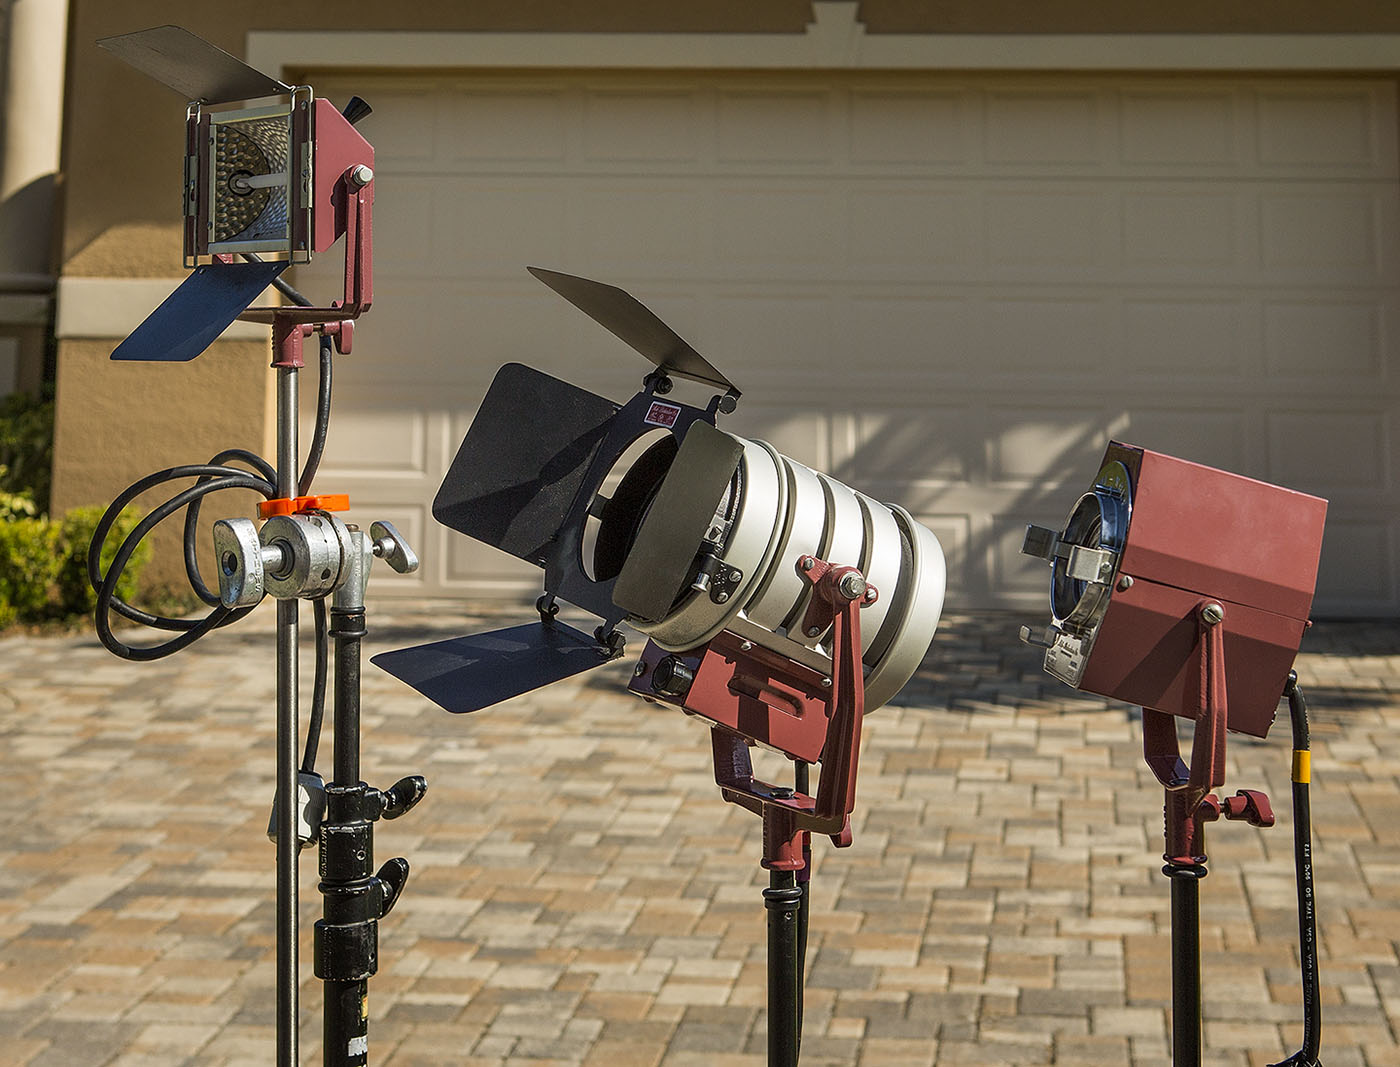
Mole-Richardson Nooklite, Tweenie II, and Mini-Mole
Step One
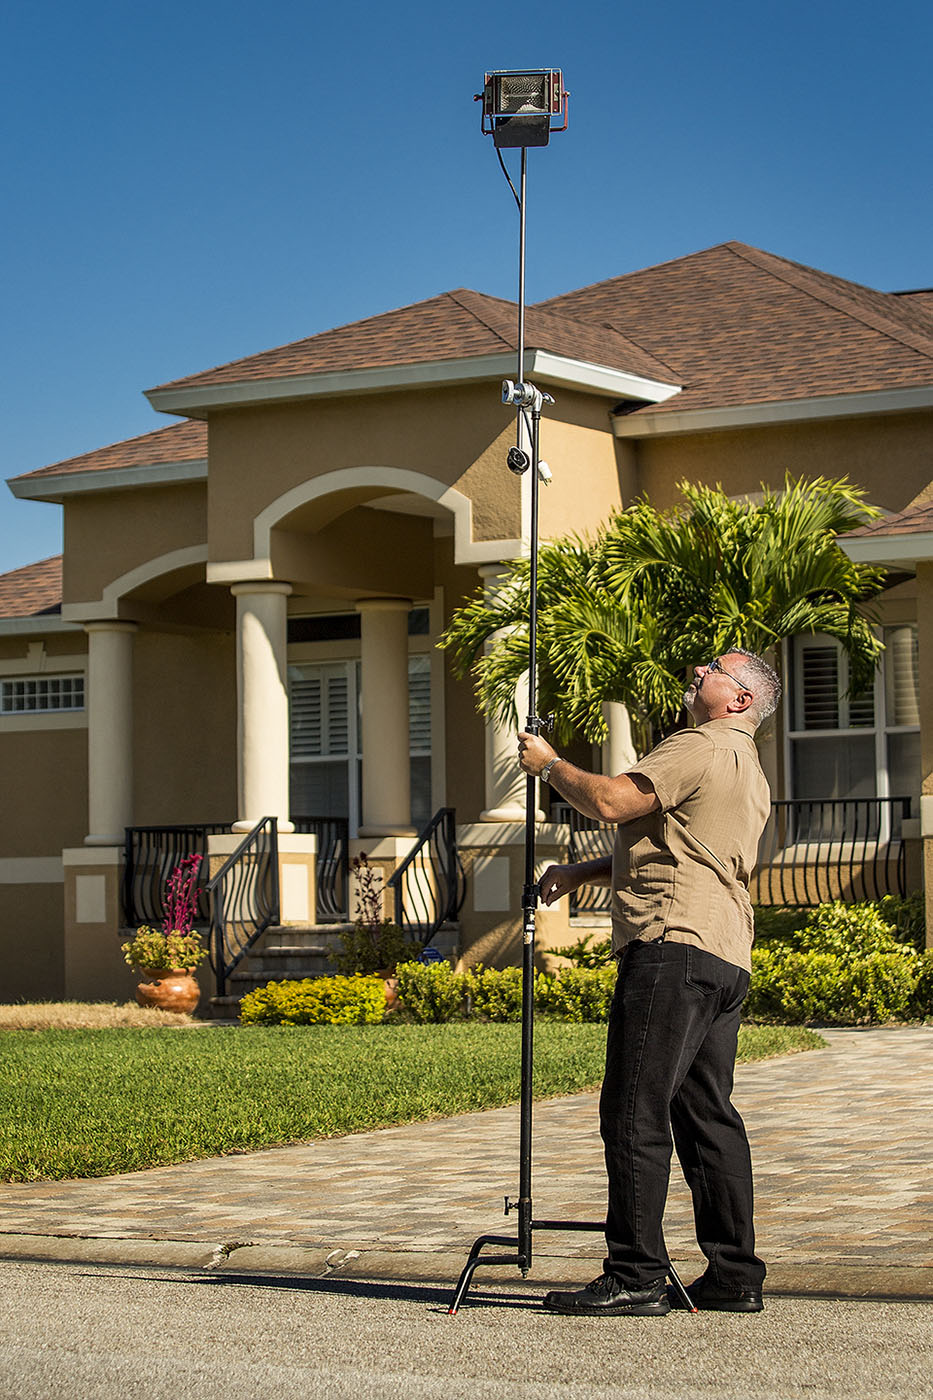
I began by finding the best camera angle to showcase the architecture in the final image, which will determine the placement of all the lights. Typically, when photographing a residential house, I try to stay away from shooting directly into garage doors. If possible, the preferred position is on the opposite side of the house to deemphasize them. For this photo, we had the opportunity to shoot from a second story window across the street, which allowed for a much more pleasing view of the building. With the camera position set, I tethered the camera to the computer, which allows me to view a larger image and will help determine where lights are placed.
When lighting architecture for twilight photographs, I like to use tungsten lighting, as it allows for precise control of light placement and gives the building a pleasing, warm tone.
Step Two
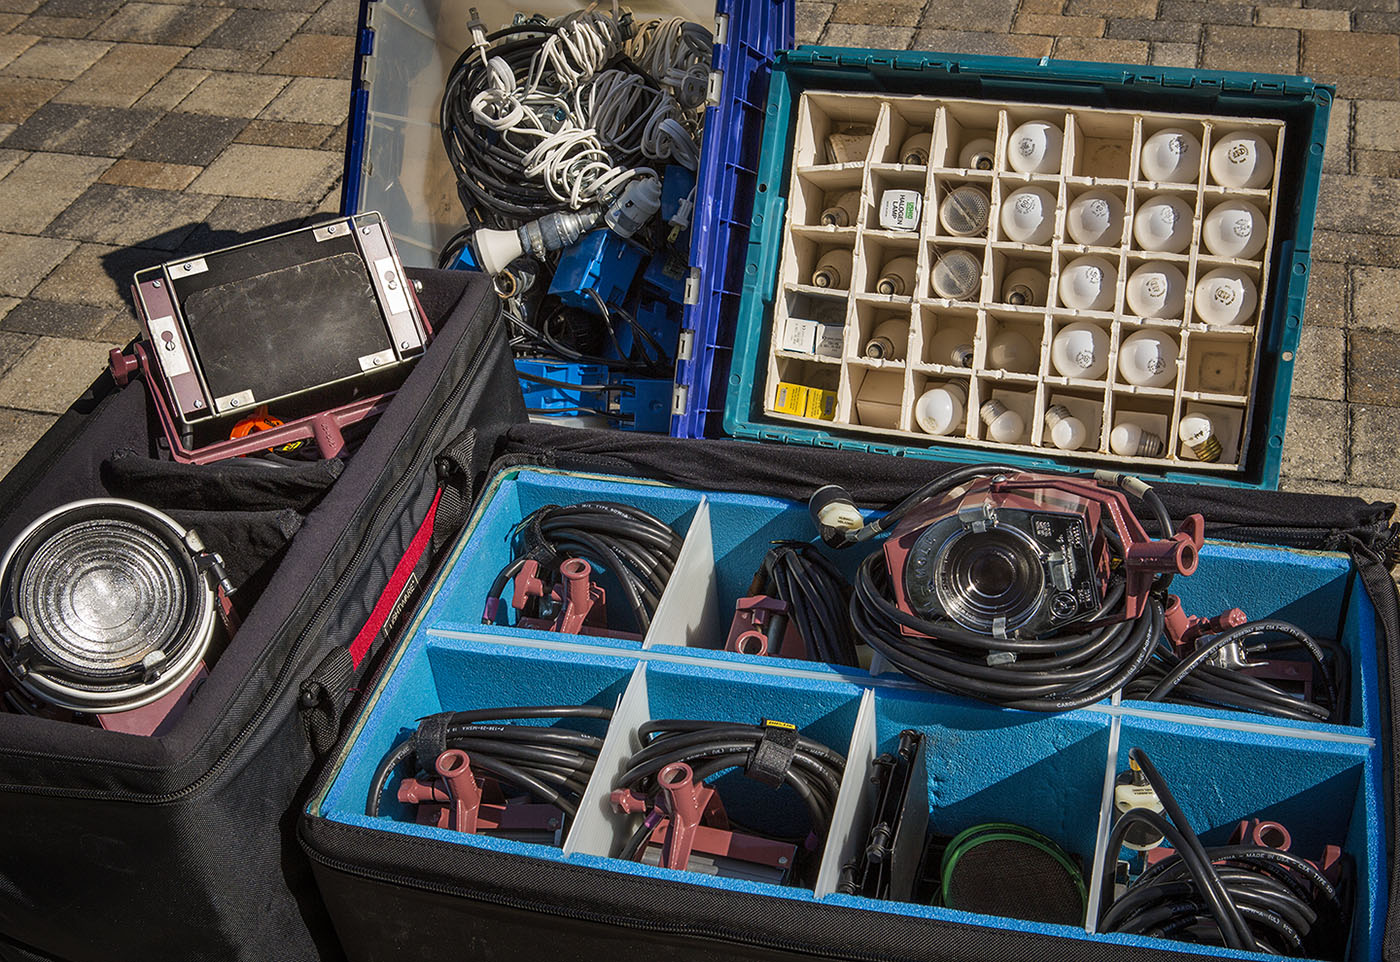
I wish I could say that I travel light, but I don’t. For this particular shoot, I had two assistants to help haul a van full of equipment, place more than 30 lights, water down driveways, and move planters. I work with Mole-Richardson lights. They’re most commonly used on movie sets because of their durability and they allow for very precise light control. For this particular shoot, I used three different types of Mole-Richardson lights: 1,000-watt Nooklites; 650-watt Tweenie II lights; and 200-watt Mini-Mole lights. The main lighting was four Mole-Richardson Nooklites placed on C-stands with arms, so we could set the height to around 20′. This helps spread the light out and reaches the top of the house. We positioned one Nooklite on both ends of the building and the remaining two lights were spaced evenly in the middle to wrap the house with light.
Step Three
Because we were photographing a very large house, we needed to add some extra lights to cover the whole building and to give the shot some interest and depth, as well as to fill in areas that were just too dark. We used Tweenie II lights to reach the top floor of the house, and the Mini-Mole lights to fill in some of the dark areas that the Nooklites were missing. Both of these lights have adjustable Fresnel lenses, which allowed us to spot the lights down as needed and remove any extraneous light with barn doors that I didn’t want hitting other areas on the home or yard.
Step Four
After lighting the house, the focus turned to the landscaping. To light the landscape, we placed Mini-Moles on base plates, which are small circular stands with a stud on top to attach the light. We then placed these lights out of camera view at the bottom of each of the palm trees and pointed them up to illuminate them. We placed several Mini-Moles on regular stands and directed them at the bushes around the house, using barn doors and scrims that varied in thickness to control the amount and quality of light. If we didn’t do this, all the trees and bushes would be very dark and our shot would look choppy and boring. By adding up-lights to the palm trees and accenting the dark bushes surrounding the house, we created interest in the photograph.
Step Five
With the exterior lighting complete, our concentration turned to lighting the interior of the house. If the inside of the house were not lit, it would have dark windows or the intensity of light inside each window would vary from window to window. By lighting the windows, I was able to control the lighting value and consistency of each window. I used inexpensive clamp lights with a 200-watt bulb, which can be purchased at any home improvement store. The clamp lights are placed in every room where a window is viewed from my camera position, and set so it would light up the wall or area that’s seen from the camera point of view. We clamped these lights onto light stands or furniture inside the rooms and adjusted them accordingly with a dimmer.
Step Six
Then came the waiting game. We had placed all our lights and adjusted them while it was still daylight, but we needed to wait until the sun started to go down and it became darker to fine-tune them. This is when things get a little crazy and everyone is running around adjusting lights. Remember, I said earlier we only had 20 minutes to capture the final images. In addition to fine-tuning all the lights, we also had to water down the driveway and sidewalk. Watering down the driveway will darken it so it’s not the brightest element in the photo and will also create a pleasing reflection of the house.
Randy Van Duinen

Randy Van Duinen
Step Seven
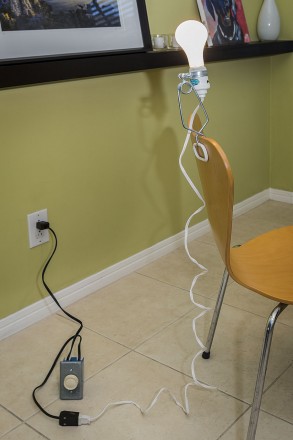
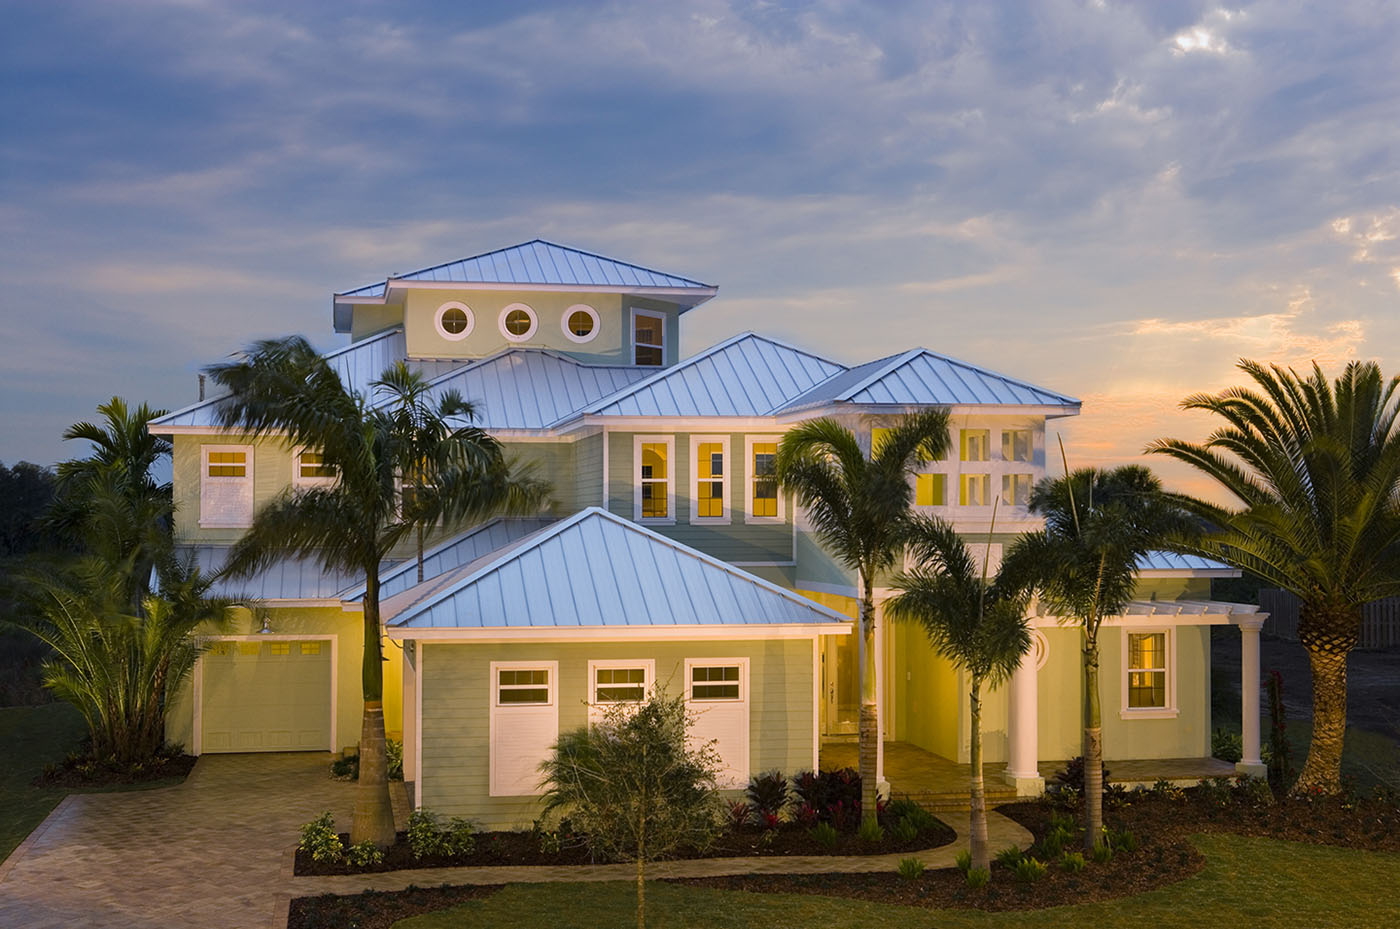
When photographing a twilight exterior, I try to capture three different versions of the image. The first version will still have some daylight visible, but the building’s windows are still dark. The second version, and usually the most pleasing, is when the sky becomes a light blue to purple and there’s just a hint of light left. This is the version that most of my clients prefer. The last version is when the sky is almost completely black and the building is aglow. It then becomes the main focus with fewer distractions. About Those Dimmers: I need to take a moment and explain the dimmers we used to adjust both the clamp lights and Nooklites. There are expensive dimmers for tungsten lights on the market that cost more than $100. I created my own dimmers for less than $15 and they take about 15 minutes to make. To create the dimmers, you’ll need a dimmer switch, an electrical box, 3′ of electrical wire, and male/female plugs. All of these items are available at home improvement stores.
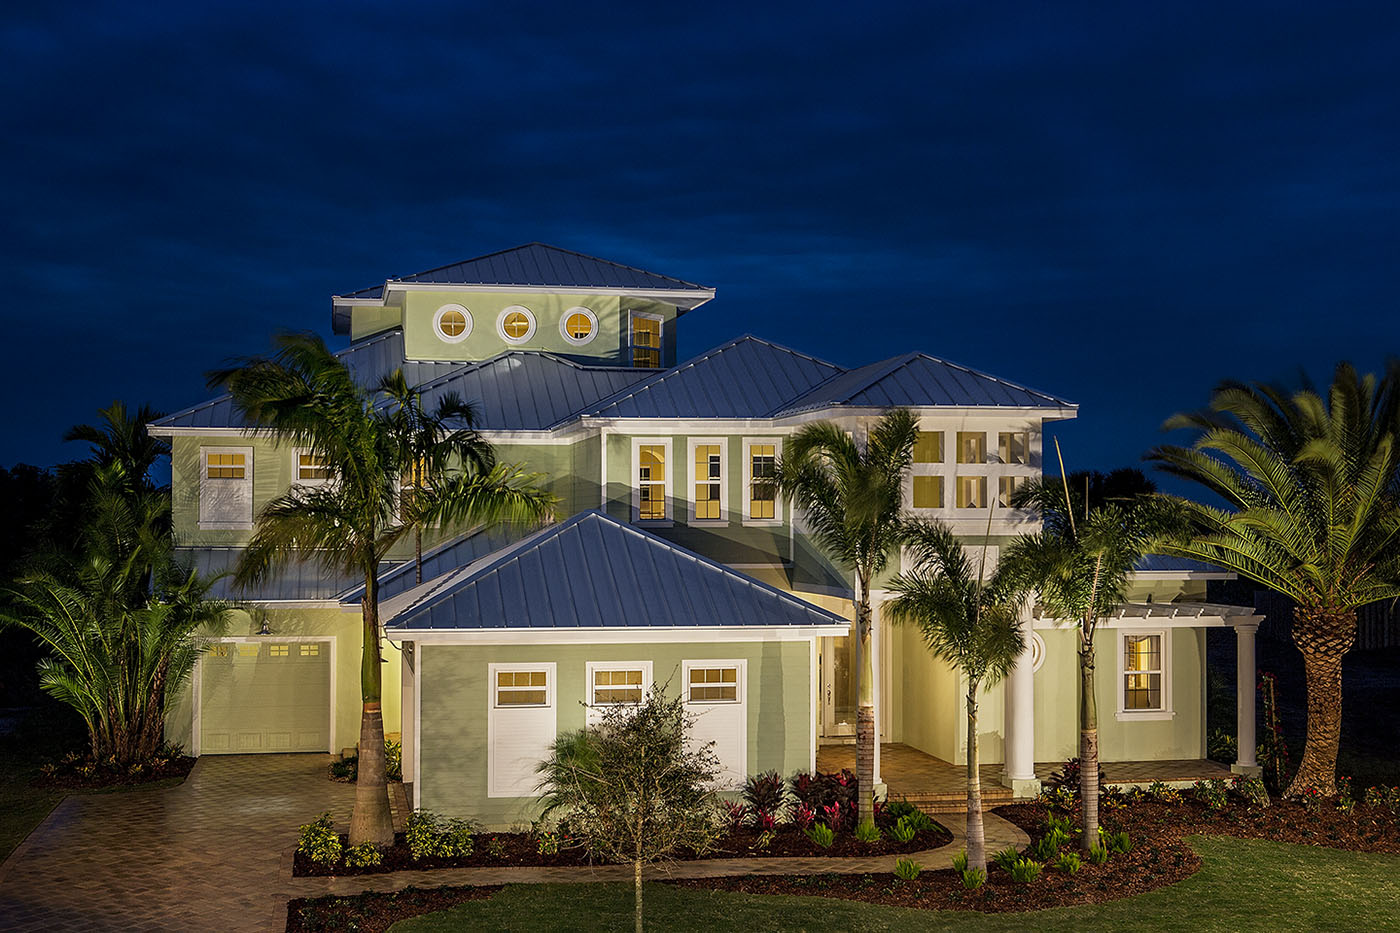
The last version is when the sky is almost completely black and the building is aglow.
It then becomes the main focus with fewer distractions.
Randy Van Duinen
I hope this inspires you to go out and try lighting some exterior architecture for yourself. If you were thinking that the cost of 30 lights would break your bank account, you’d be wrong. You can purchase all the lights for less than one good strobe pack and head. Remember, this was a large house—most take fewer lights to complete than this.
About the Author: Randy Van Duinen is currently an architectural, fine art photographer and photography instructor located in St. Petersburg, Florida. He has been a professional photographer for over 25 years and his photography is in hundreds of brochures for builders, architects and interior designers from around the country. His art photography is in the permanent collection of the Grand Rapids Art Museum and is in many corporate and private collections. Follow him on Facebook.
