
Lighting Interiors
Lighting interiors is easier now than in the days of film. Knowing how to shoot all the parts means doing more setups in a day. It’s one of the keys to getting that next great job.
Walking into a room that’s warm and inviting is a completely different experience than lighting that space to look enticing. The first thing in photographing an interior is to choose the camera angle. Once this variable is locked down, everything else serves that view.
I always shoot with my camera tethered to a laptop. For me, the laptop is a great big Polaroid, similar to what I’d shoot when working with color transparency film to see what the scene needed in lighting, furniture arrangement, gels (more on that in a minute), and contrast control. You had to add light to dark areas to open up the shadows. To make the composition pleasing and the interior appear spacious, you had to move or remove furniture. If the light sources were different colors, you had to apply compensating gels to the nondominant illuminants to balance them to the main source. You’d need to reduce the daylight streaming through windows either by waiting until the sun went down, hoping for clouds to roll in, or taping neutral density gels, Cinescreen, or black scrim to the windows themselves. The latter was what I did most often. Sometimes I still use them when the brightness of the daylight is more than three stops brighter than the exposure for the interior. Gels and scrims are from Rosco.
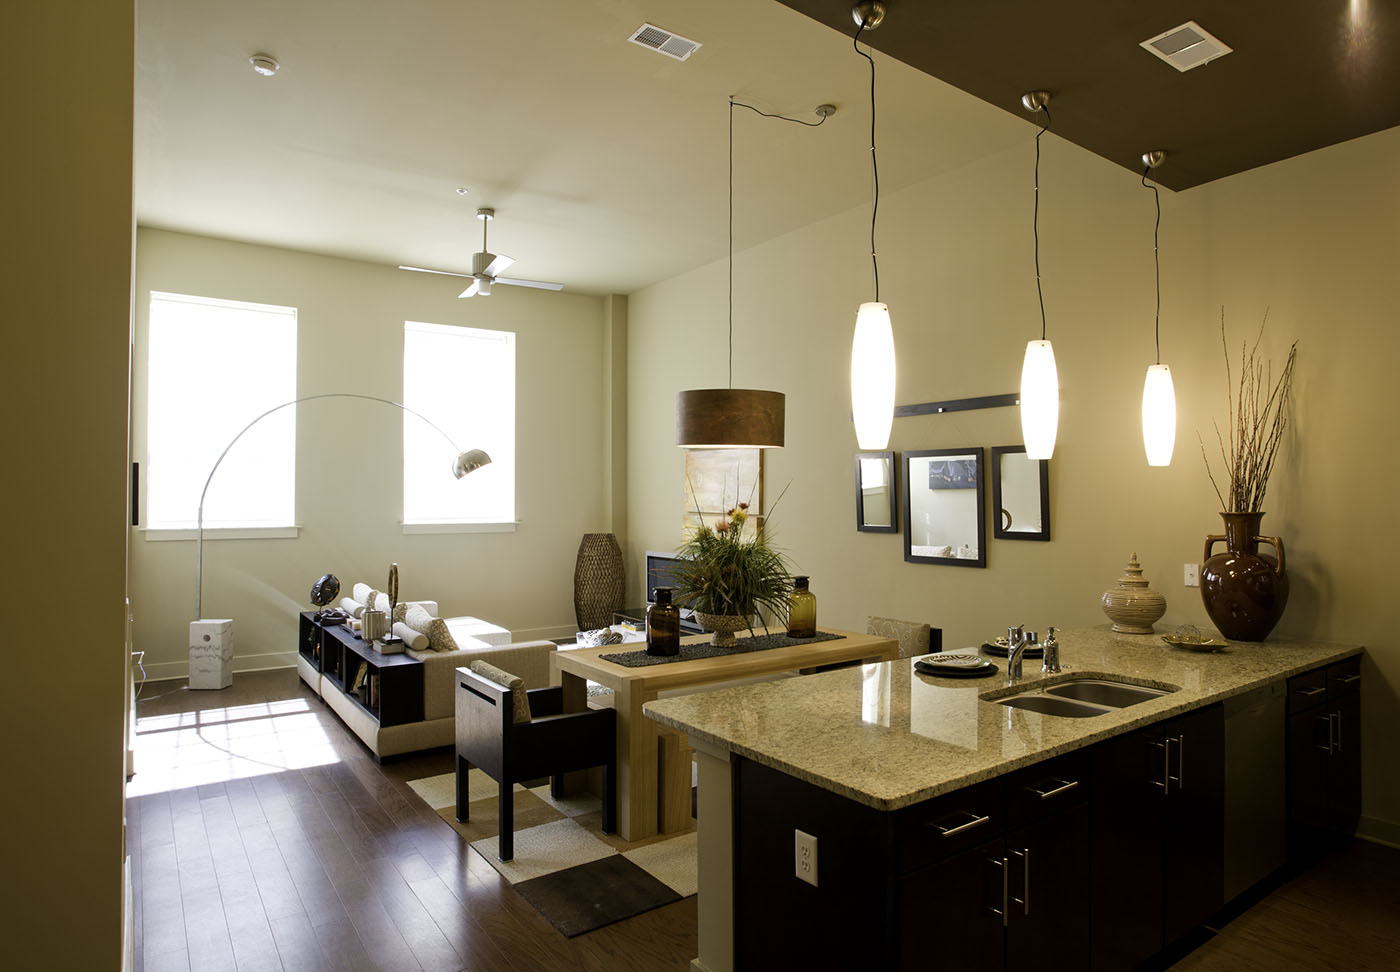
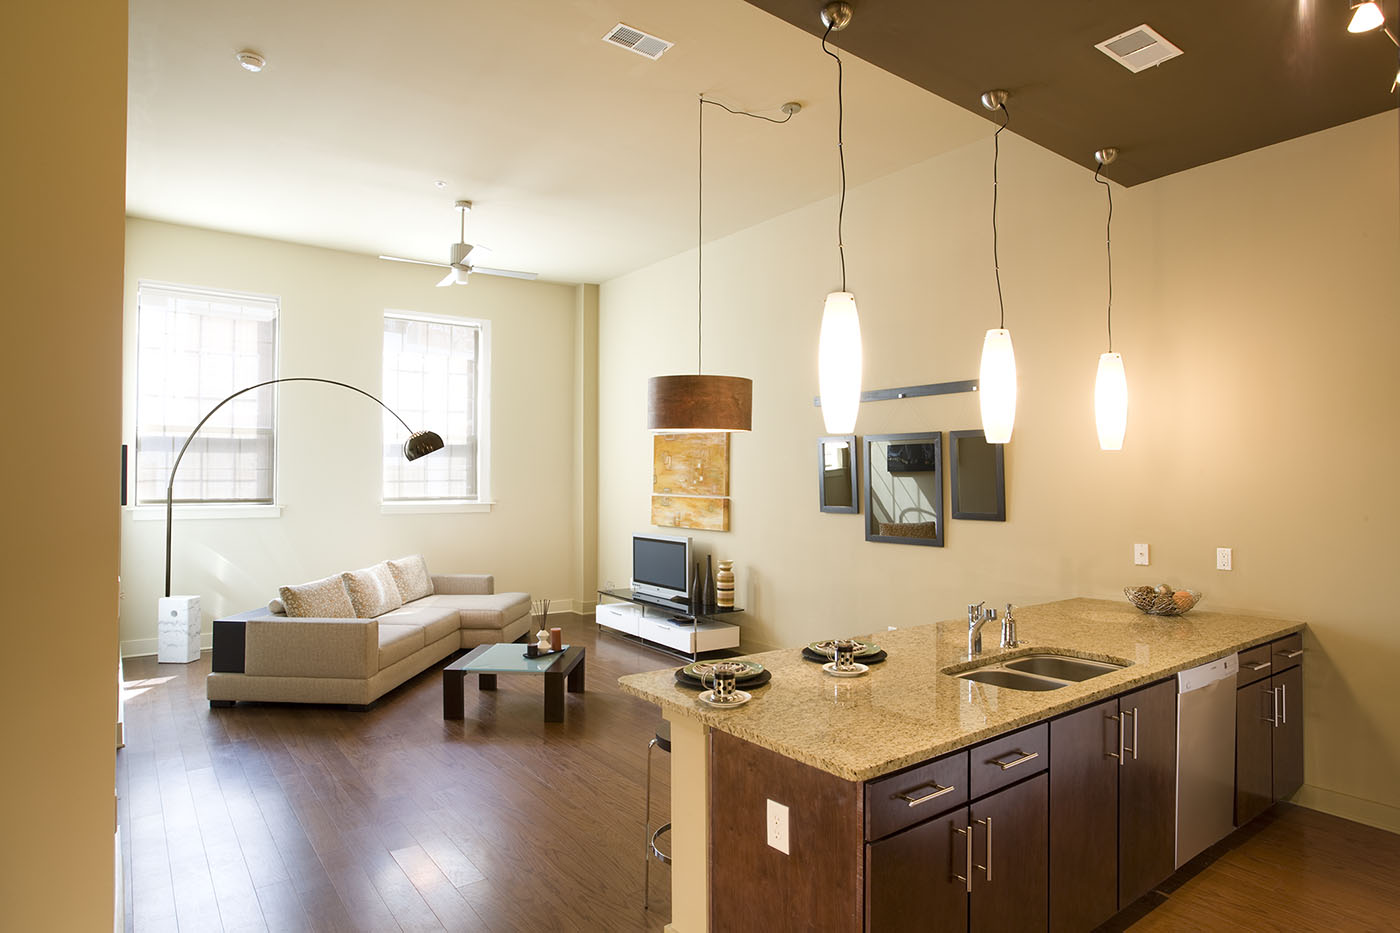
Testing The initial photograph makes the room look cramped: the staging is cluttered, the table fills in all the open space, the entryway is too wide, and the living room is closed off from the viewer. Credit: Kevin Ames
Less is More, Much More
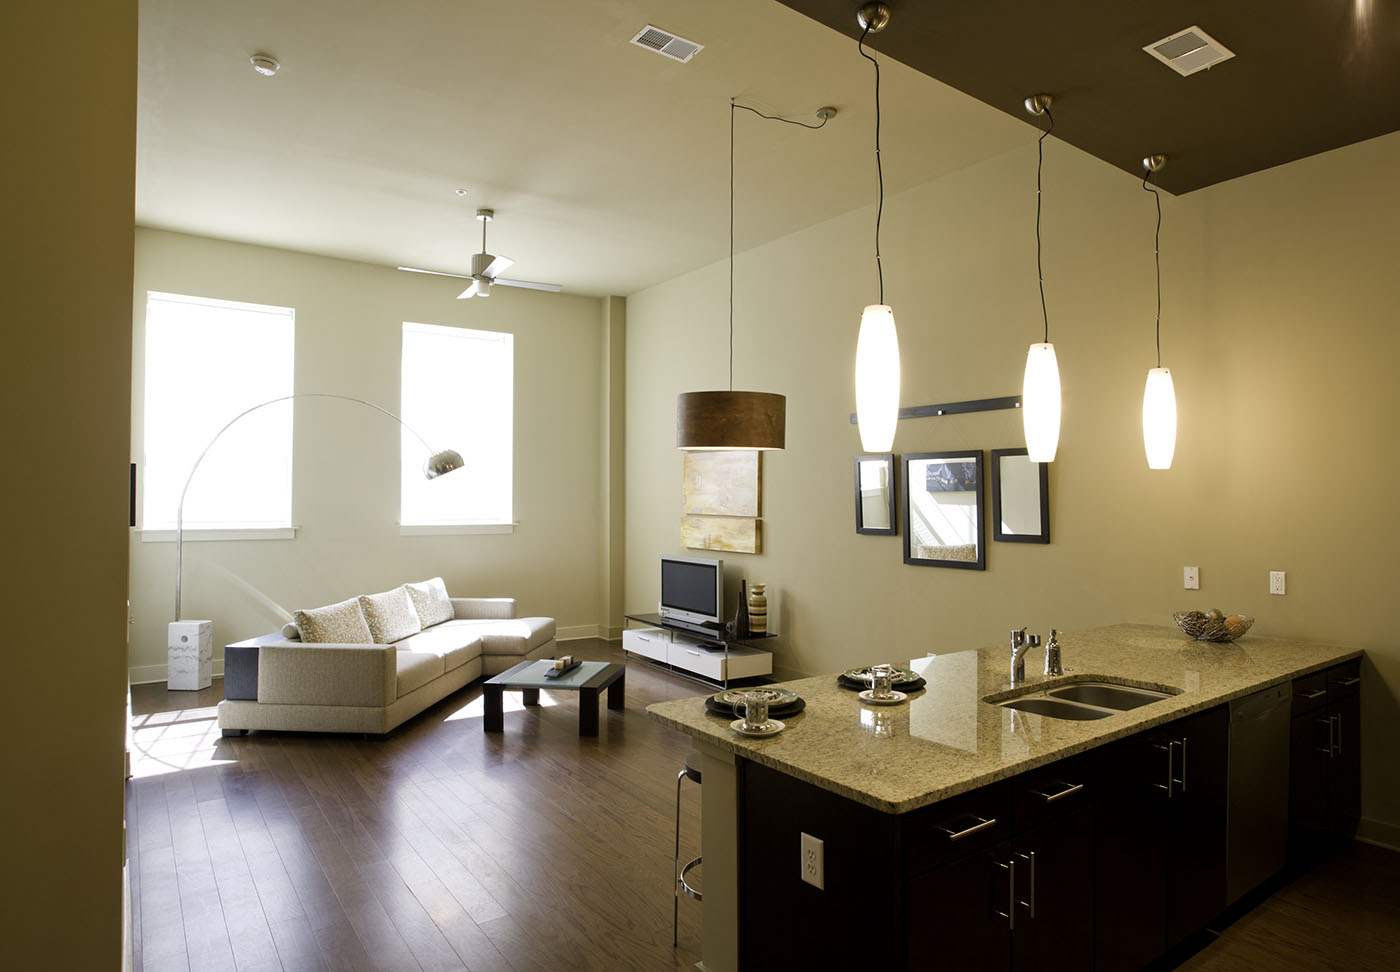
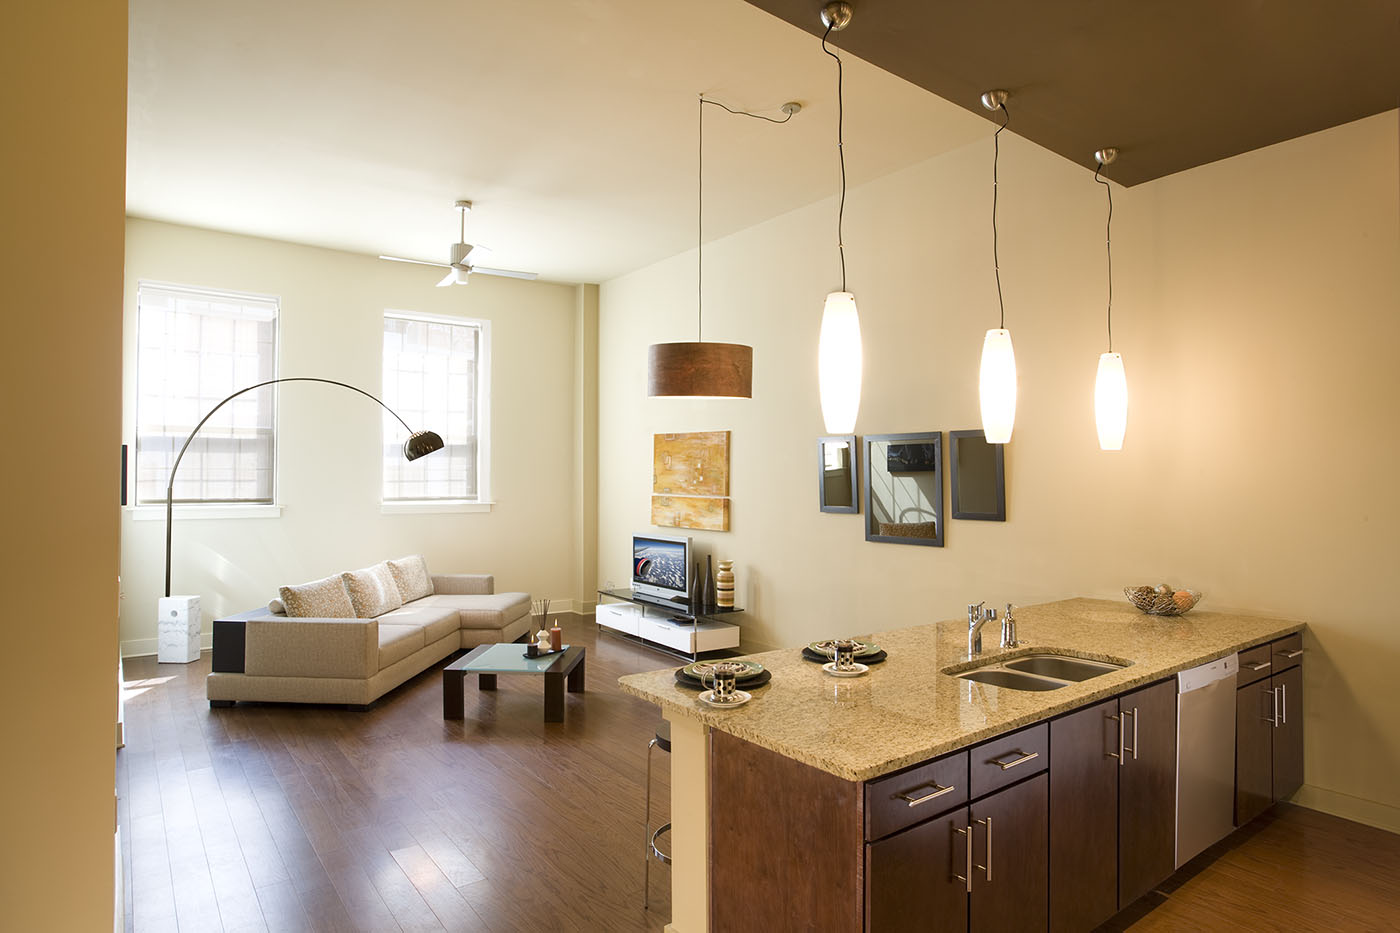
My assistant, Patrick Hegney, and I did a bit of rearranging, removing, and minimizing. We removed the table and the rug beneath it. We pulled out the pot of sticks, the urn, the bottles, the plant, the chairs, the wicker basket in the corner, and most of the tiny bits. Then we repositioned the sofa and coffee table for a more open and inviting feel. A bar stool is revealed at the edge of the kitchen island. The view is set; the space is arranged; up next is lighting the shot.
Kevin Ames
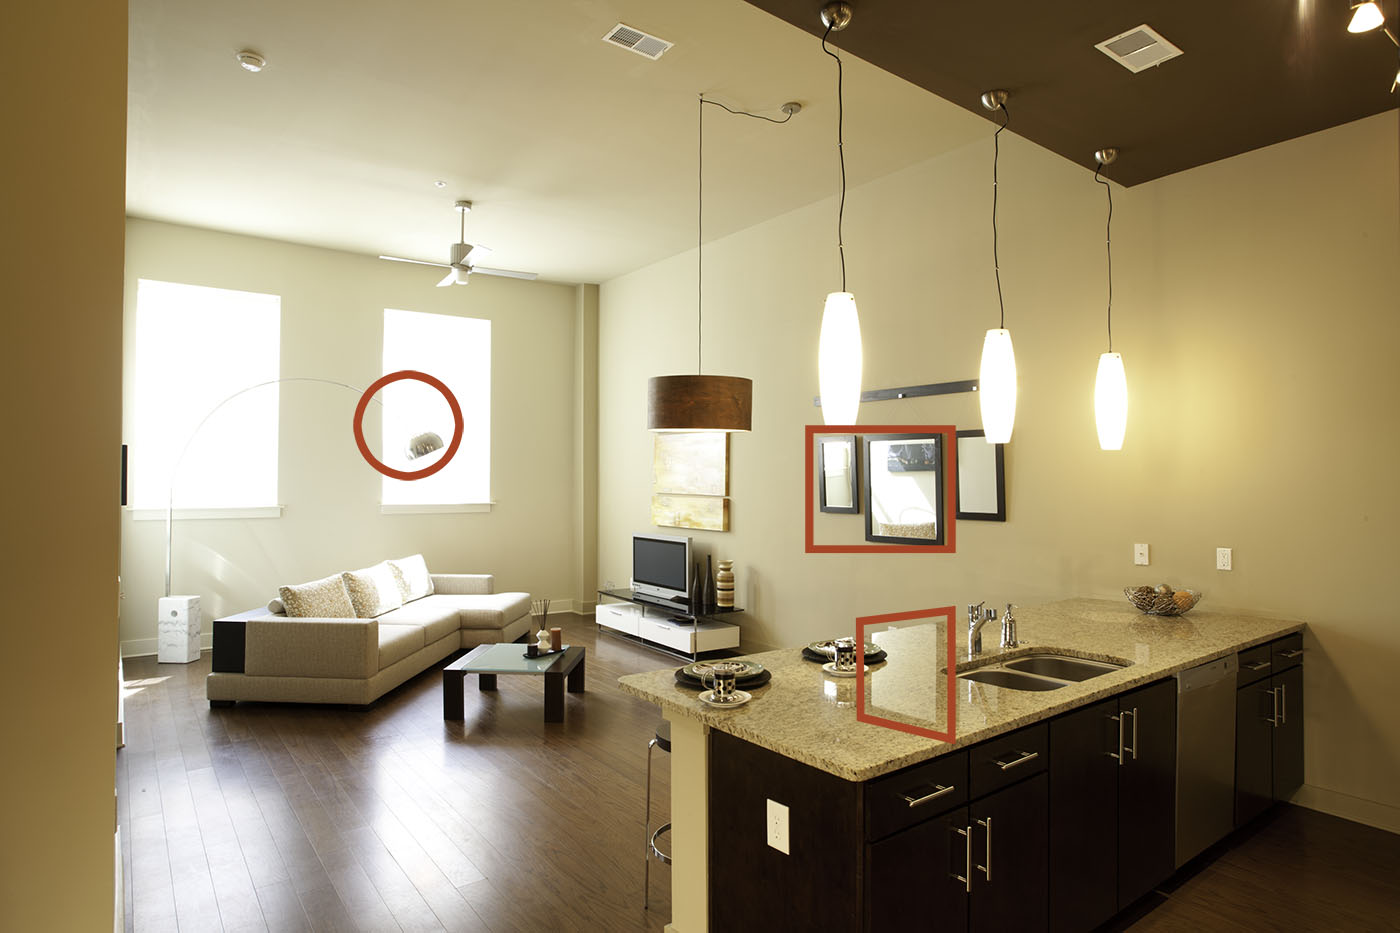
Dominant Source
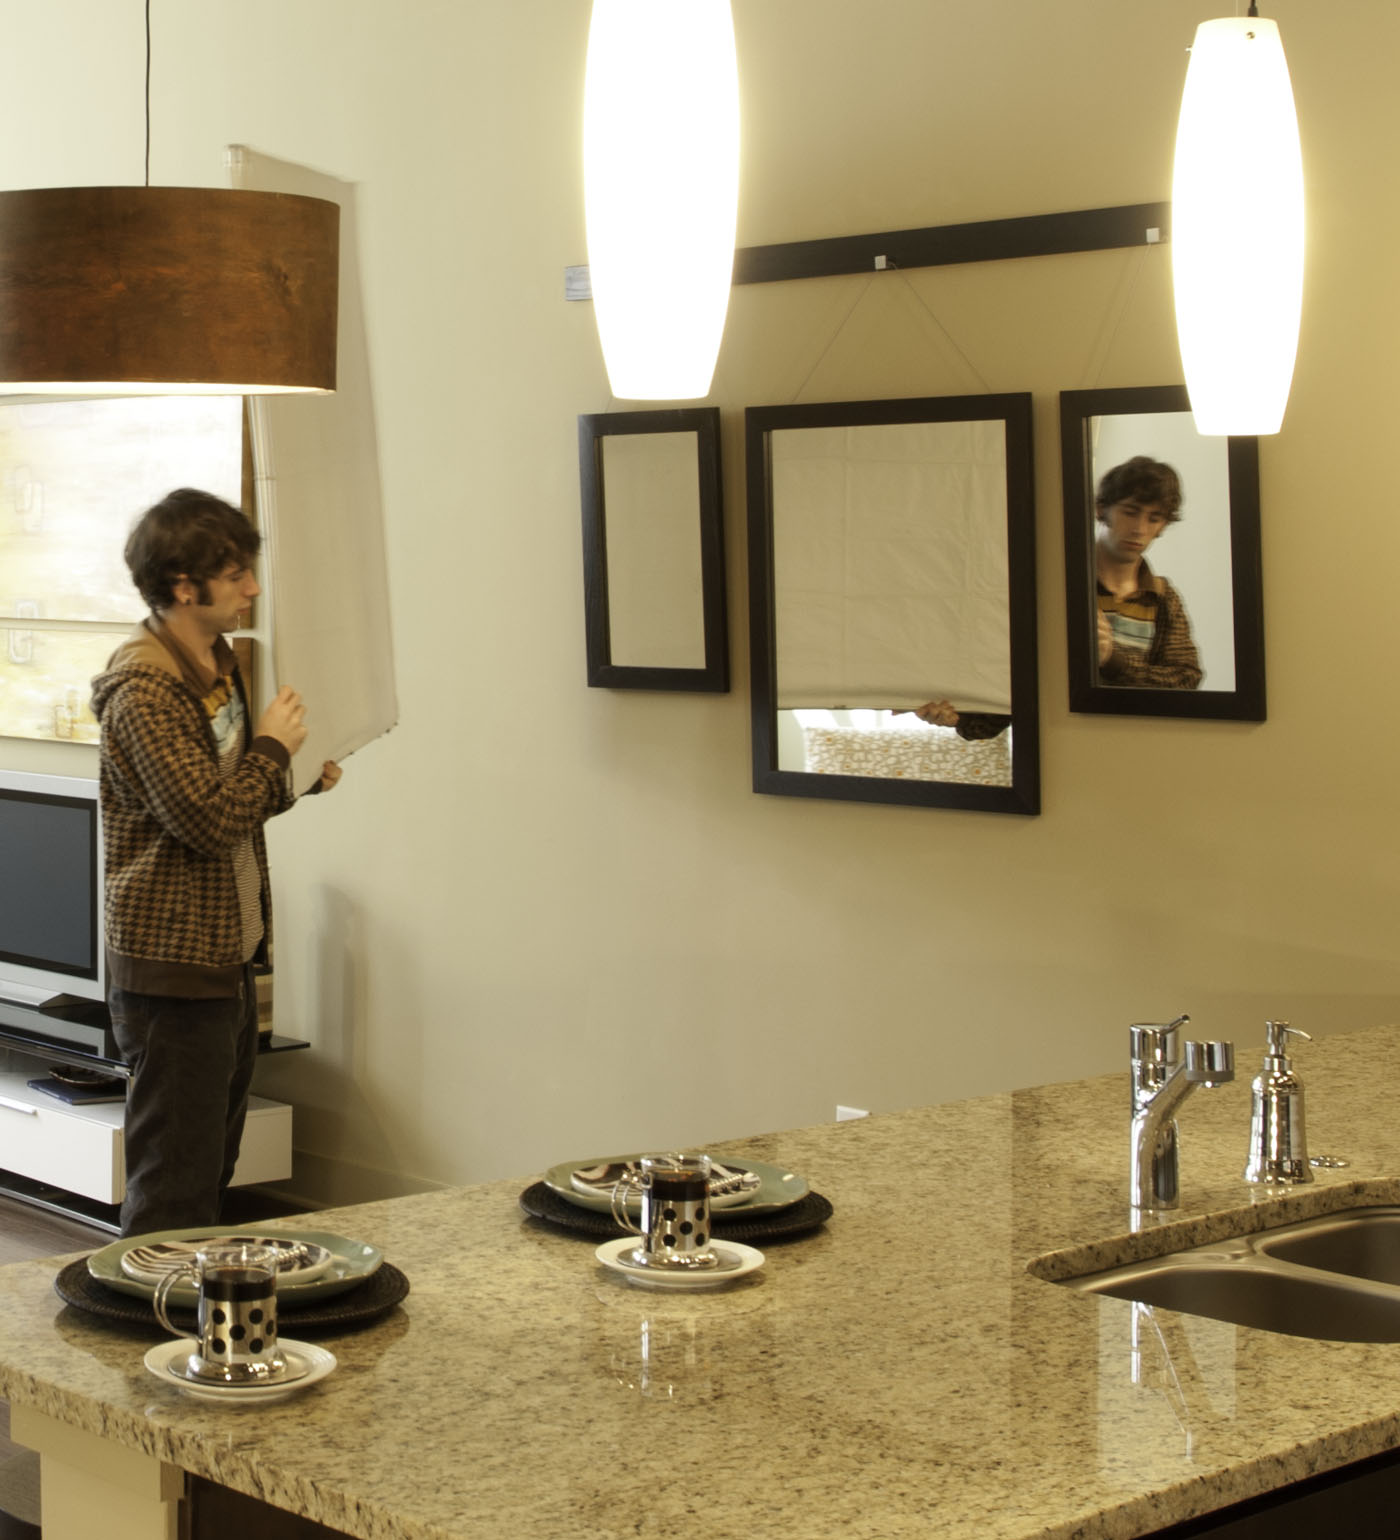
The primary illumination is coming from the windows in the back of the interior. The windows are the source of the glare on the floor and on the three framed mirrors on the wall. The glare from them also reflects in the shiny marble countertops. A shaded fixture hangs in the middle and three columnar lamps float over the island. There’s a chrome lamp over the sofa positioned in front of one of the windows, and the reflective surface makes it lose detail in the brightness of the outside light.
The island is made of very dark stained wood and the kitchen is dark—without windows. There’s no detail. The stainless steel dishwasher is almost impossible to see. These features have to be revealed. We’ll begin there.

Kevin Ames
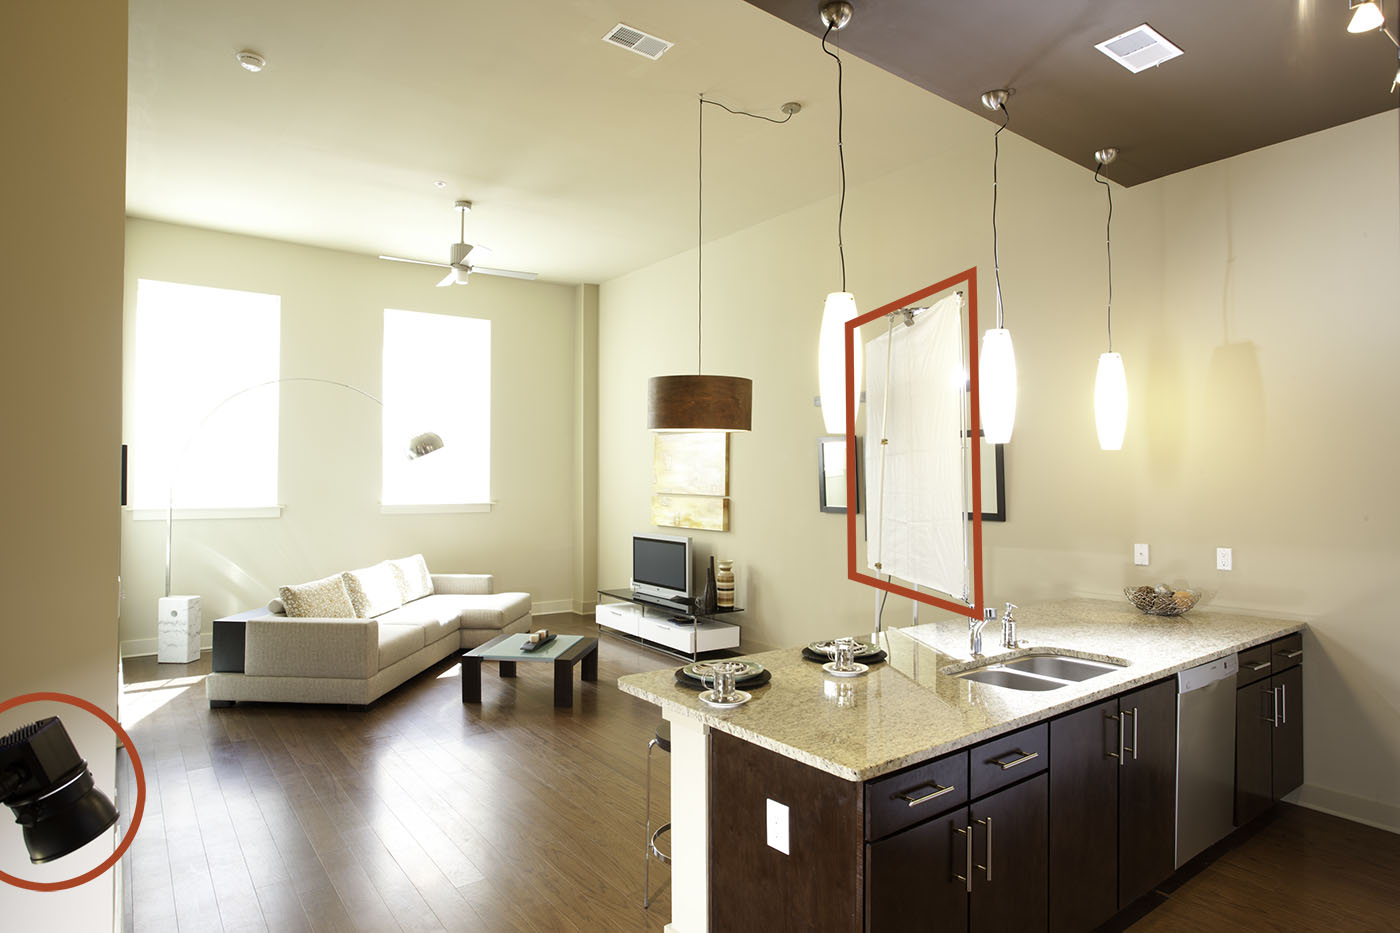
Lighting the Dishwasher and Cabinetry
The dishwasher is a reflective surface. Putting a flash head on it would do nothing more than show a dot of light bouncing ineffectively onto the far wall. Patrick placed a large, 72×42″ frame covered in white fabric lengthwise along the floor, resting its top against the door of the oven and refrigerator. As he set up this big white reflector, I aimed a flash head at it from over the countertop. The head did a great job of lighting the reflector. It also shone on the lens, causing flare, so
I placed a 4×4′ panel on a light stand between the head and the camera. I covered it with a black-on-one-side-white-on-the-other fabric panel. The black side is facing the flash. The power pack was adjusted to match the f/10 aperture needed to assure that everything’s sharp from foreground to background.
The island’s side panel was still dark. I aimed a second head at the floor in front of the panel. The light bounces off the floor, picking up its warm color onto the panel. The pack was adjusted to deliver about a stop brighter result than the cabinet and dishwasher side. The only part of this photograph that’s important is the cabinetry and dishwasher.
Kevin Ames
Controlling Glare
The window’s bright glare burns out the chrome lamp and its support. It also pulls the viewer’s eye to the glass covering the art, then to the countertop and back again.
Patrick put the square panel (black side toward the camera) over the window behind the lamp. This brought back the shape of the chrome lampshade and arching metal stand. It has the added benefit of cutting light falling on the art above the flatscreen television, as well as on the three mirrors. Another photograph was recorded. Patrick flipped the reflector over and held it so it was reflected in the left and middle mirrors. It’s the reflection of the panel rather than the glare from the window that shows in the countertop in the final version.
The last photograph is an overall view made with only the light from the windows and the practical illuminants. Throughout the session, the camera is locked down on a tripod and doesn’t move.
Kevin Ames
Kevin Ames
Assembly and Finishing
Rest assured this isn’t a Photoshop-heavy operation. I spend less than an hour cutting together the parts using layer masks then retouching out distractions.
Finishing touches include slight darkening of the windows, removing vents, outlets, the bar between two of the three dropped fixtures, raising the lampshade, lighting the candles, and to avoid copyright issues with television broadcasters, adding one of my photographs to the flatscreen.
Lighting interiors in the good old days of film meant that everything had to be controlled before the shutter was released, recording the image to silver halide media. Lights had to be hidden and existing lights had to be color-corrected individually. On a good day, four to six setups were possible. Today, interior lighting is best handled in sections, as I did with this example. I can do eight to twelve setups like this one in a day. What does that mean for the working pro? Getting the job amidst a greater pool of competition.
Kevin Ames
If you liked this post on Photographing Interiors, here is a free online video tutorial for using Photoshop to create an award show style graphic. Or maybe you would rather see this tutorial from Scott Kelby on Camera Raw showing you how to add Clarity, Vibrance and Saturation.
